3. Manager Level - Call Center Feature - Campaigns Tab
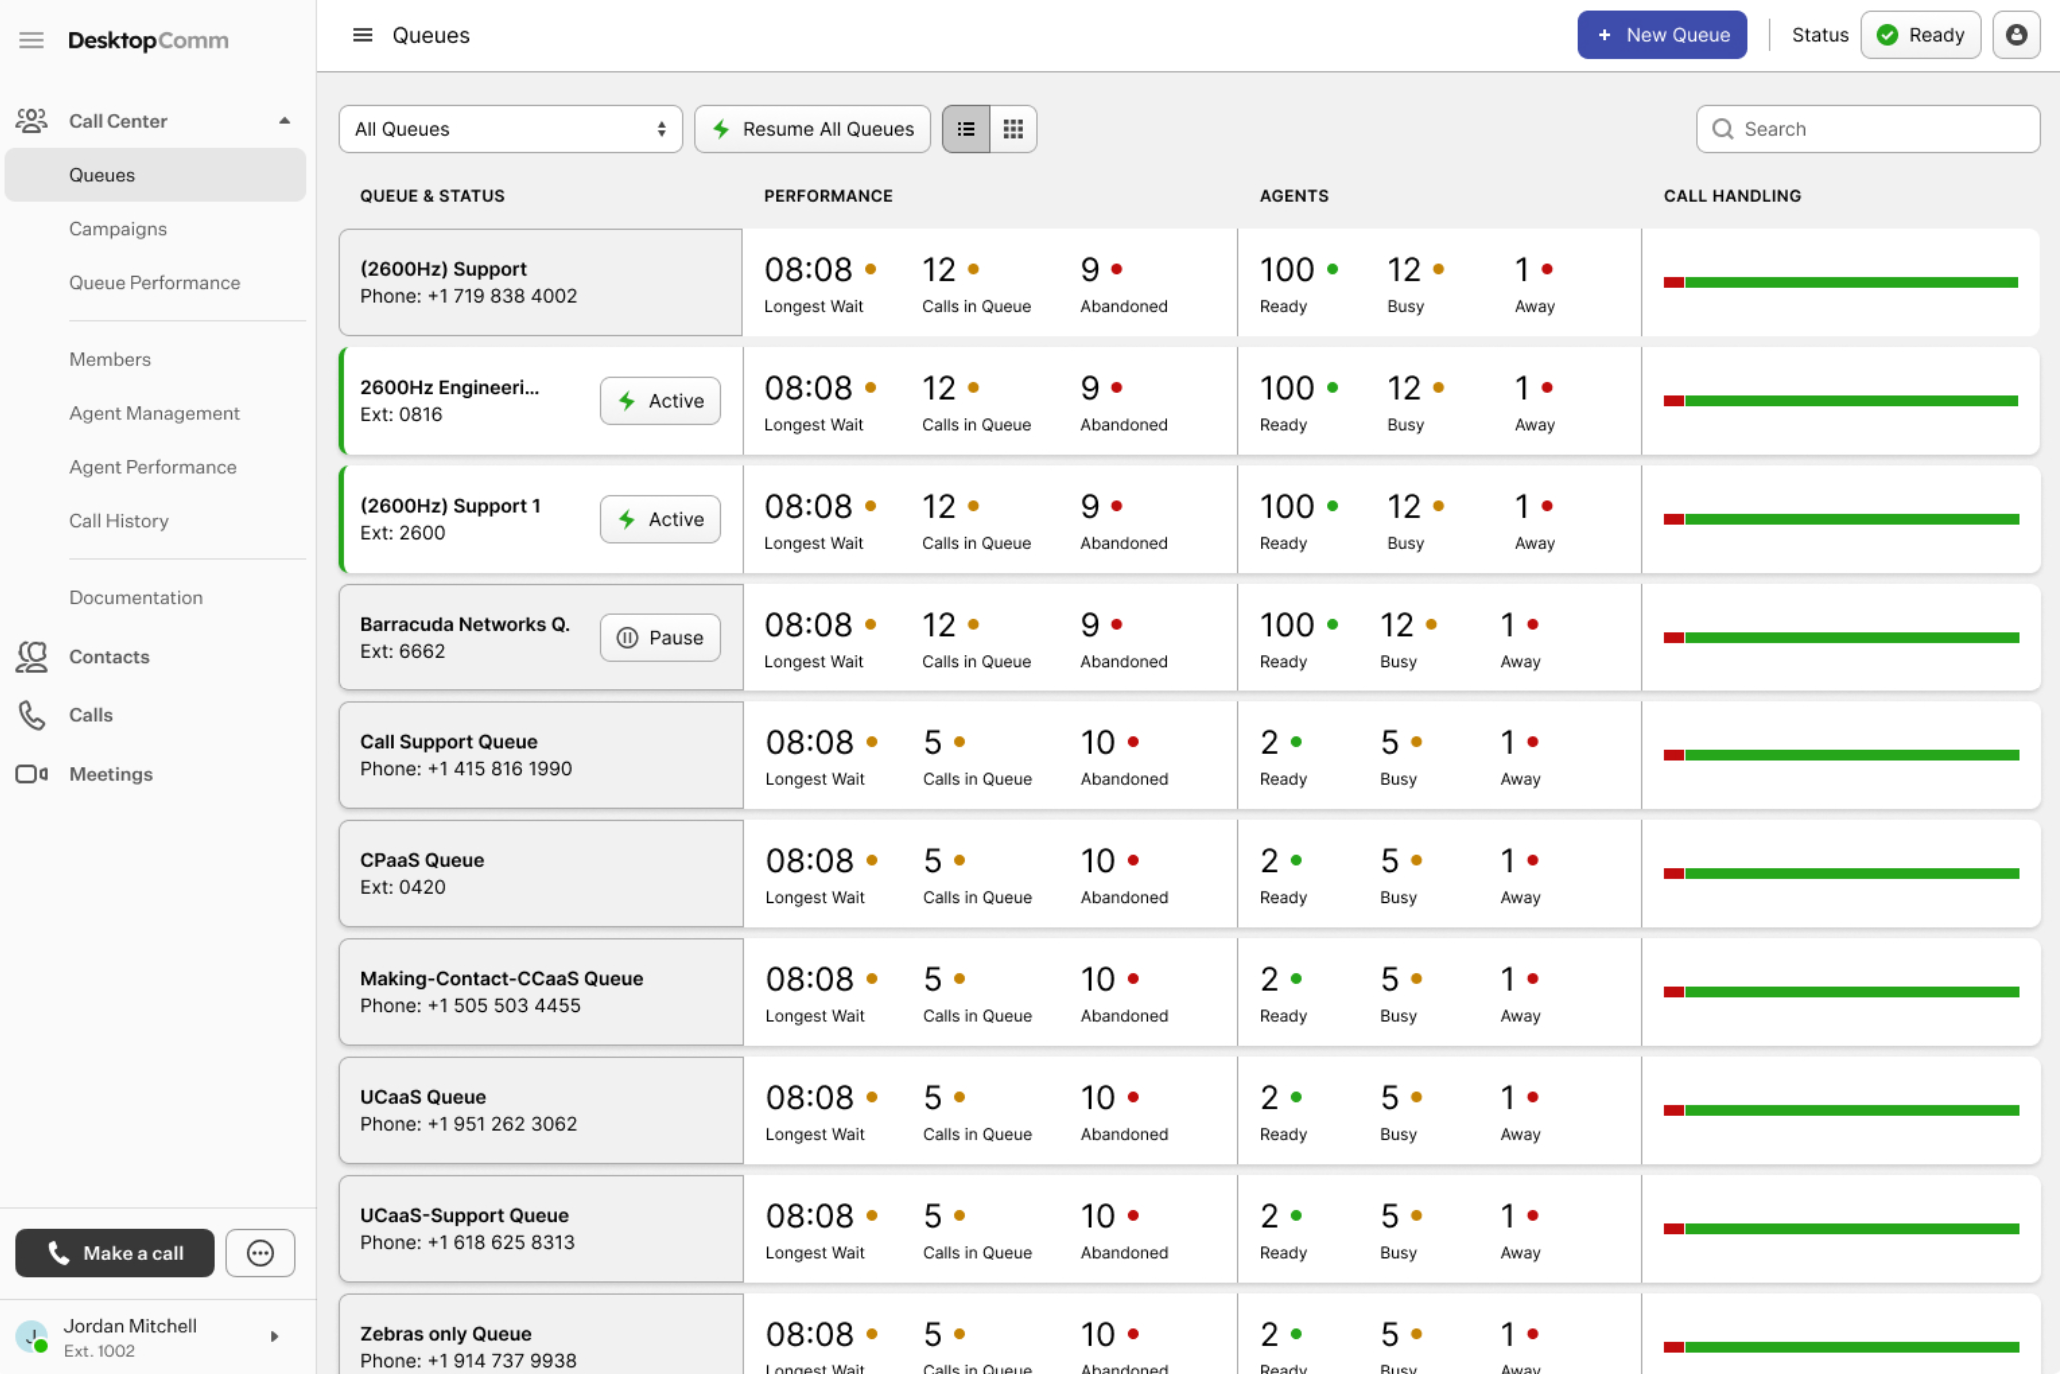
After you click the “Begin Session” button, the session will start and the Queues tab will appear in the main space of the app.
Click the Campaigns tab in the left-hand menu of the portal to open the corresponding section of the Call Center.
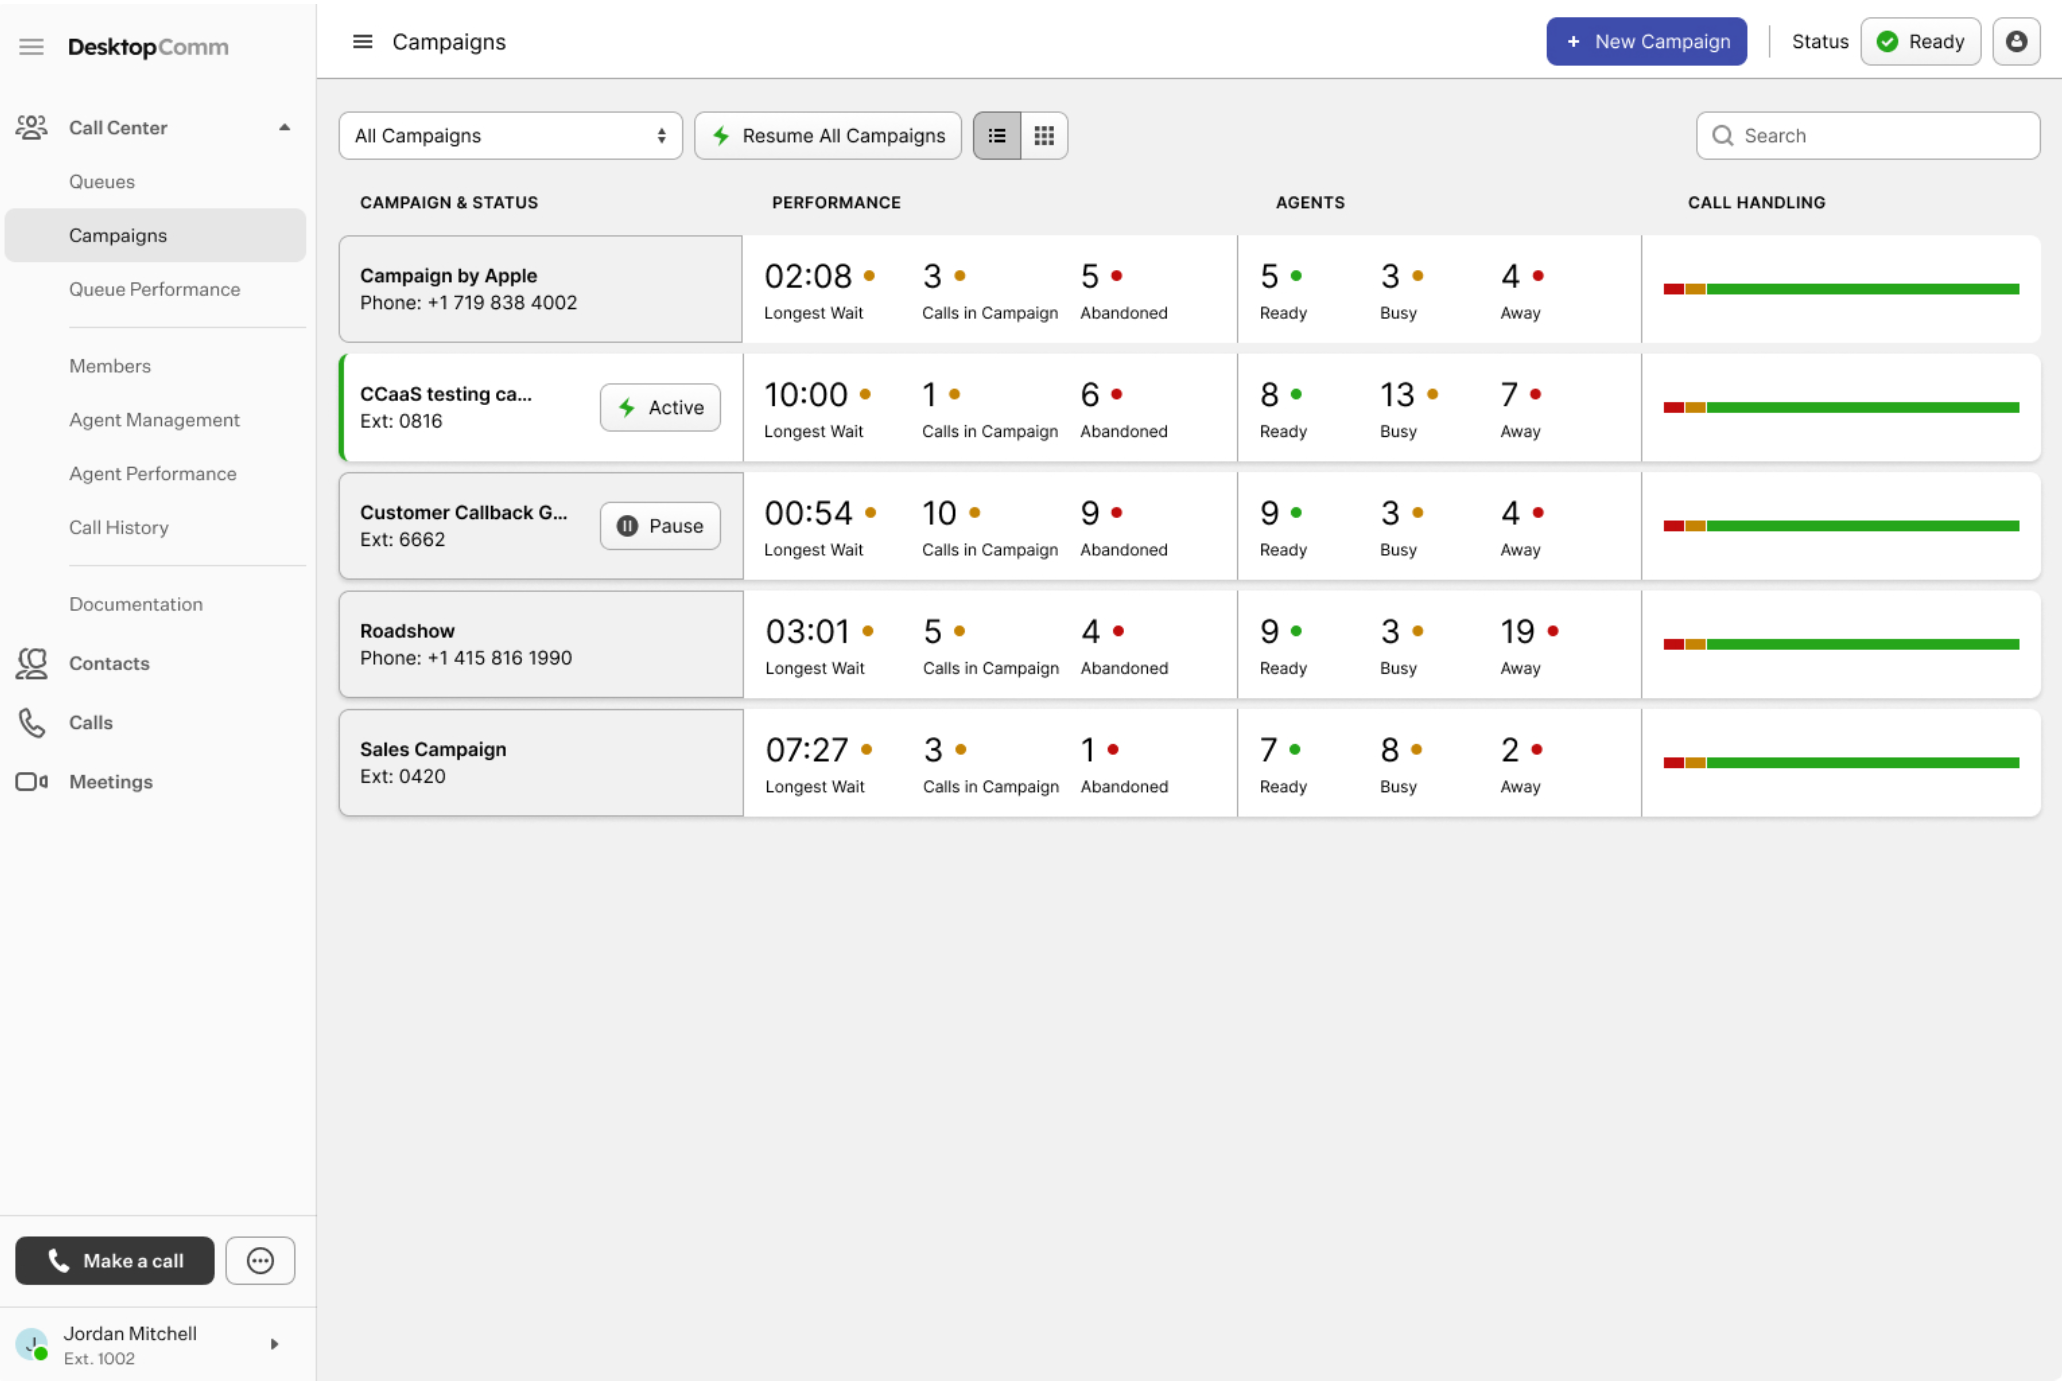
Campaigns are structured call-center initiatives designed to manage and track interactions related to a specific objective, such as sales outreach, customer surveys, appointment reminders, marketing promotions, customer follow-ups, or service notifications. An outbound campaign is a structured set of calls placed to a specific list of contacts for a specific purpose, such as: sales, customer surveys, marketing promotions, etc.
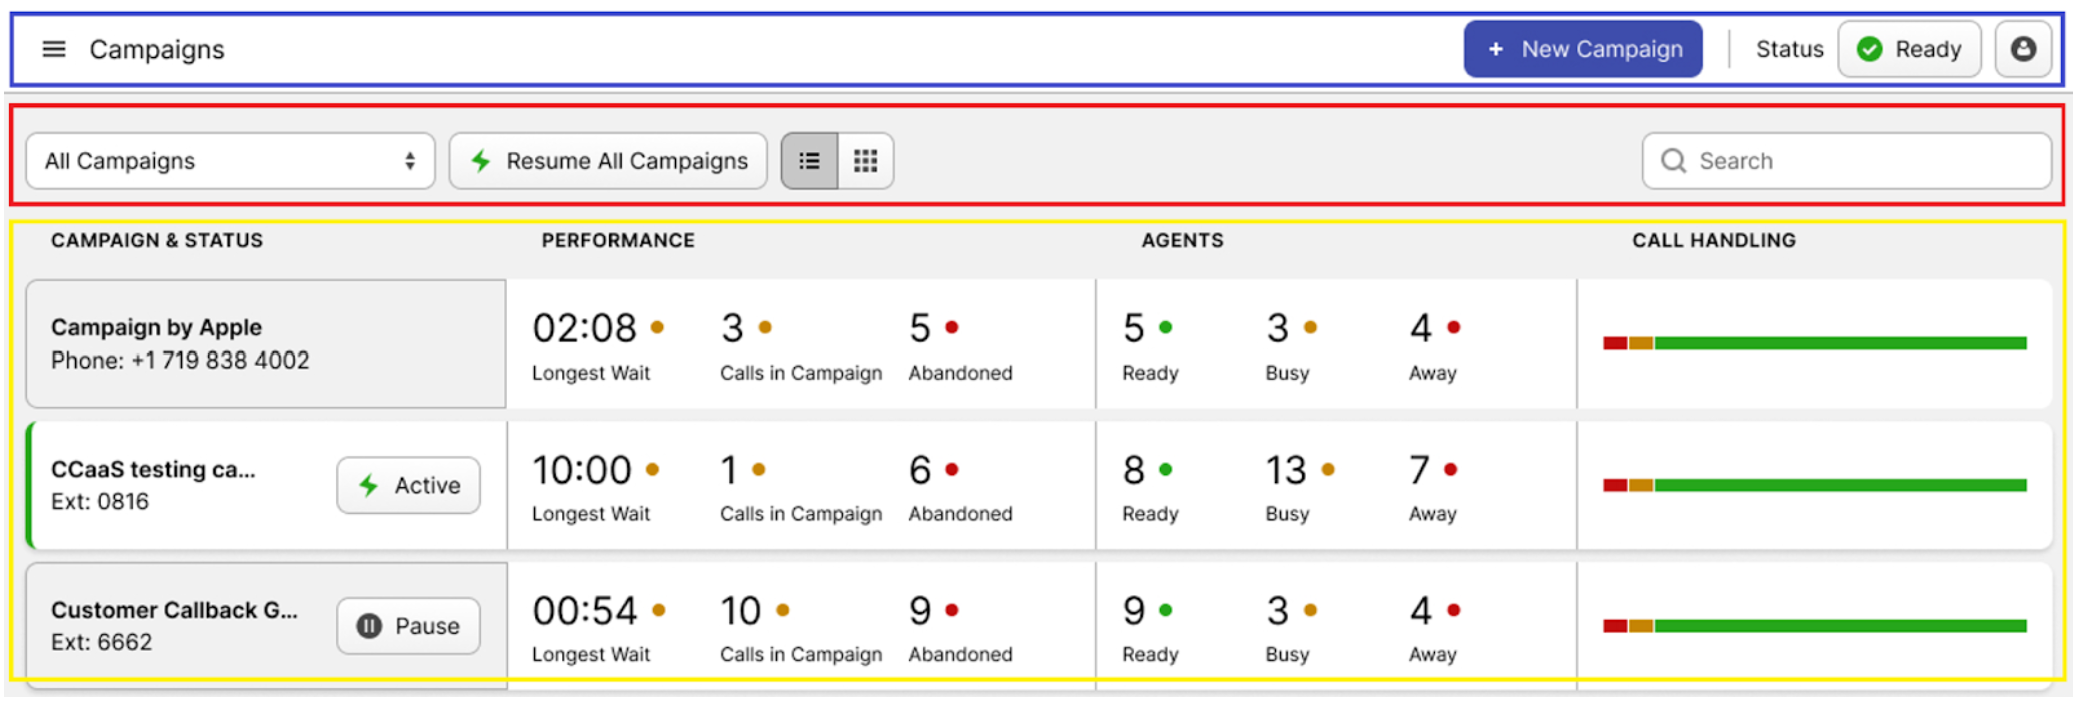
The interface of the Campaigns tab can be divided into three primary sections:
-
Campaigns Status Bar (blue rectangle): this bar allows you to control the status of the campaign sessions.
-
+ New Campaign: by pressing this button, a form for creating a new campaign will appear.

All the parameters that need to be configured are organized across several tabs.
- The **status button** lets you update your account’s status. Clicking it opens a drop-down list with options such as “Ready,” “Away,” or “End Session.”This topic is extensive and will be covered in detail in the following sections of the user guide.
-
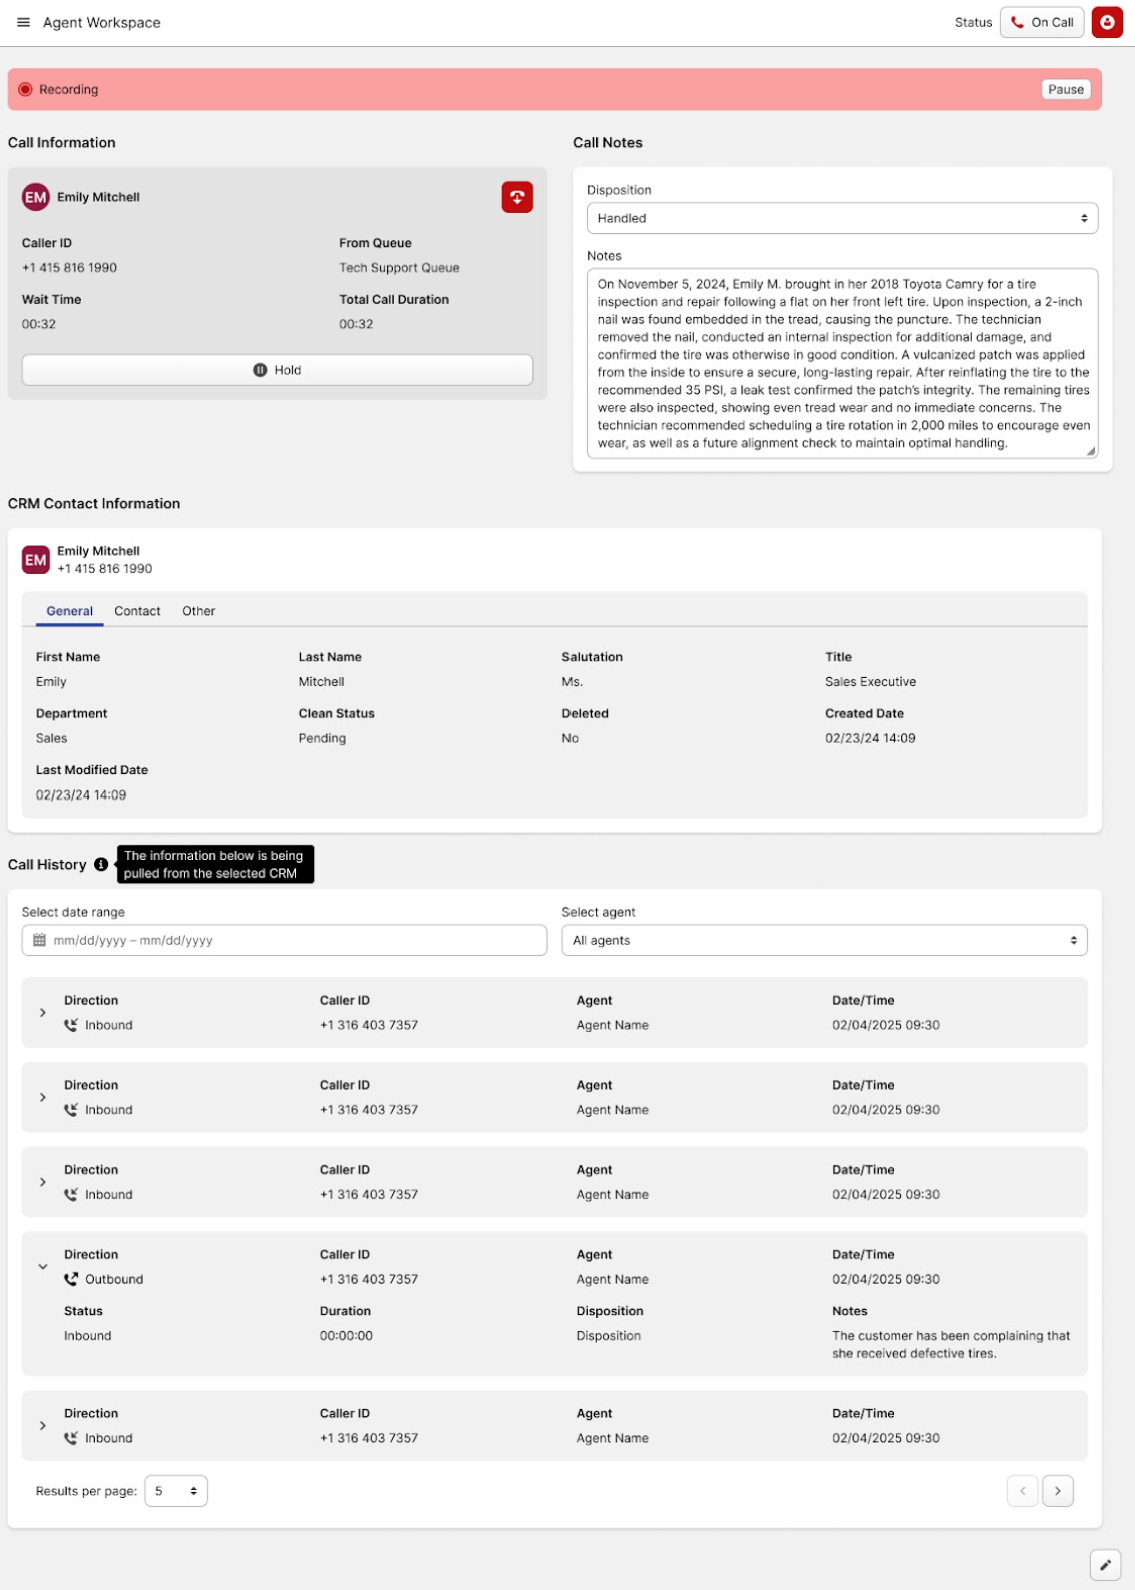
The button with the human icon provides access to the agent workspace, where you can enter call details, notes, and other related information.
-
-
Action Bar (red rectangle): this bar contains all the action controls used to sort campaigns, switch the view, and pause or resume all queues simultaneously.

- All Campaigns: clicking this field allows you to sort the campaigns.
- Pause/Resume All Campaigns: when you click the “Pause All Campaigns” button, every campaign in the list will be paused. The button will then switch to “Resume All Campaigns,” which you can click to reactivate all campaigns.
- List / Grid View: clicking this button will change the way all campaigns are displayed in this tab.
- Search Bar: it functions as a typical search field, helping you locate a particular campaign or narrow down the list.
-
Campaigns (yellow rectangle): each campaign in the section is displayed as a tile. Depending on the selected View, it will appear either as a long horizontal tile or a smaller rectangular one. Each tile contains useful information such as the campaign name, its status, performance metrics, assigned agents, and key call-handling details.

If a tile displays a status button, it indicates that the campaign currently has an active session. Clicking this button allows you to change the session’s status from “active” to “paused.”
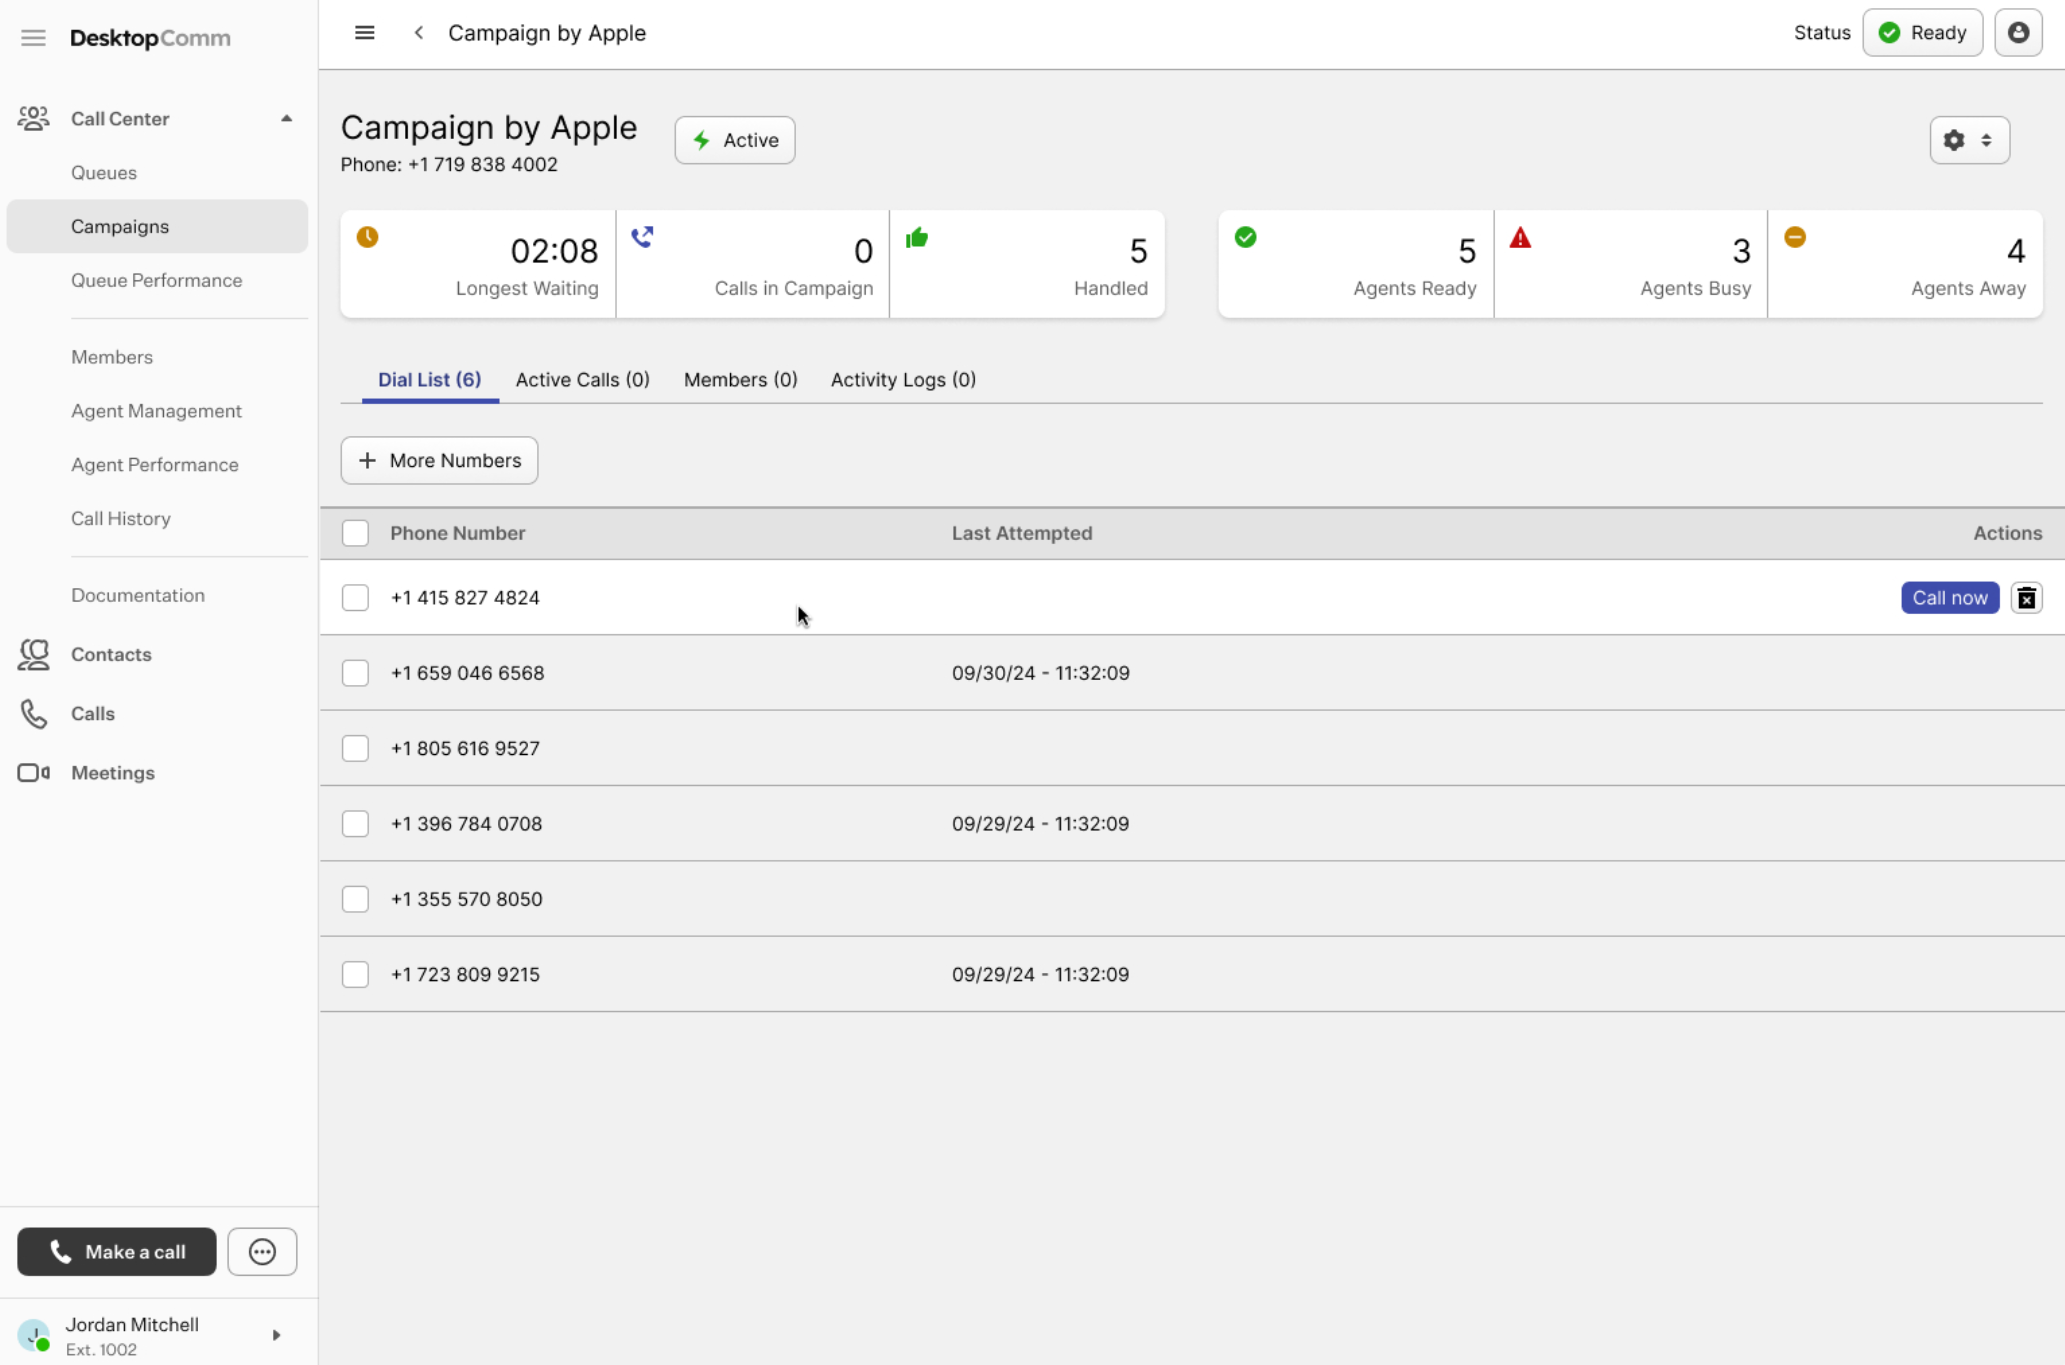
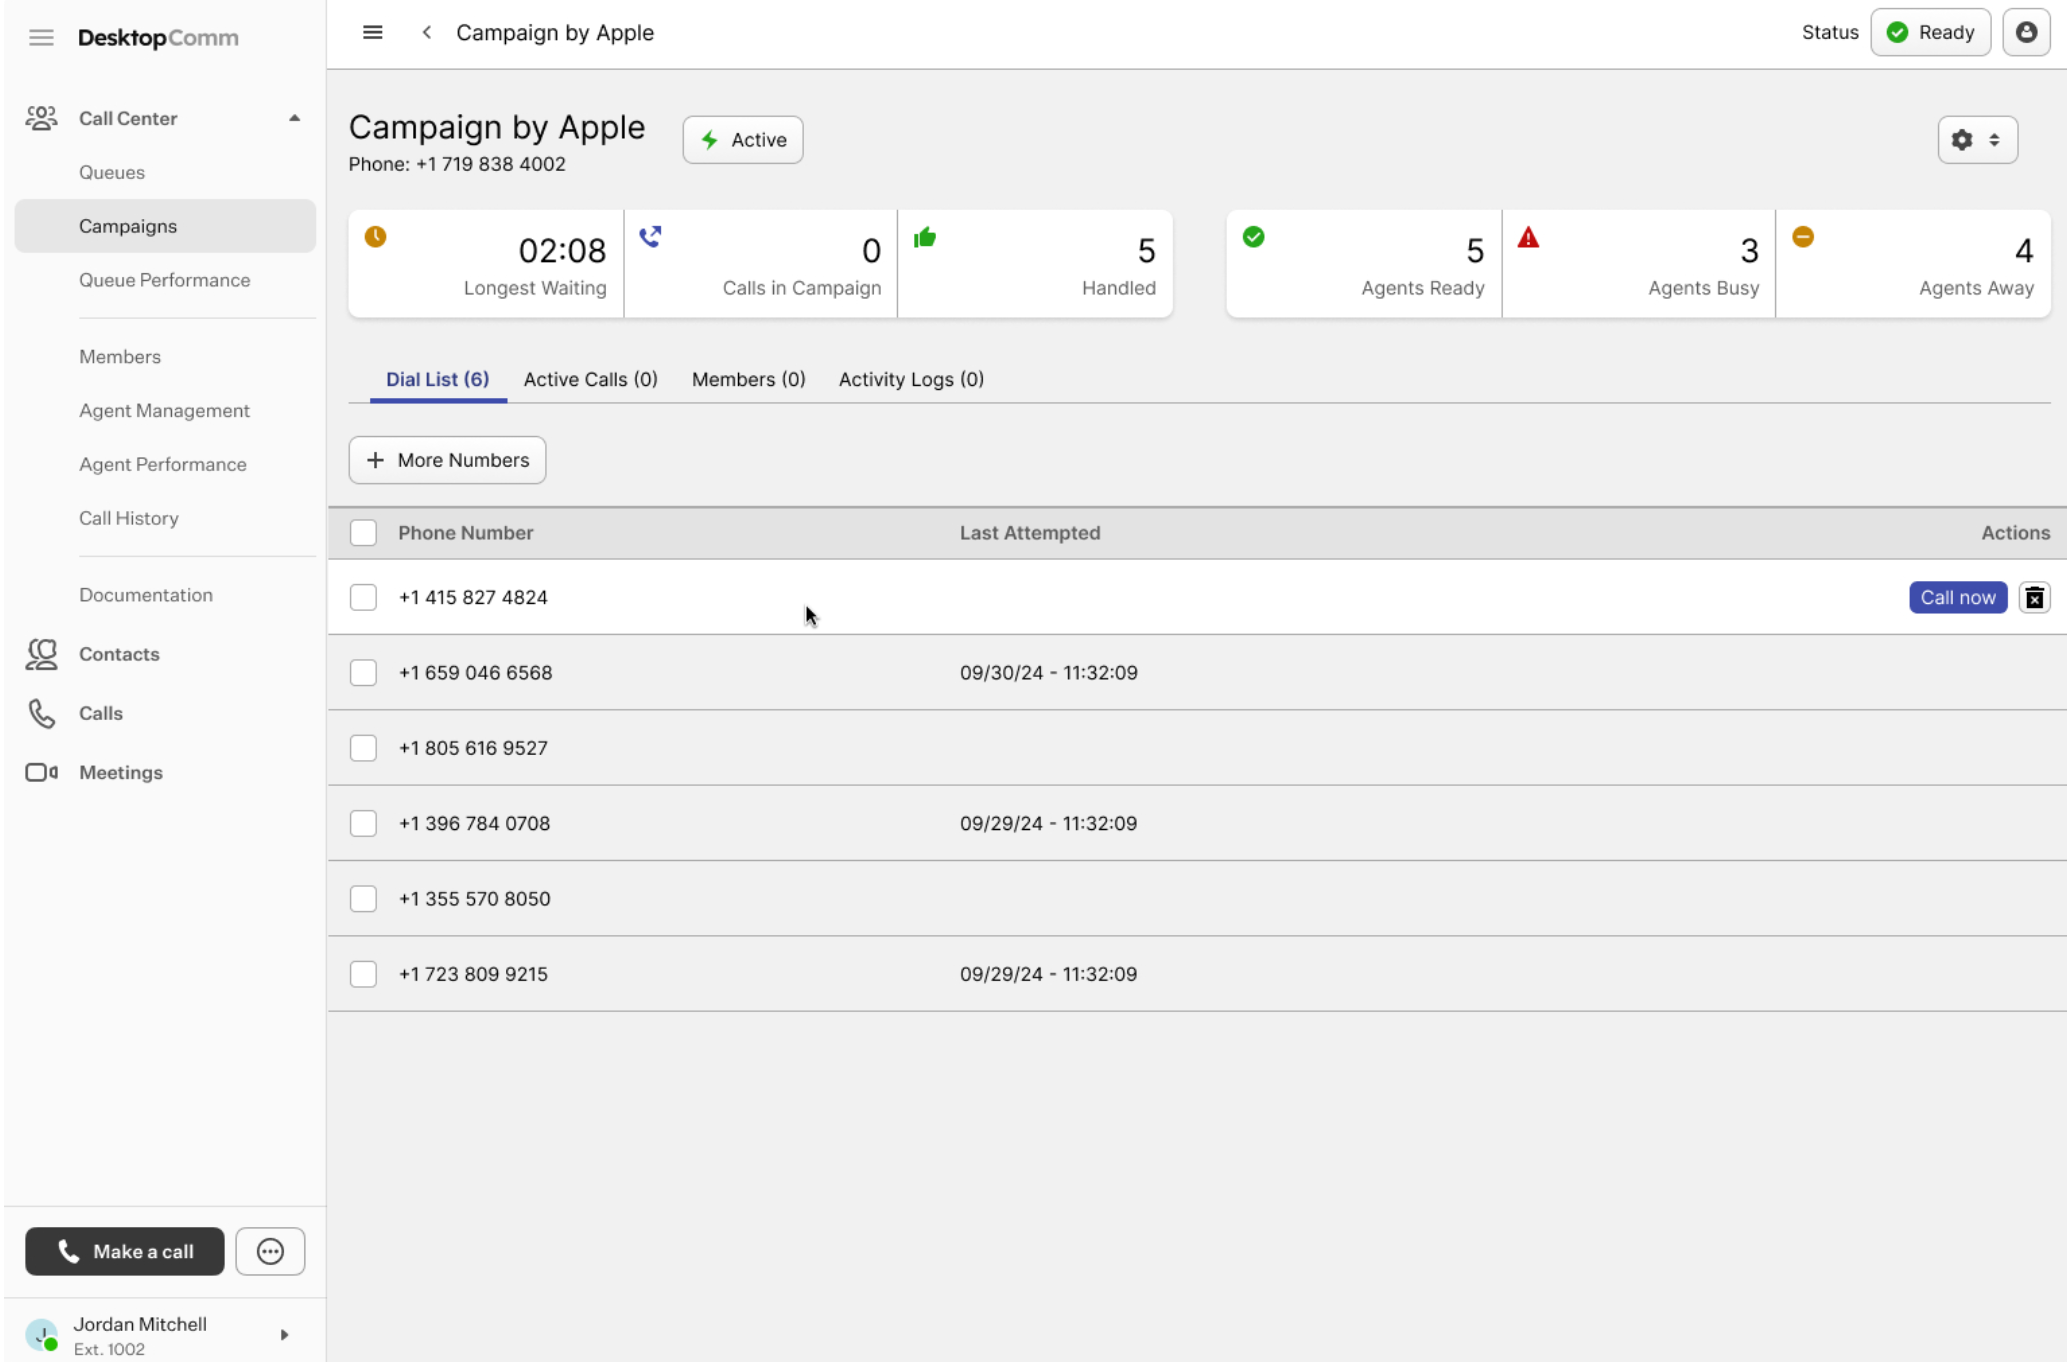
Clicking any campaign in the list opens its dedicated page, where you’ll find the same information in greater detail, along with action buttons and tabs for dial list, calls, members, and activity logs.
The action buttons include:
-
Activity button: clicking this button allows you to enable or pause the selected campaign.

-
Settings button: clicking this button allows you to edit the campaign’s settings.
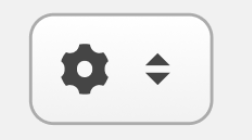
A separate page opens where you can modify all parameters of the selected campaign.
This topic is extensive and will be covered in detail in the following sections of the user guide.
The lower half of the selected campaign’s page contains four tabs:
-
Dial List tab: this tab displays all phone numbers in the selected campaign’s Dial List.
- **Active Calls tab**: here, you can see a list of active calls currently taking place within the selected **campaign**.This topic is extensive and will be covered in detail in the following sections of the user guide.
-
Members tab: this tab displays all agents assigned to this campaign. You can view their names, roles, status, and key statistics, including call handling data, current session duration, time spent in “away” status, and a list of their skills.
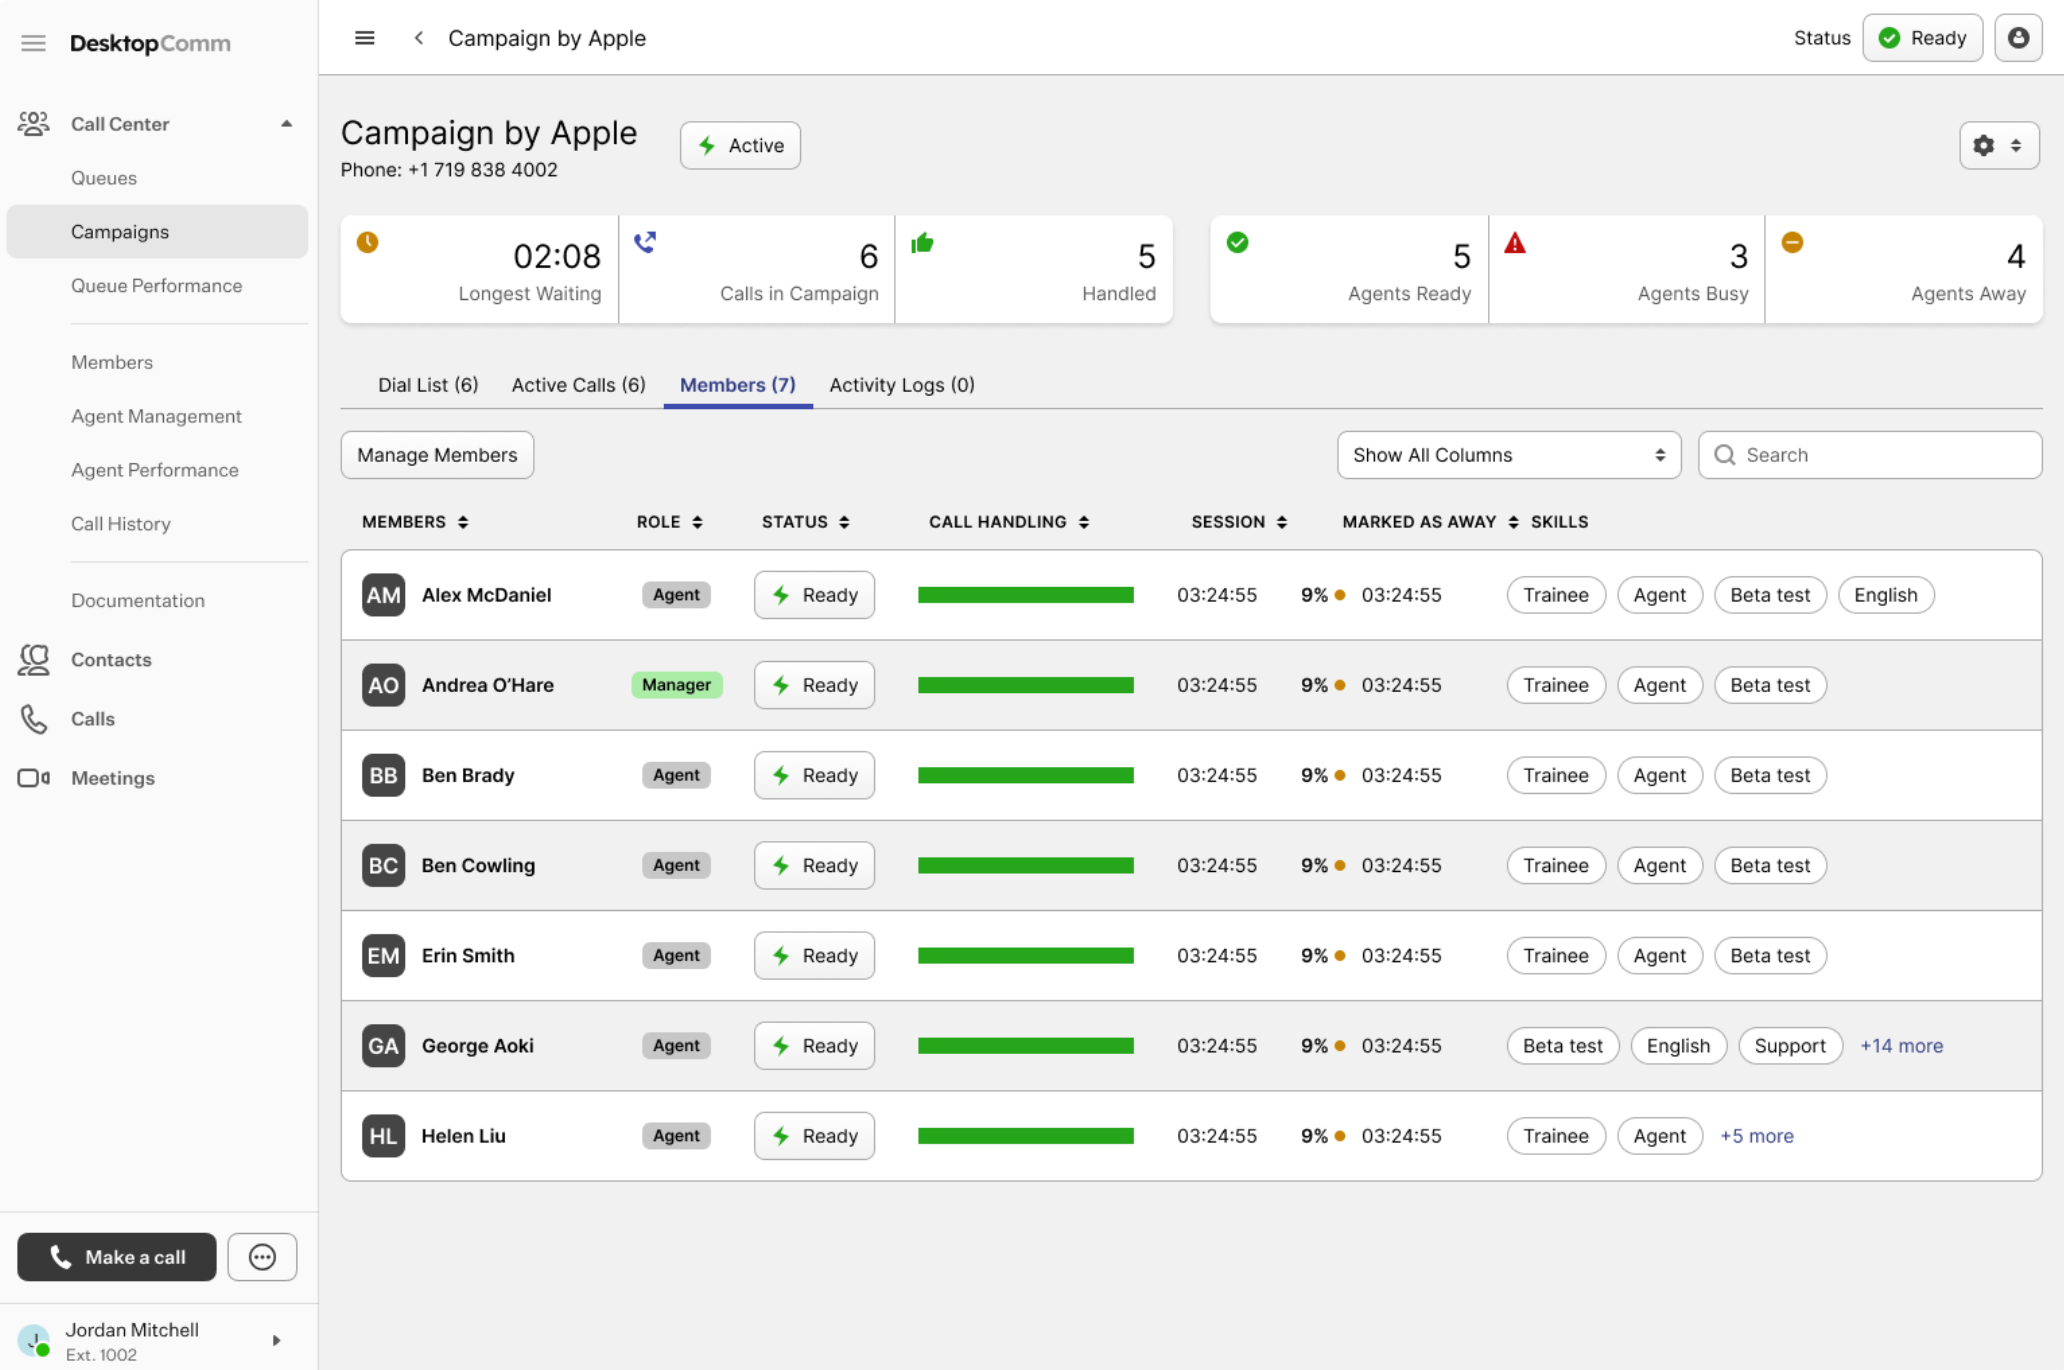
By clicking the “Manage Members” button, you will enter the member managing mode.
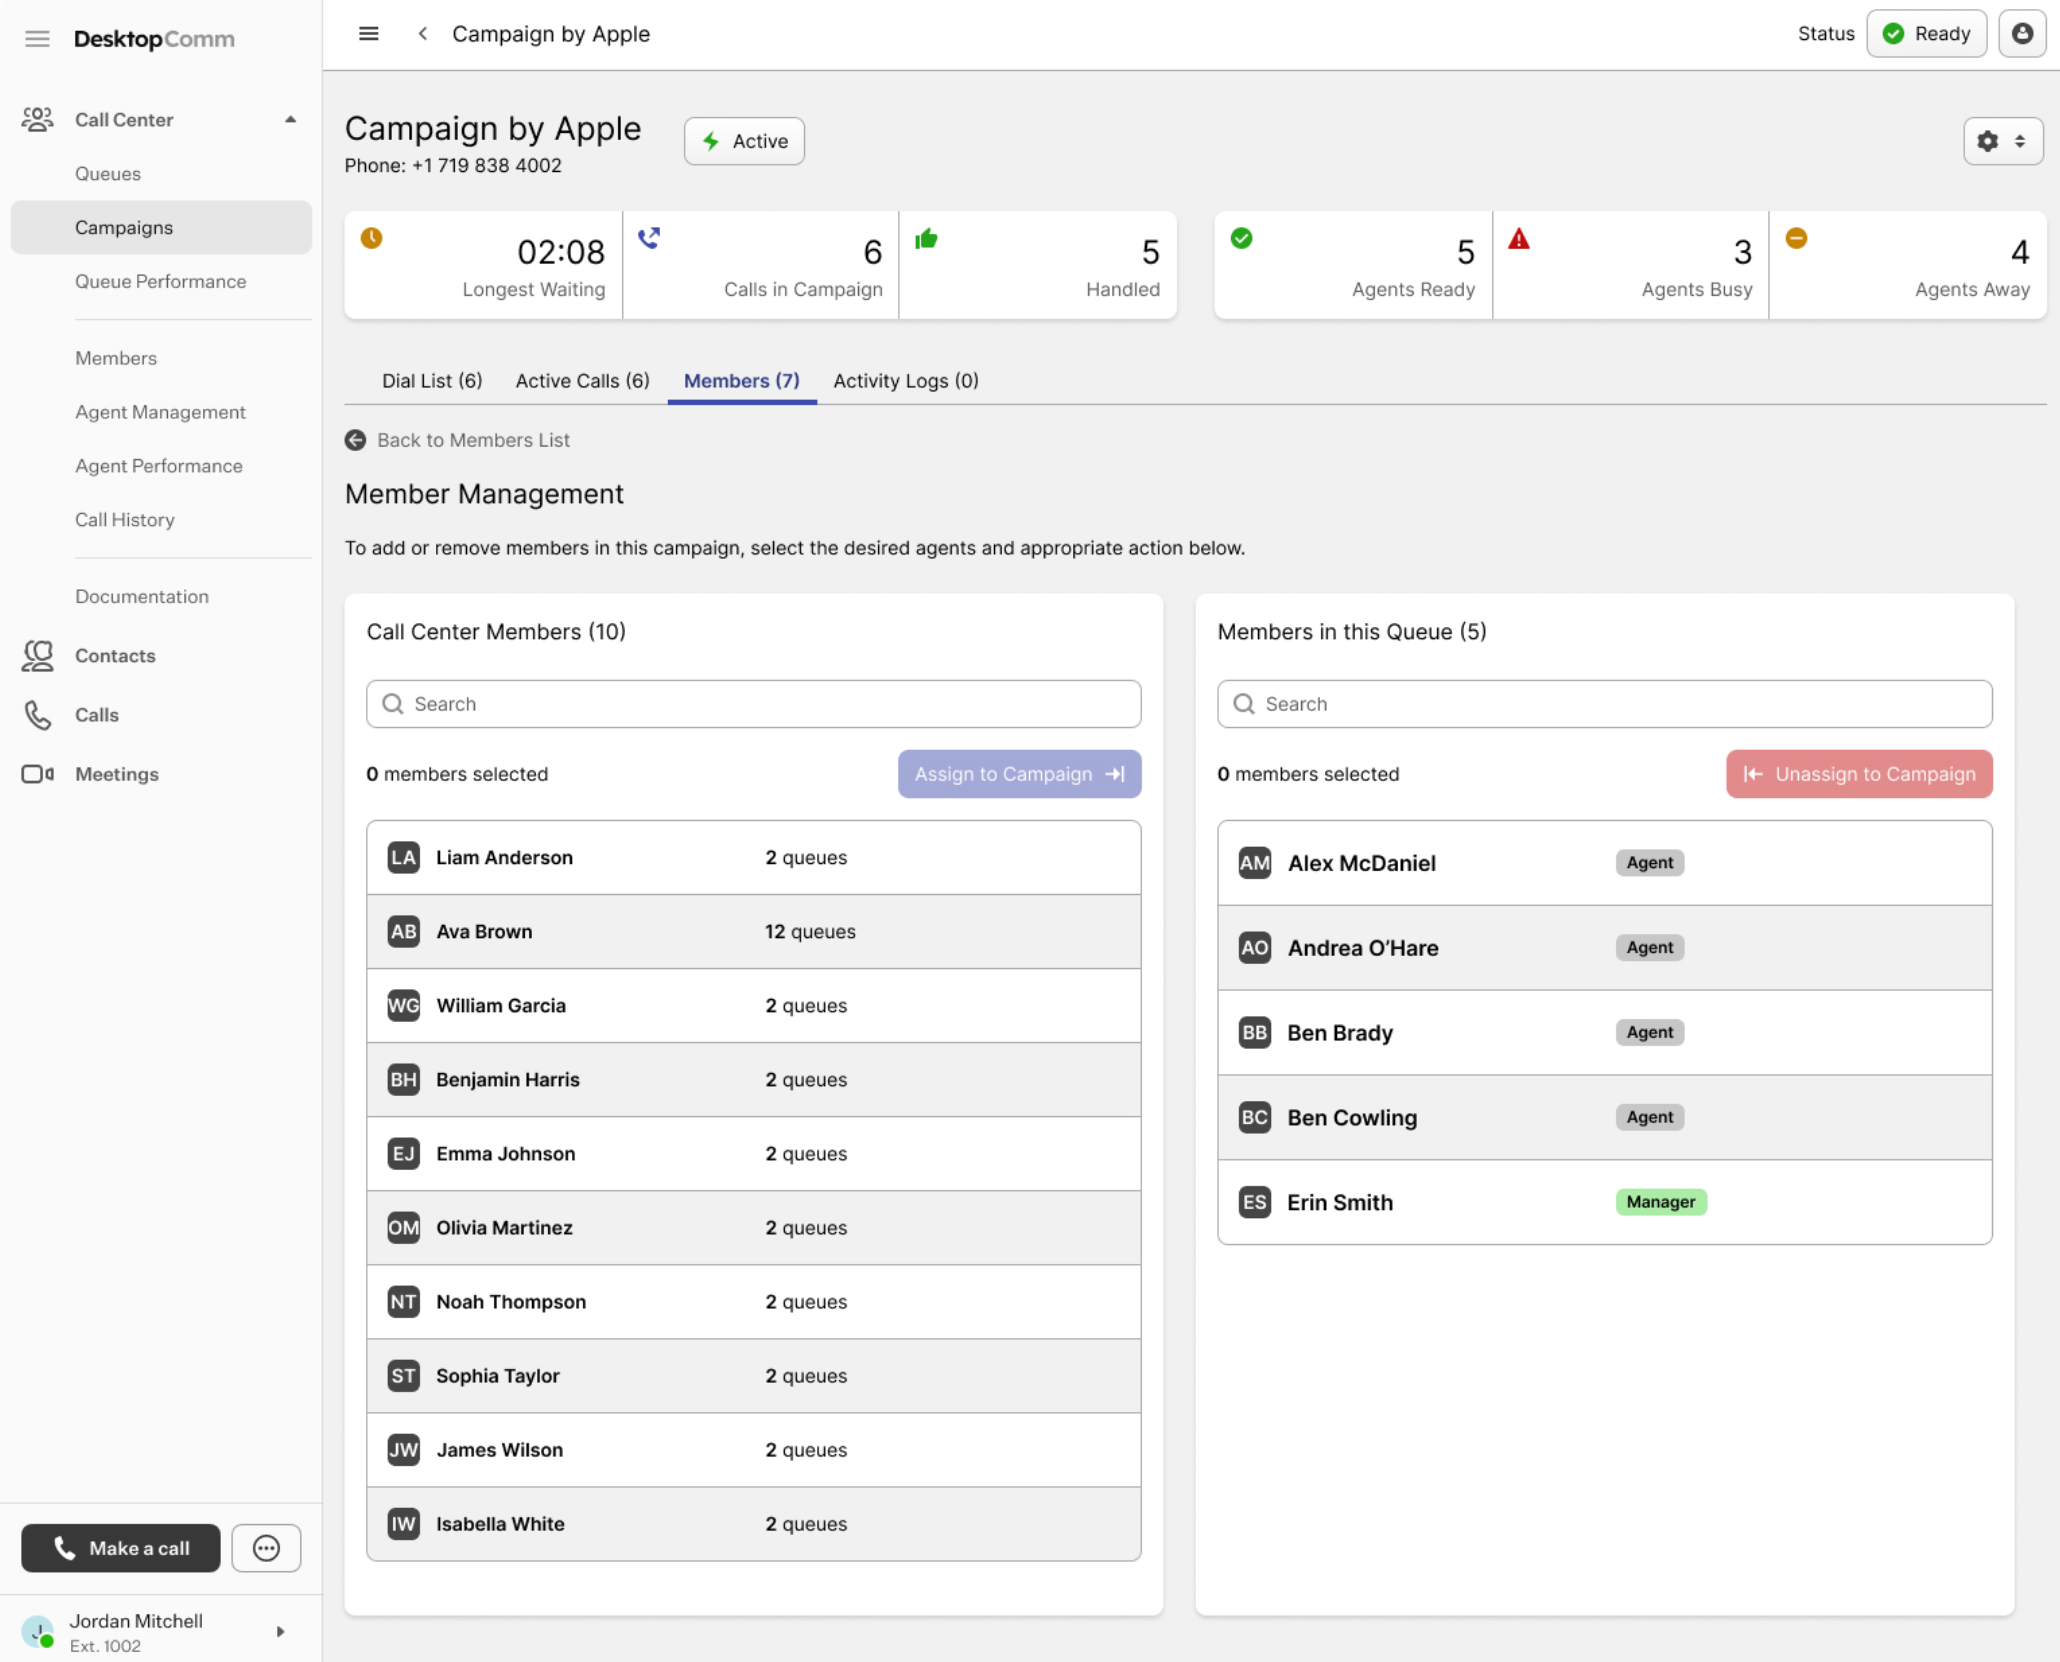
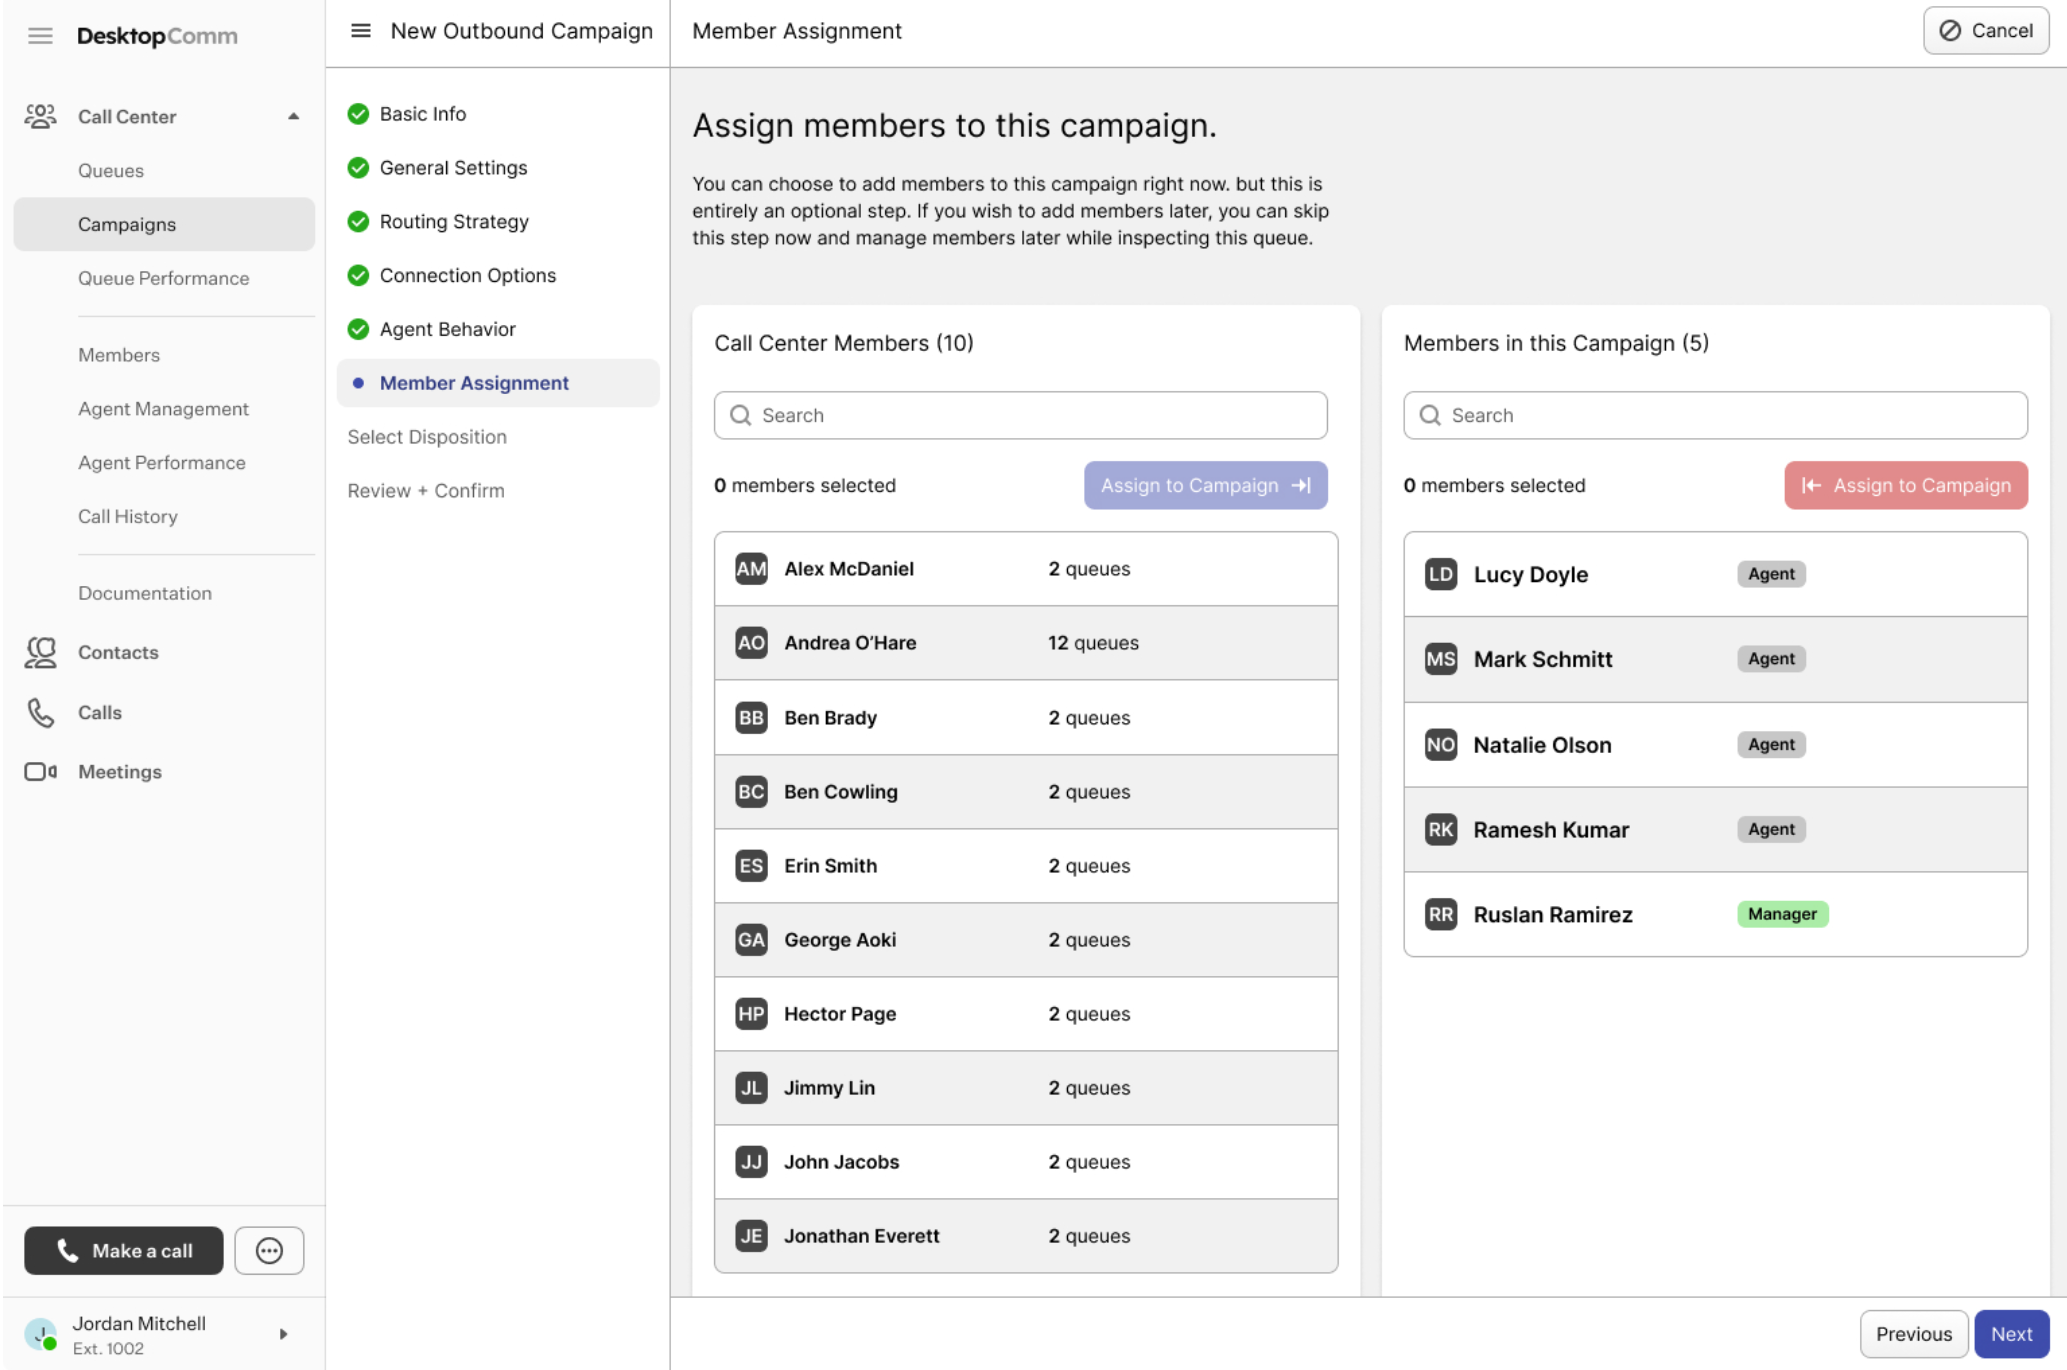
Here, you can manage the agents assigned to the configured campaign. The agents in the left list represent all call center members, while the agents in the right list are assigned to this campaign. To add a member, select an agent from the left list and click the “Assign to Campaign” button. To remove an agent, select them from the right list and click the “Unassign from Campaign” button.
-
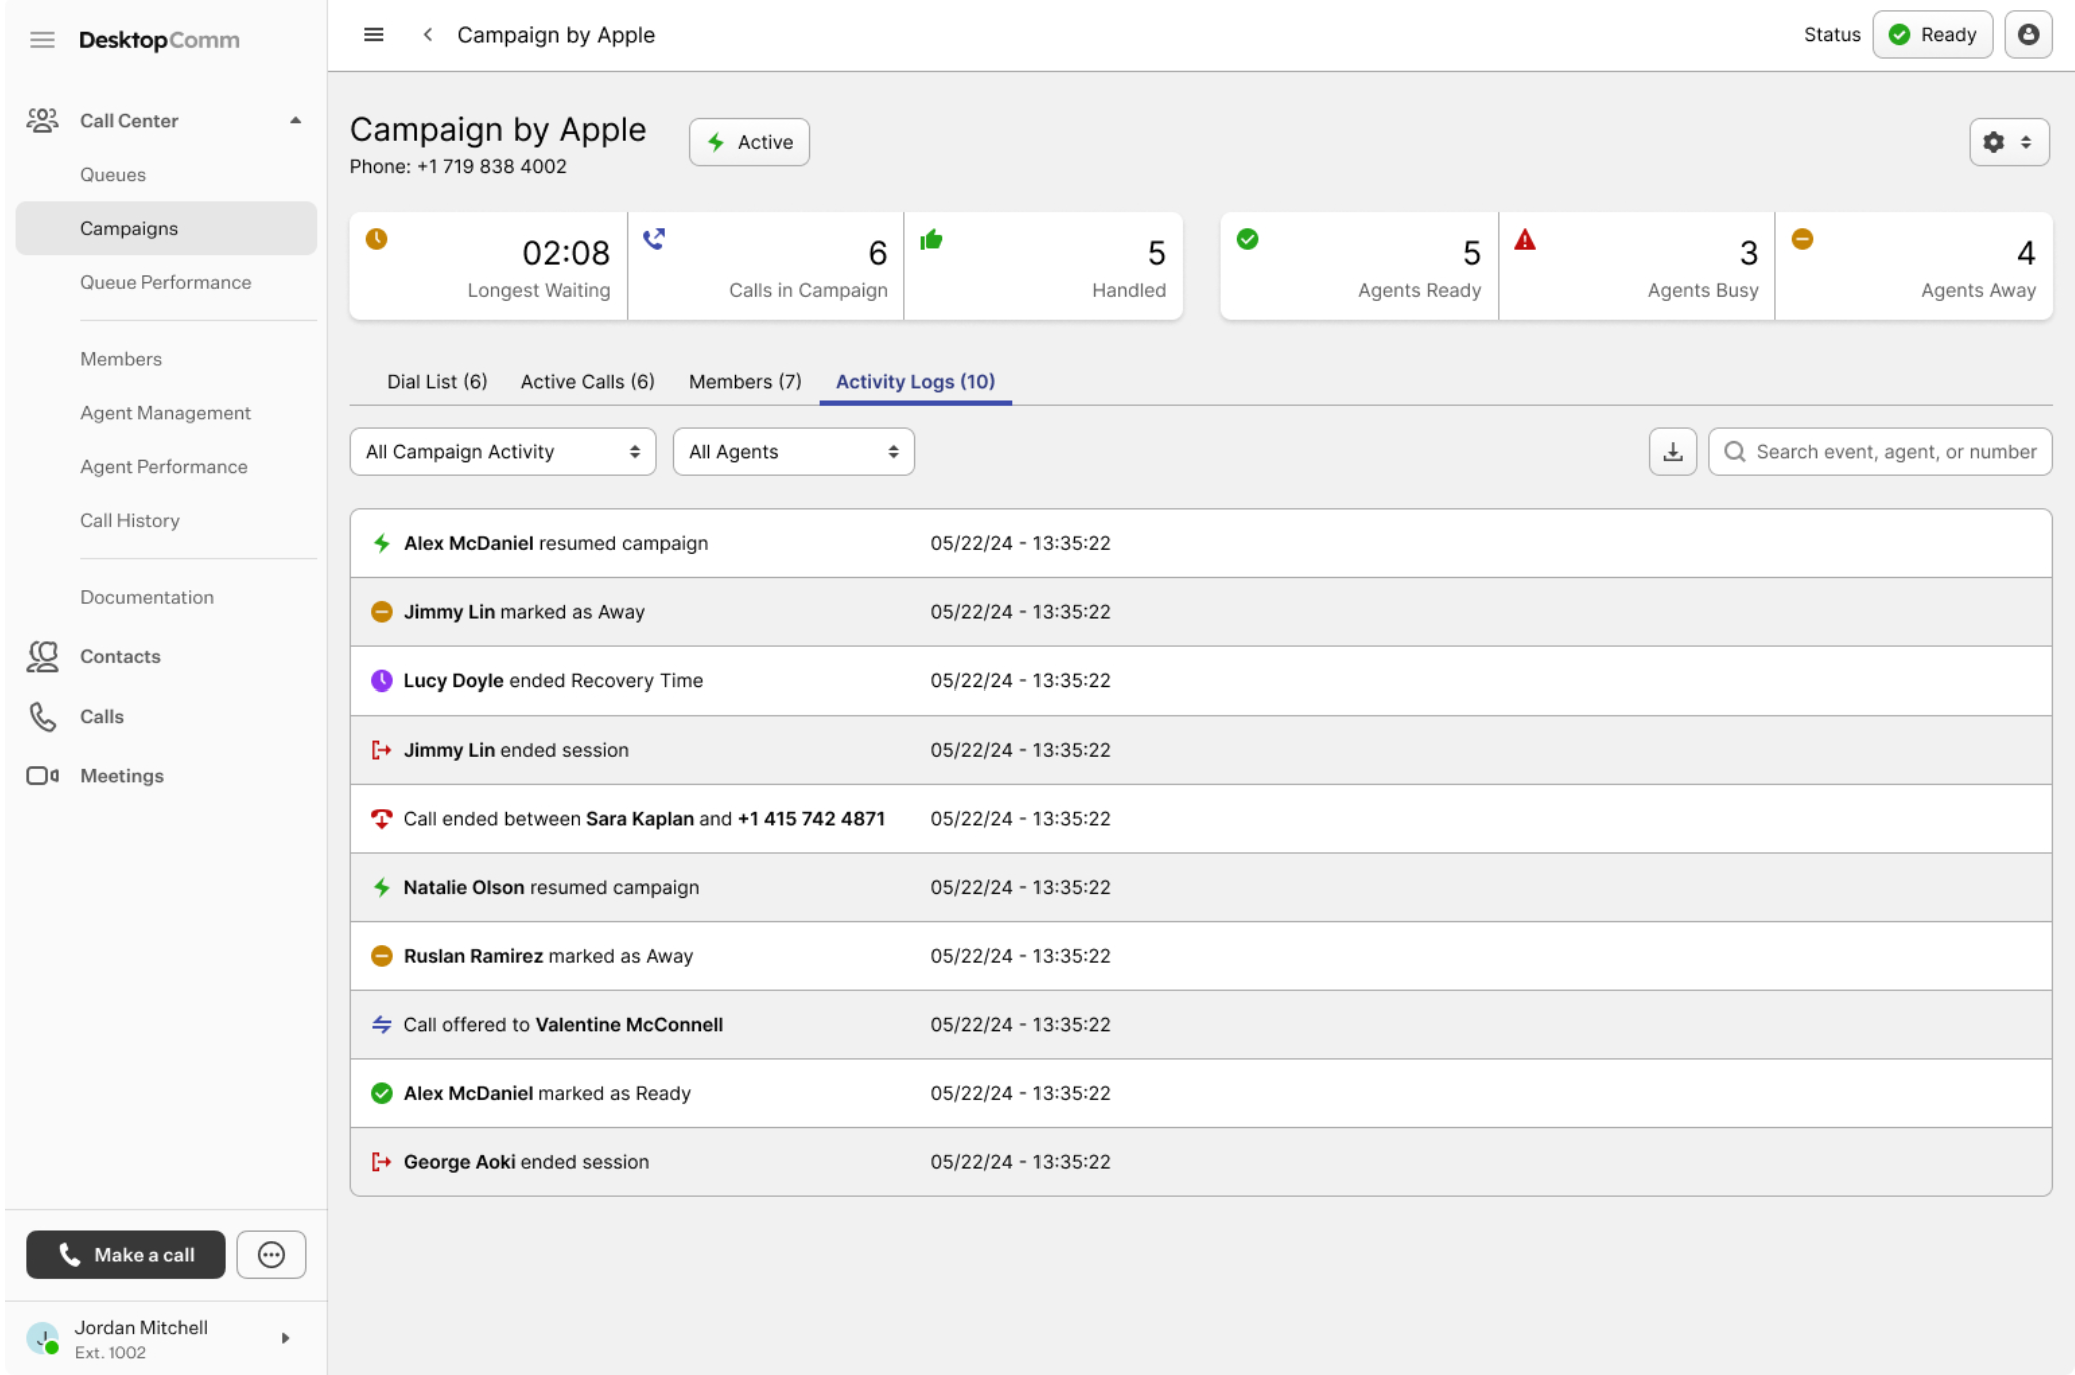
Activity Logs tab: this tab contains all logs related to the current campaign. You can filter logs by activity status or agent name, search by event, agent, or phone number, and download the entire log history.
-
Creating / Editing Campaigns
Clicking the “Edit Campaign Settings” button opens a separate page where you can adjust all parameters of the selected campaign. These parameters are organized across several tabs:
-
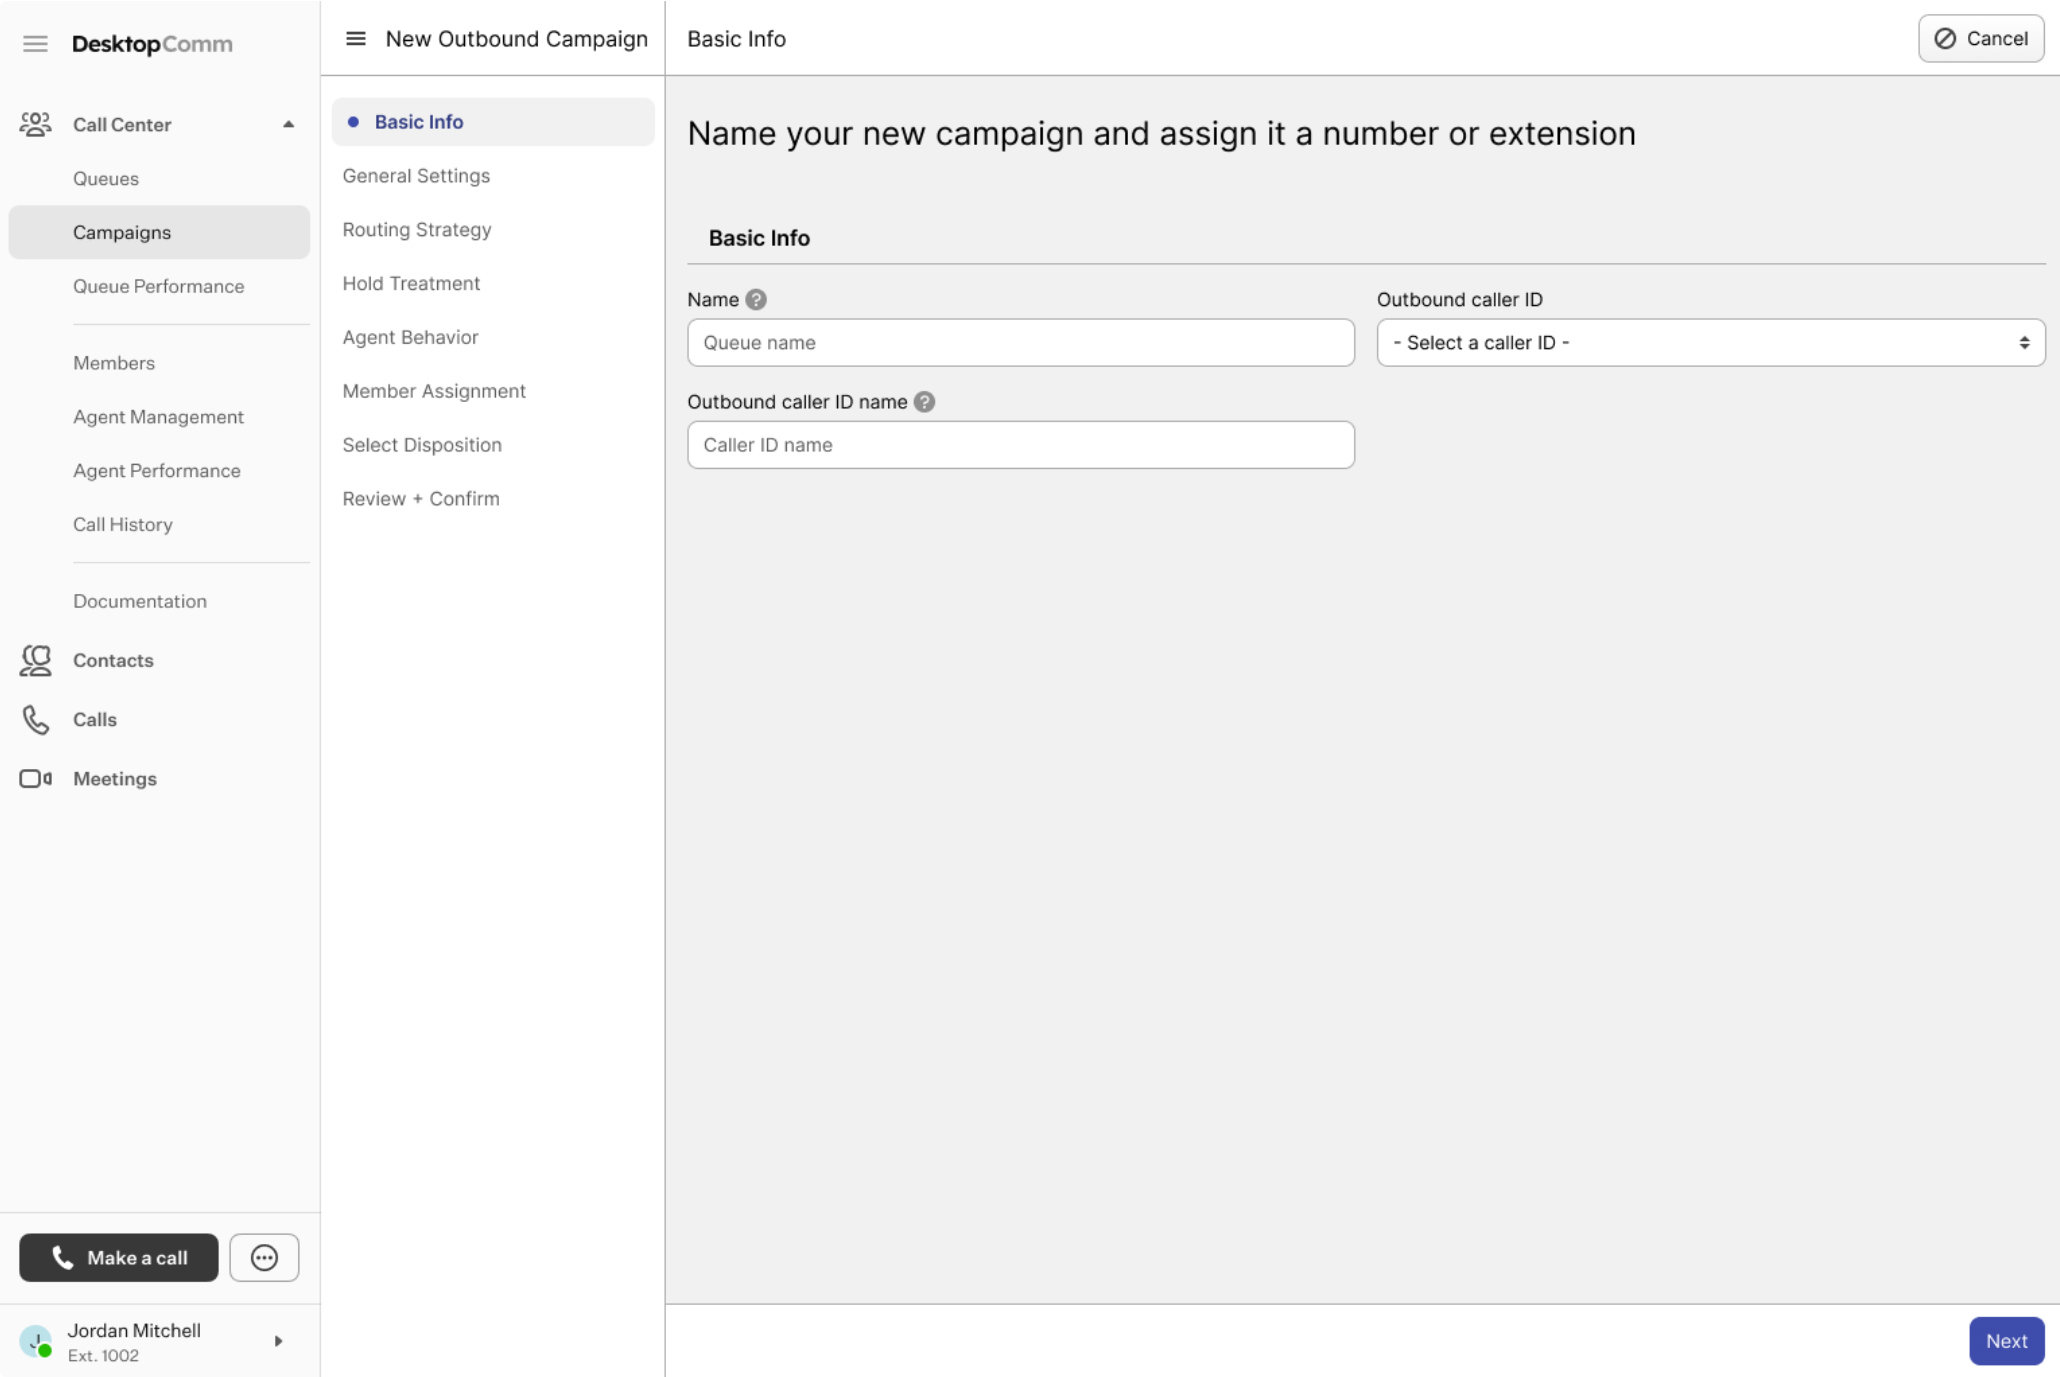
Basic Info tab: here, you can modify the selected campaign’s basic parameters.

- Name: here, you can set a custom campaign name.
- Outbound Caller ID: here, you can set a custom Outbound Caller ID.
- Outbound Caller ID Name: here, you can set a custom Outbound Caller ID Name.
-
General Settings tab: here, you can configure the main settings of the selected campaign.
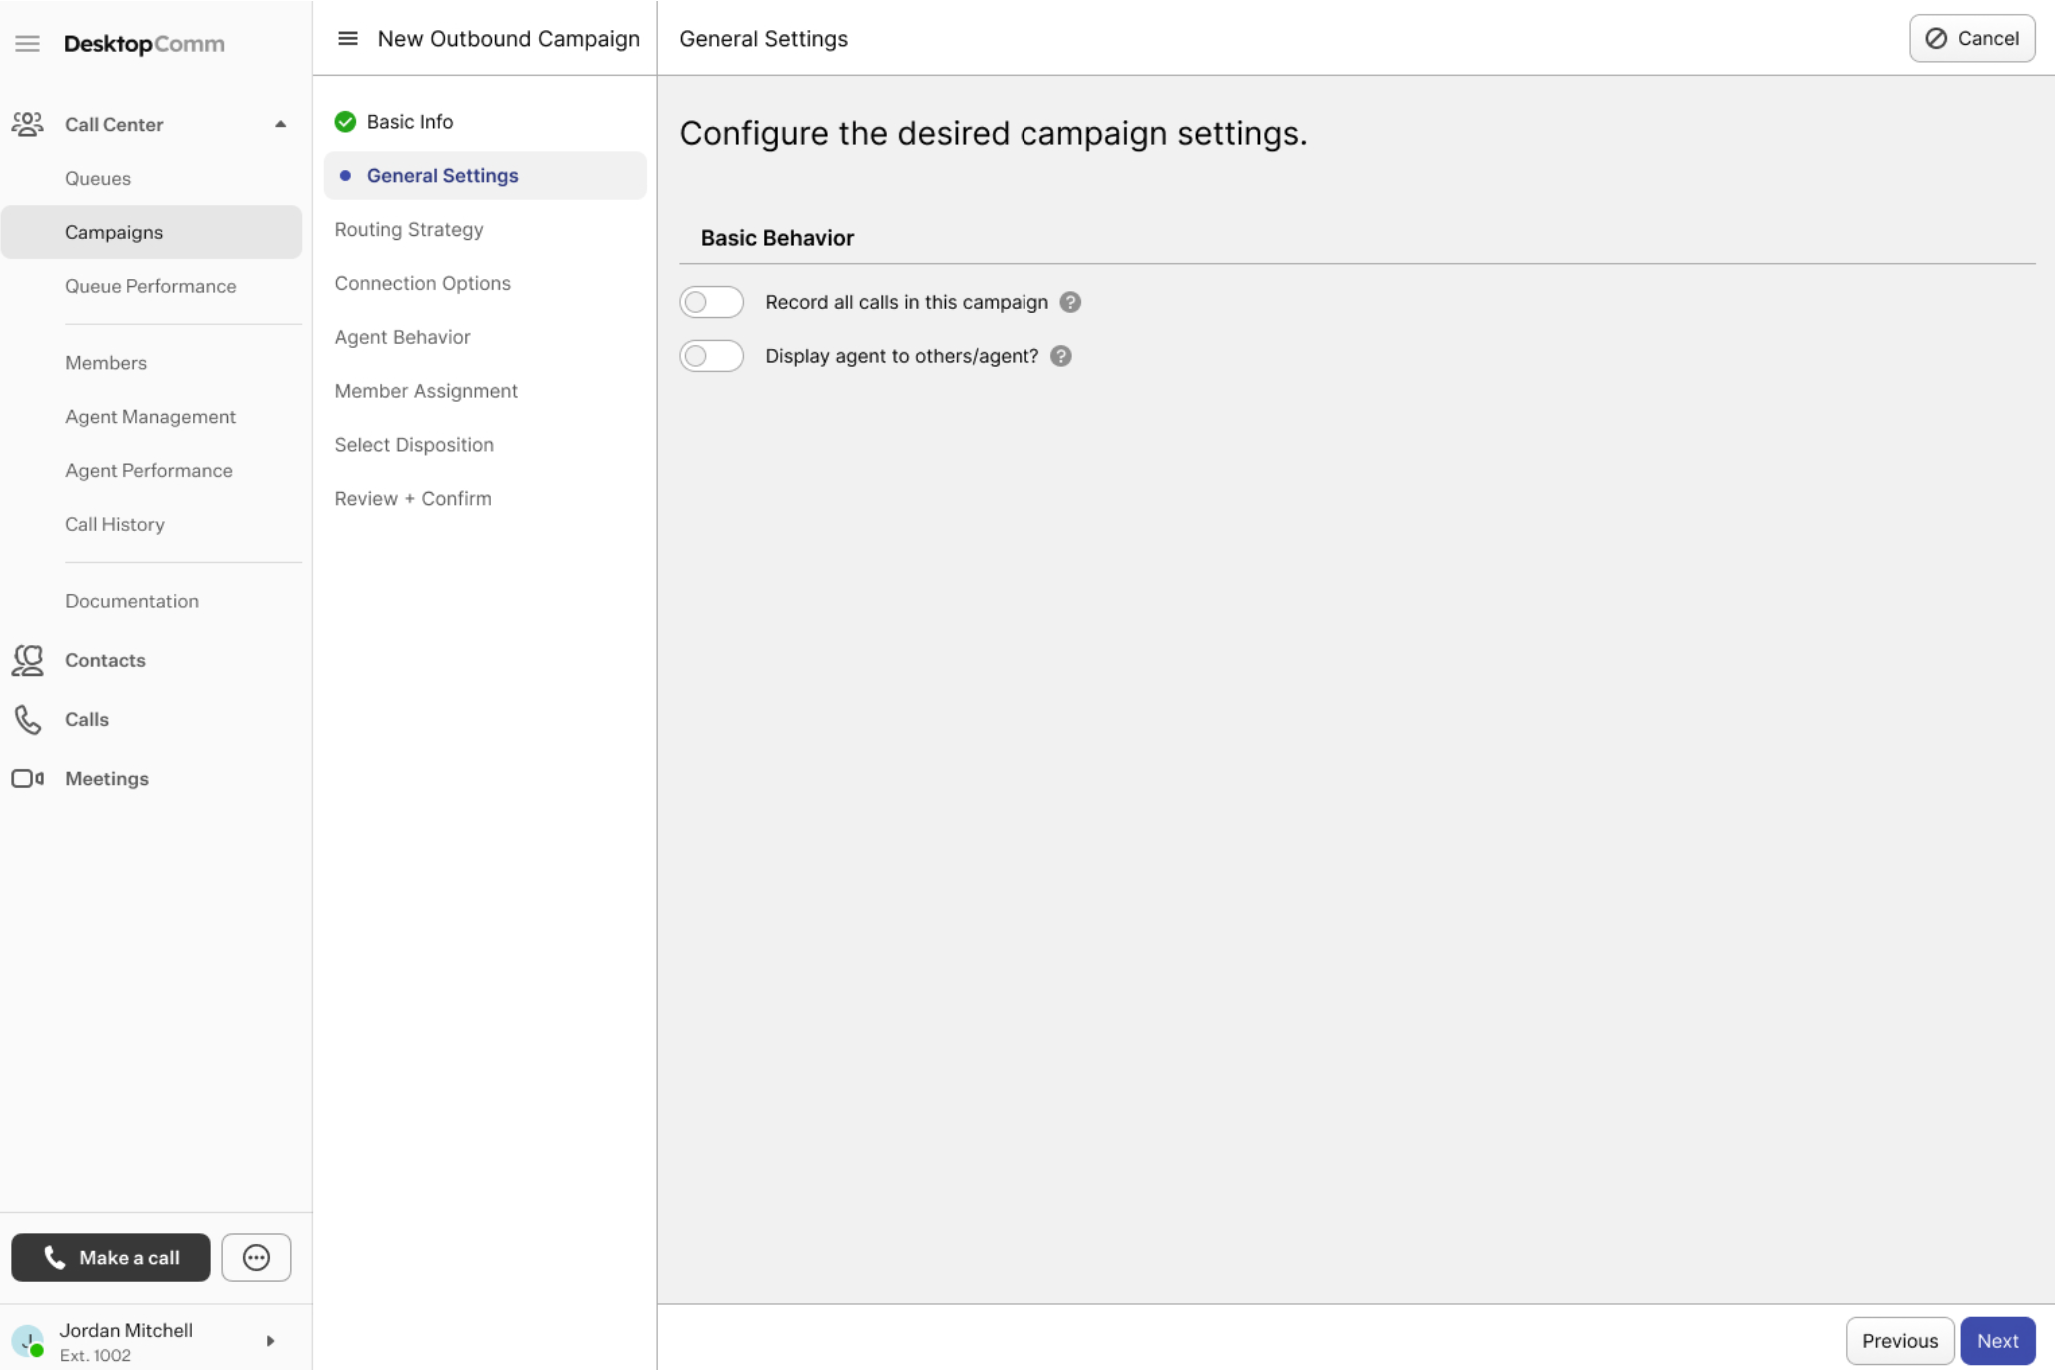
- Basic Behavior section: here, you can configure the basic behavior of the queue.
- Record all calls in this queue: if turned on, all calls will be recorded by default.
- Display agent to others/agents?: enabling this toggle switch allows agents to see other agents who are part of the same campaign.
- Basic Behavior section: here, you can configure the basic behavior of the queue.
-
Routing Strategy tab: here, you can set a strategy of how the calls should be routed to agents.
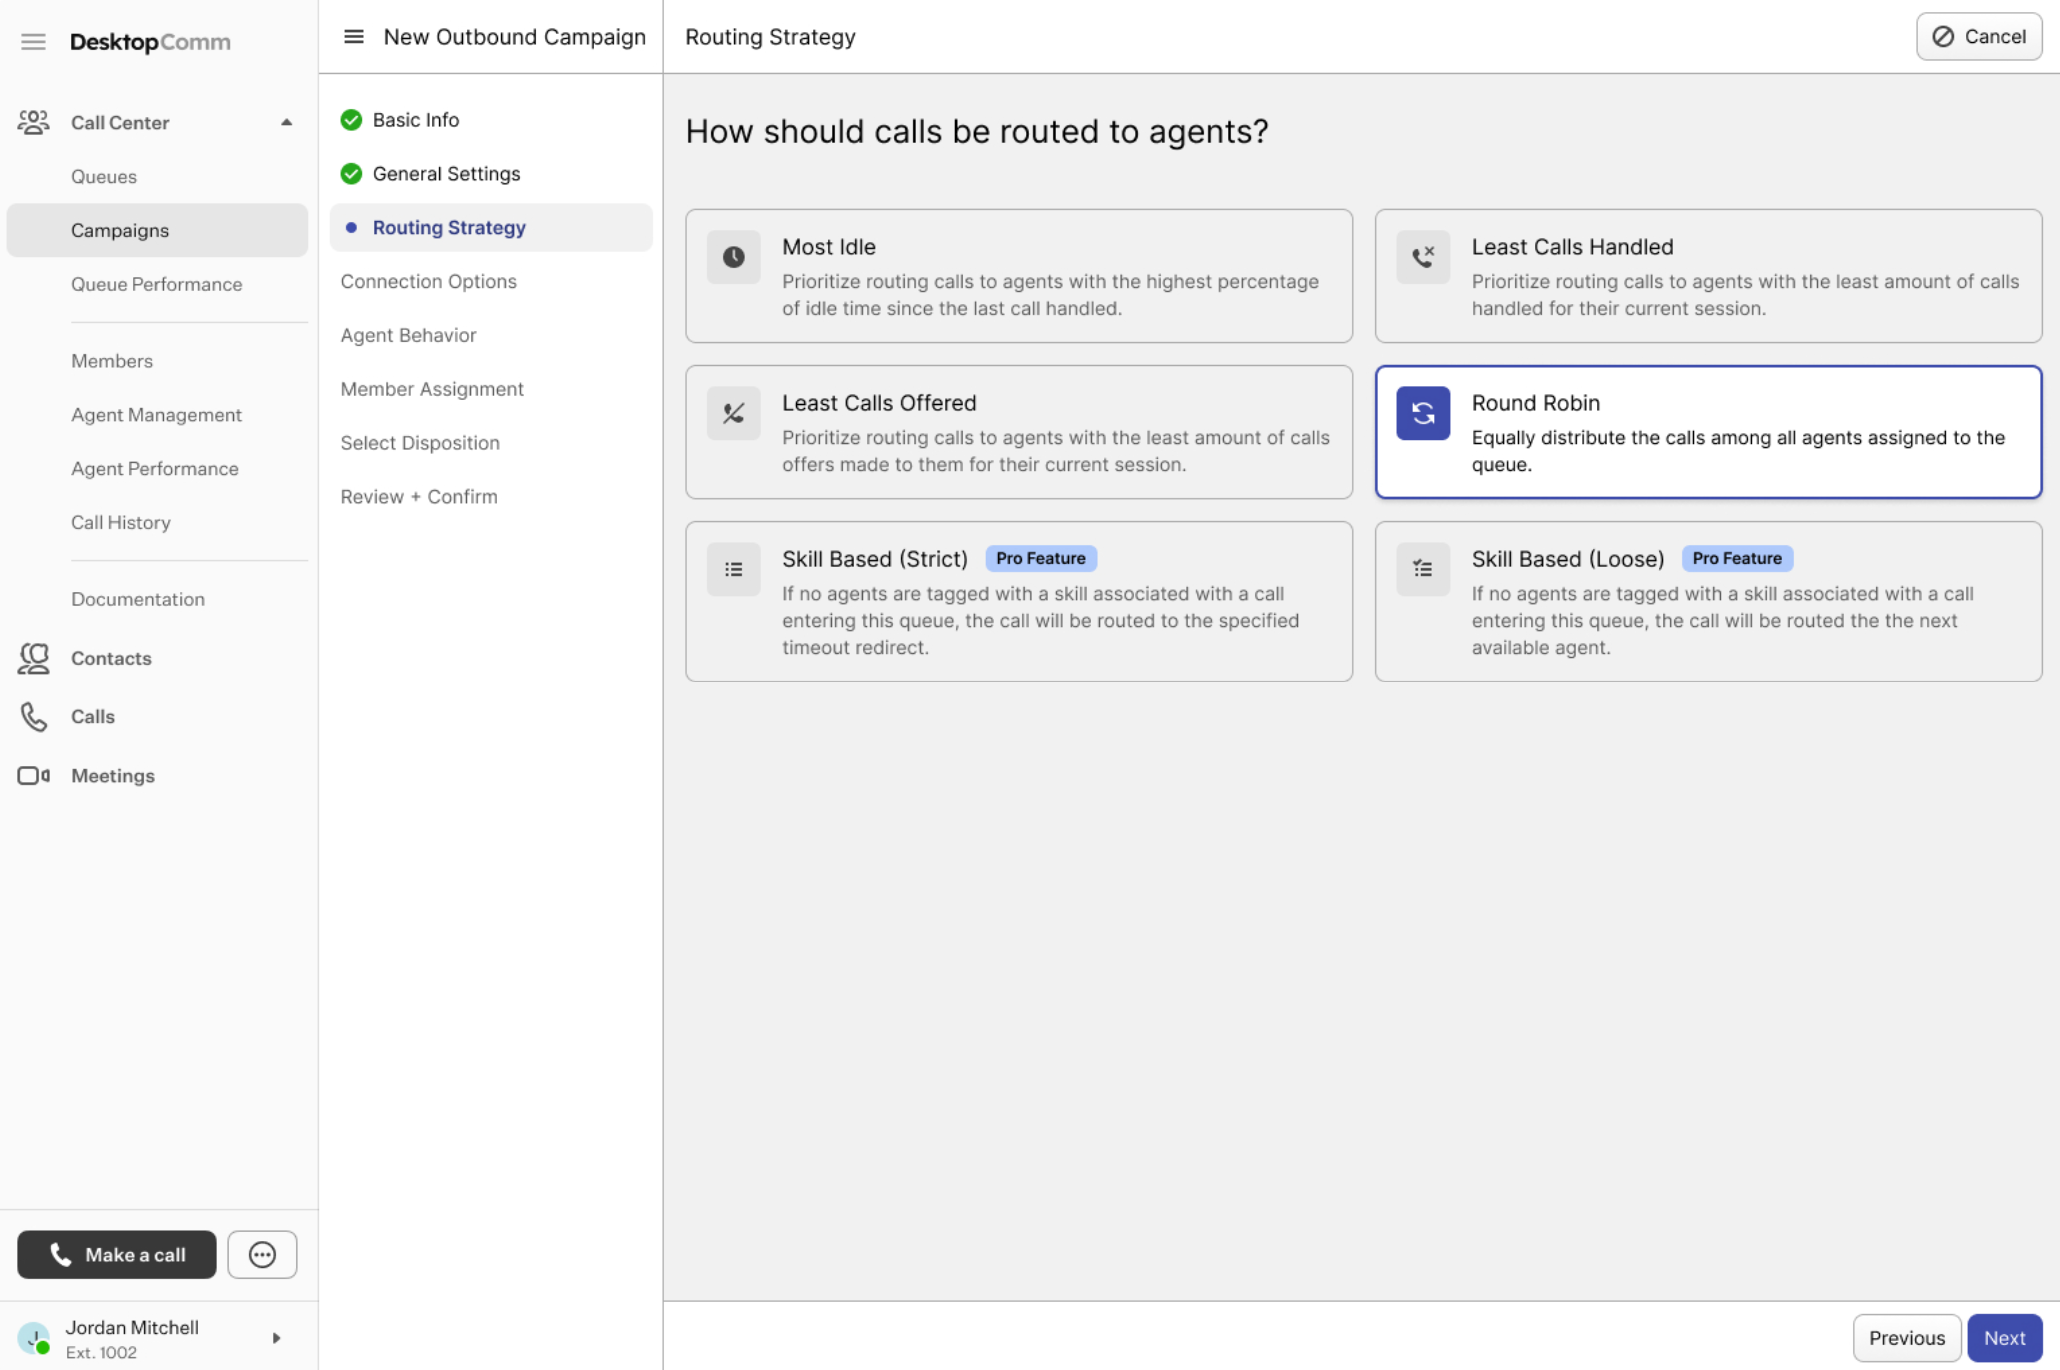
- Most Idle: prioritize routing calls to agents with the highest percentage of idle time since the last call handled.
- Least Calls Handled: prioritize routing calls to agents with the least amount of calls handled for their current session.
- Least Calls Offered: prioritize routing calls to agents with the least amount of call offers made to them for their current session.
- Round Robin: equally distribute the calls among all agents assigned to the queue.
- Skill Based (Strict): if no agents are tagged with a skill associated with a call entering this queue, the call will be routed to the specified timeout redirect.
- Skill Based (Loose): if no agents are tagged with a skill associated with a call entering this queue, the call will be routed to the next available agent.
-
Connecting Options tab: here, you can configure how callee actions should be handled.
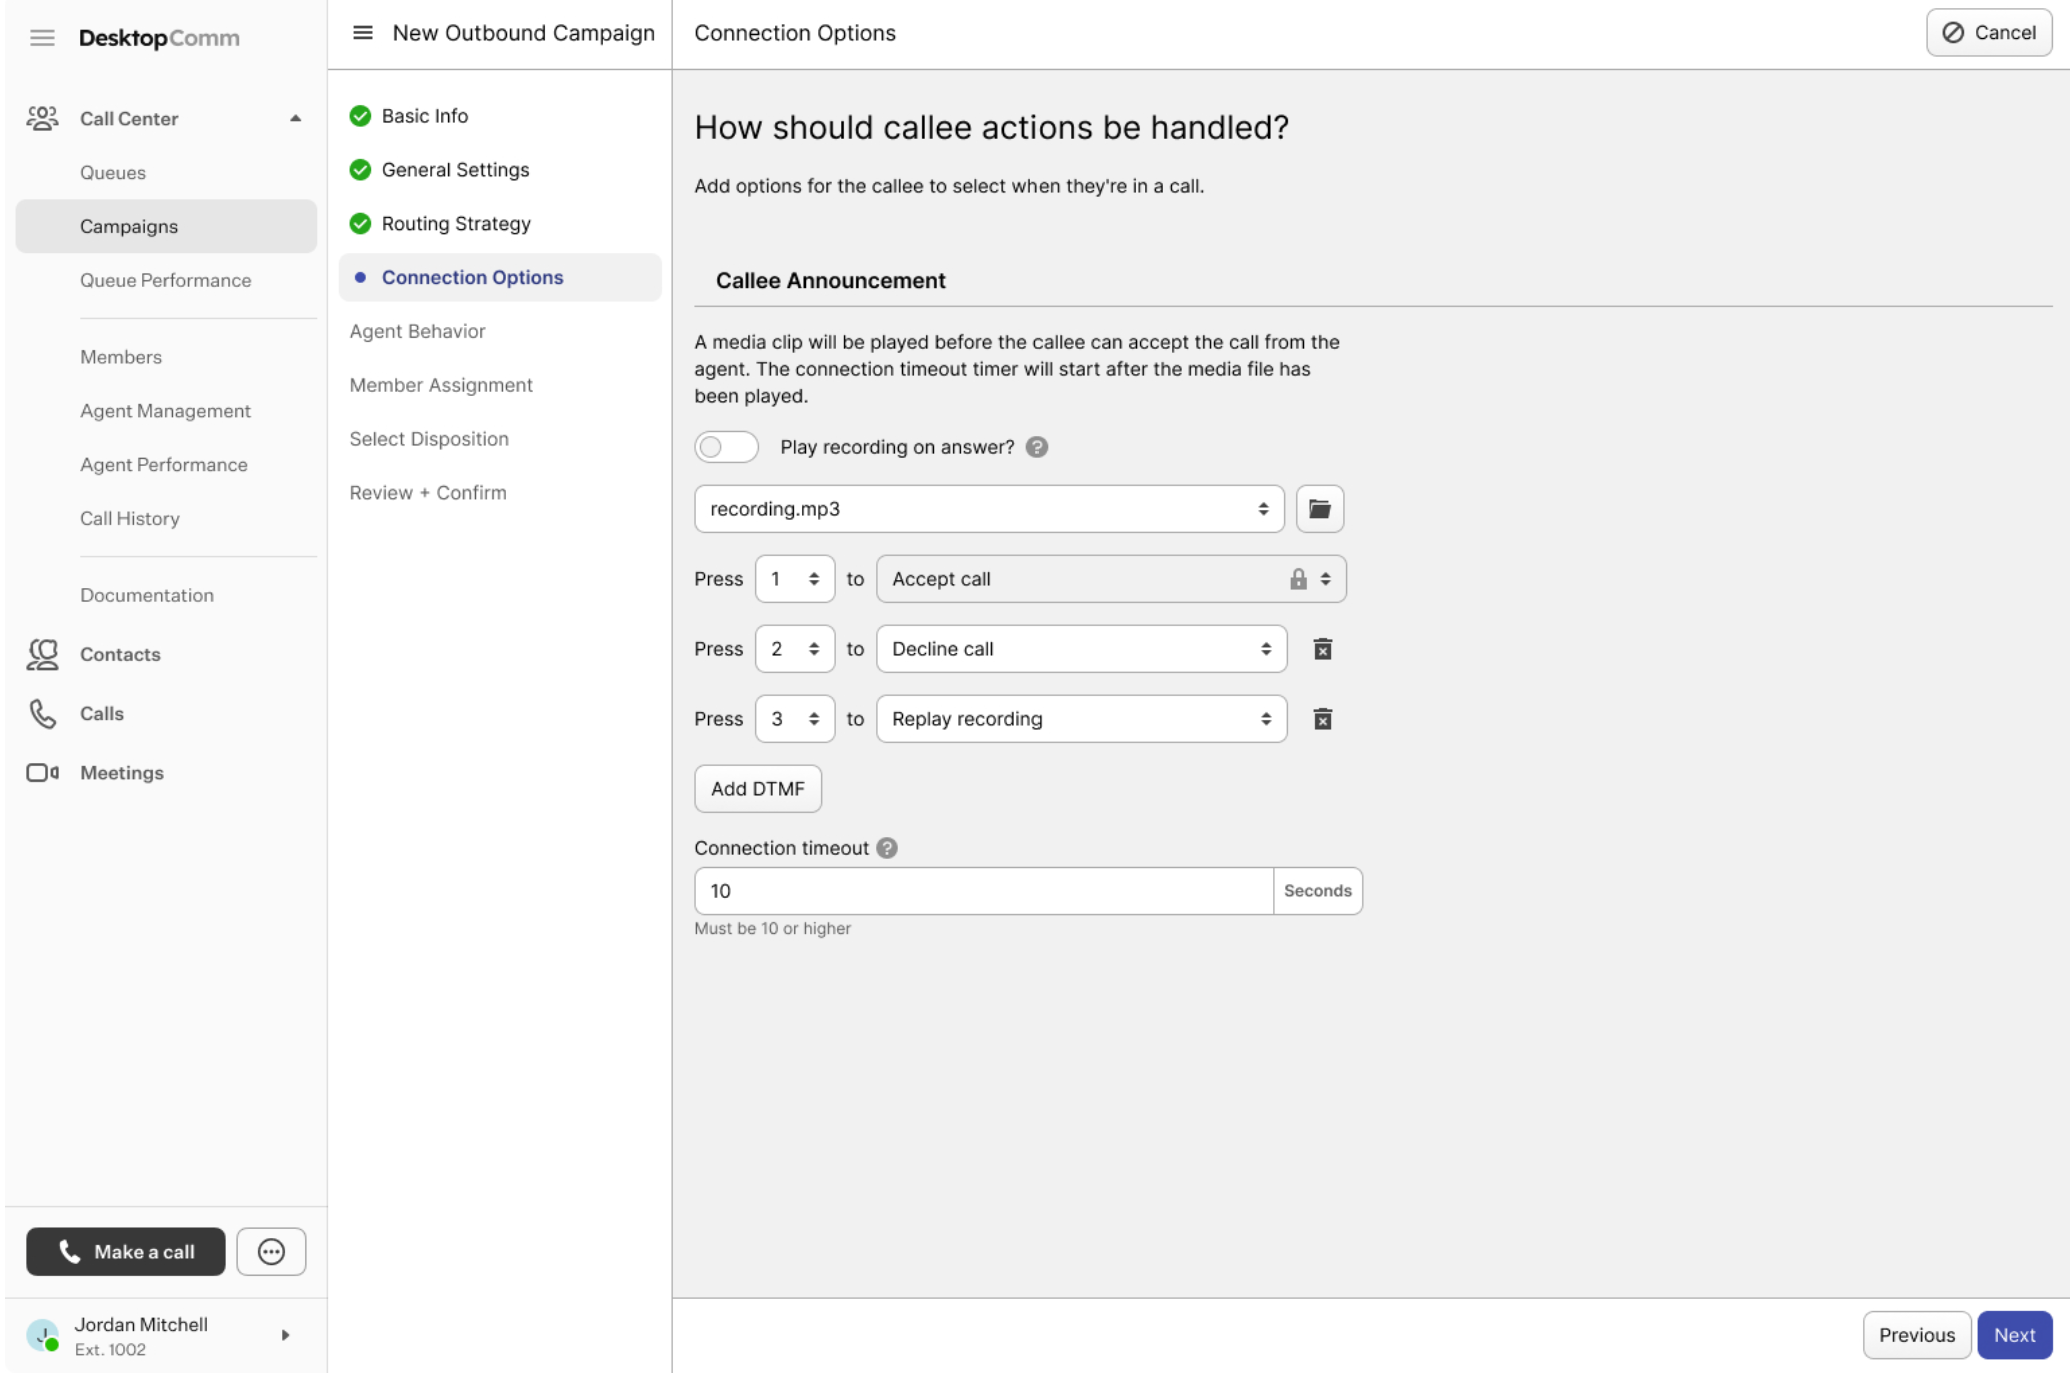
- Callee Announcement Section: a media clip will be played before the caller can accept to get connected with the agent. The connection timeout timer will start after the media file has been played.
- Play Recording on Answer?: turning on this toggle switch allows the queue to use the call announcement feature.
- Select a file: use this field to choose an audio file for the callee announcement.
- Add DTMF: select a button and assign an action to it. You can also click the “Add DTMF” button to add additional actions, which can be assigned to other key presses.
- Connection timeout: here, you can set the callee connection timeout. It should be at least 10 seconds long.
- Callee Announcement Section: a media clip will be played before the caller can accept to get connected with the agent. The connection timeout timer will start after the media file has been played.
-
Agent Behavior tab: here, you can configure the way how the agents should handle the calls.
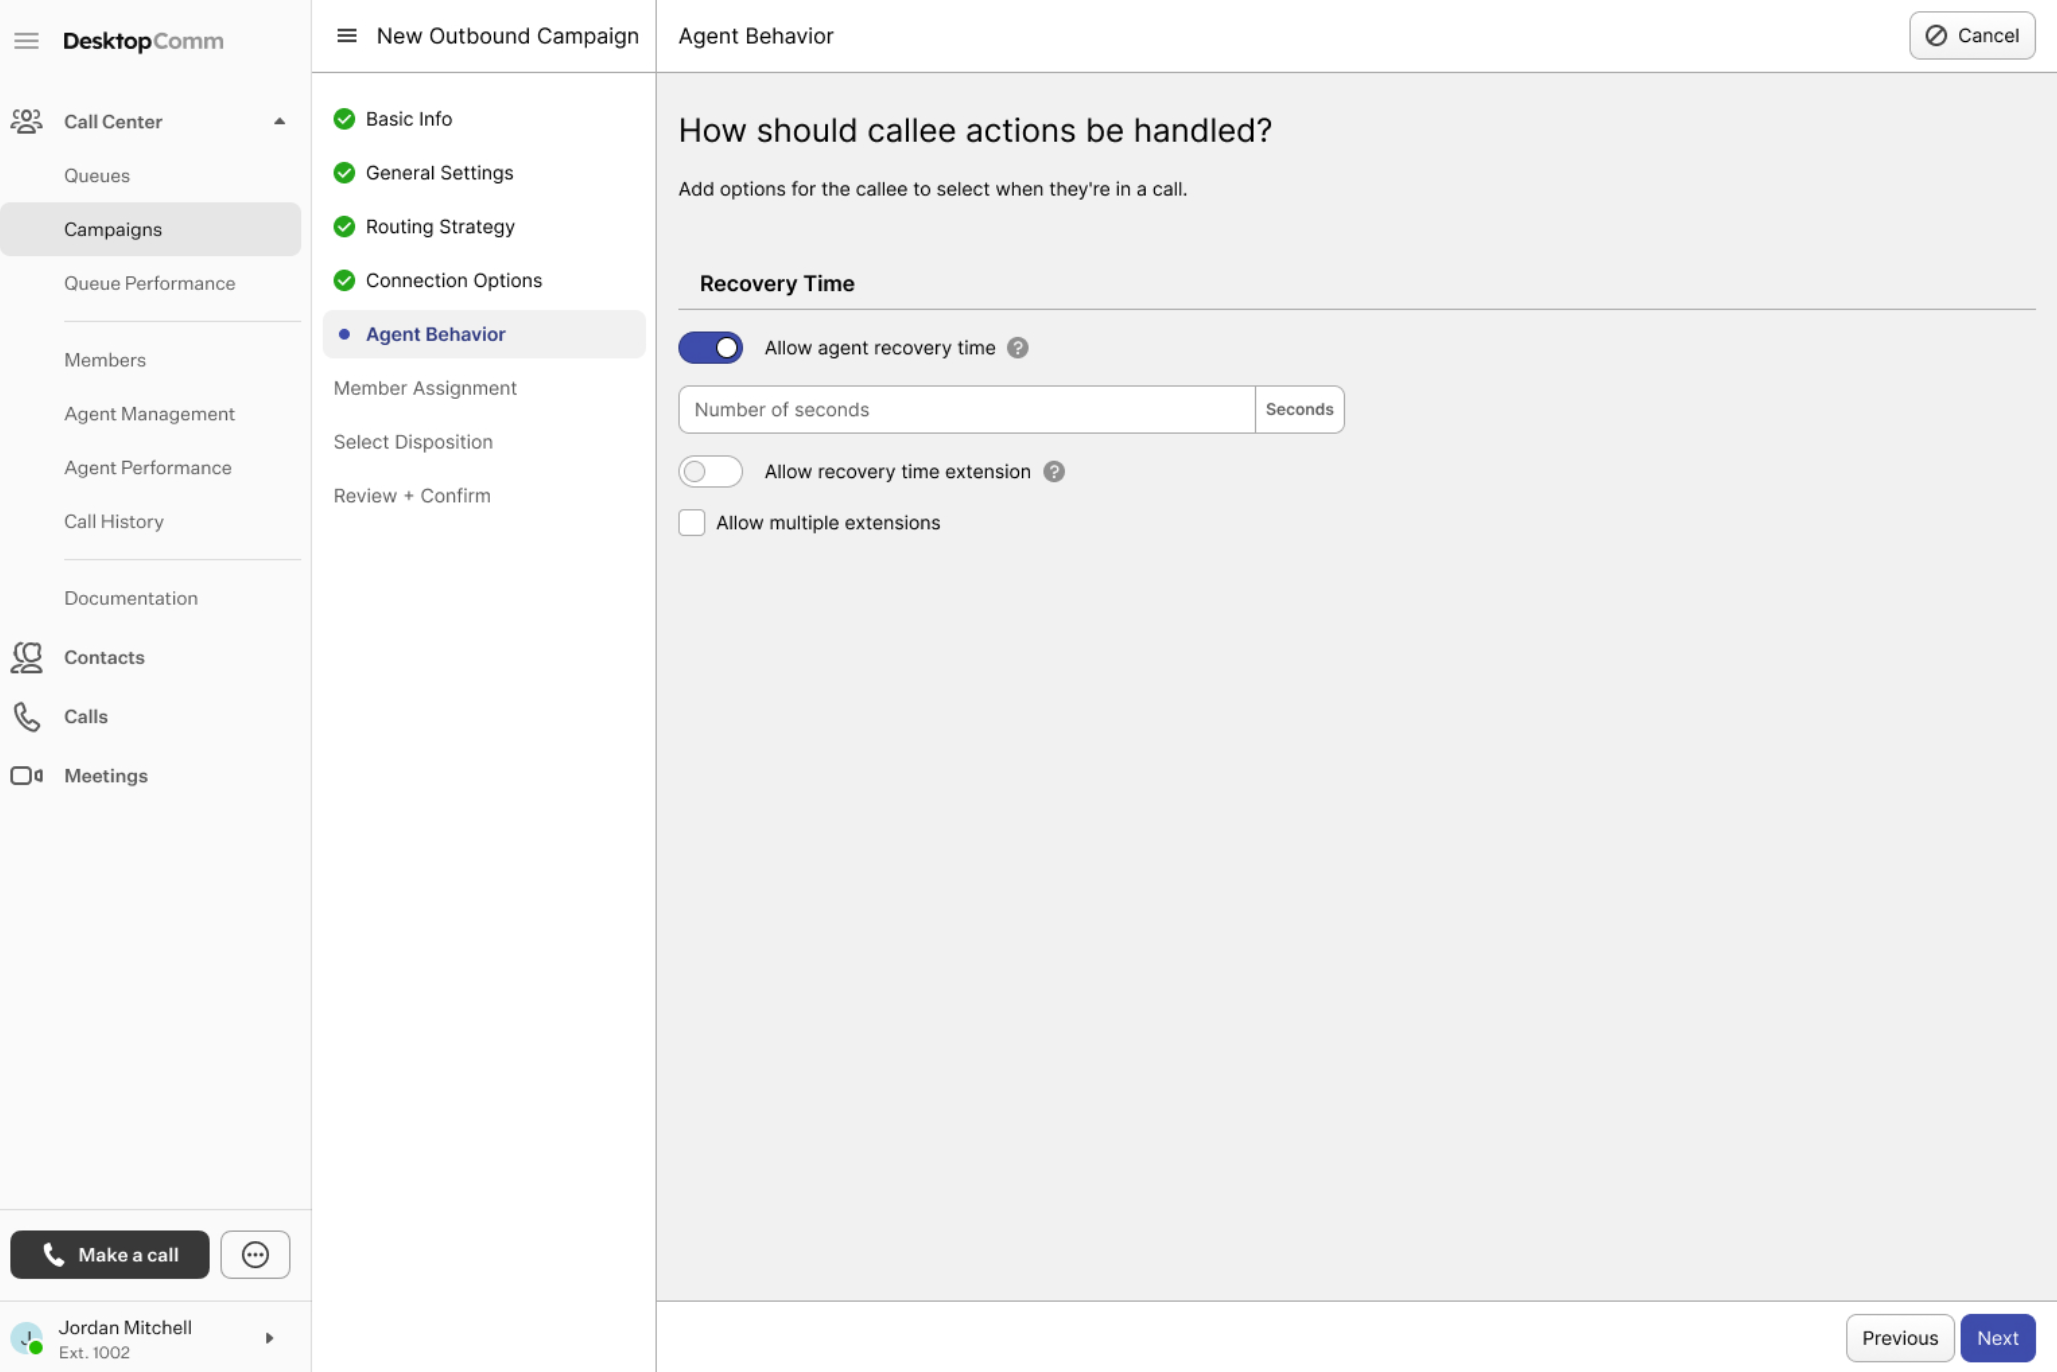
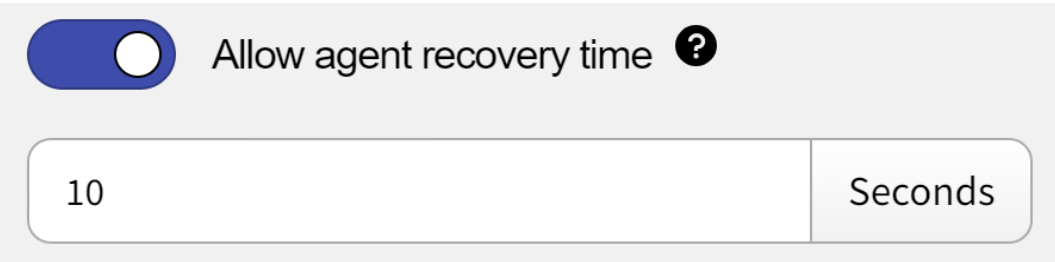
- Recovery Time Section: here, you can set agents’ recovery time.
-
Allow agent recovery time: activating this toggle gives agents recovery time, which can be set in seconds using the field below.
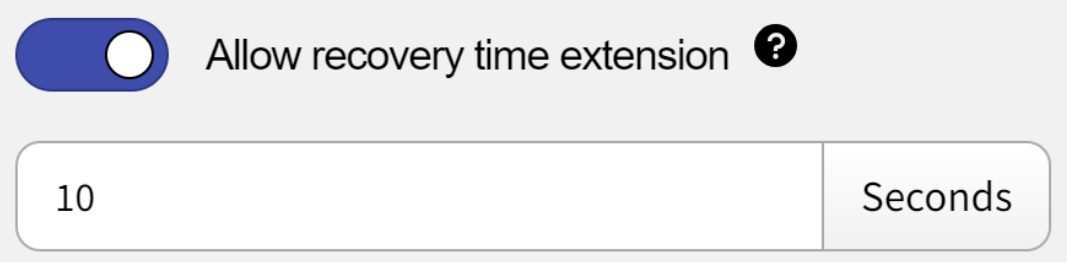
-
Allow recovery time extensions: enabling this toggle switch allows agents to have an extended recovery time. You can specify the additional duration in seconds in the field below.
-
Allow multiple extensions: by checking this box, you allow agents to have multiple recovery time extensions.
-
- Recovery Time Section: here, you can set agents’ recovery time.
-
Member Assignment tab: in this tab, you can manage the agents assigned to the configured campaign. The agents in the left list represent all call center members, while the agents in the right list are assigned to this campaign. To add a member, select an agent from the left list and click the “Assign to Campaign” button. To remove an agent, select them from the right list and click the “Unassign from Campaign” button.
-
Select Disposition tab: on this tab, you can set up dispositions to be used as labels for calls occurring within the configured campaign.
A disposition is a label assigned to a call after it is completed, indicating the outcome or result of that interaction. Dispositions help track performance, categorize call results, and guide next steps. Dispositions are created by users (admins), and each account can have up to 10 dispositions.
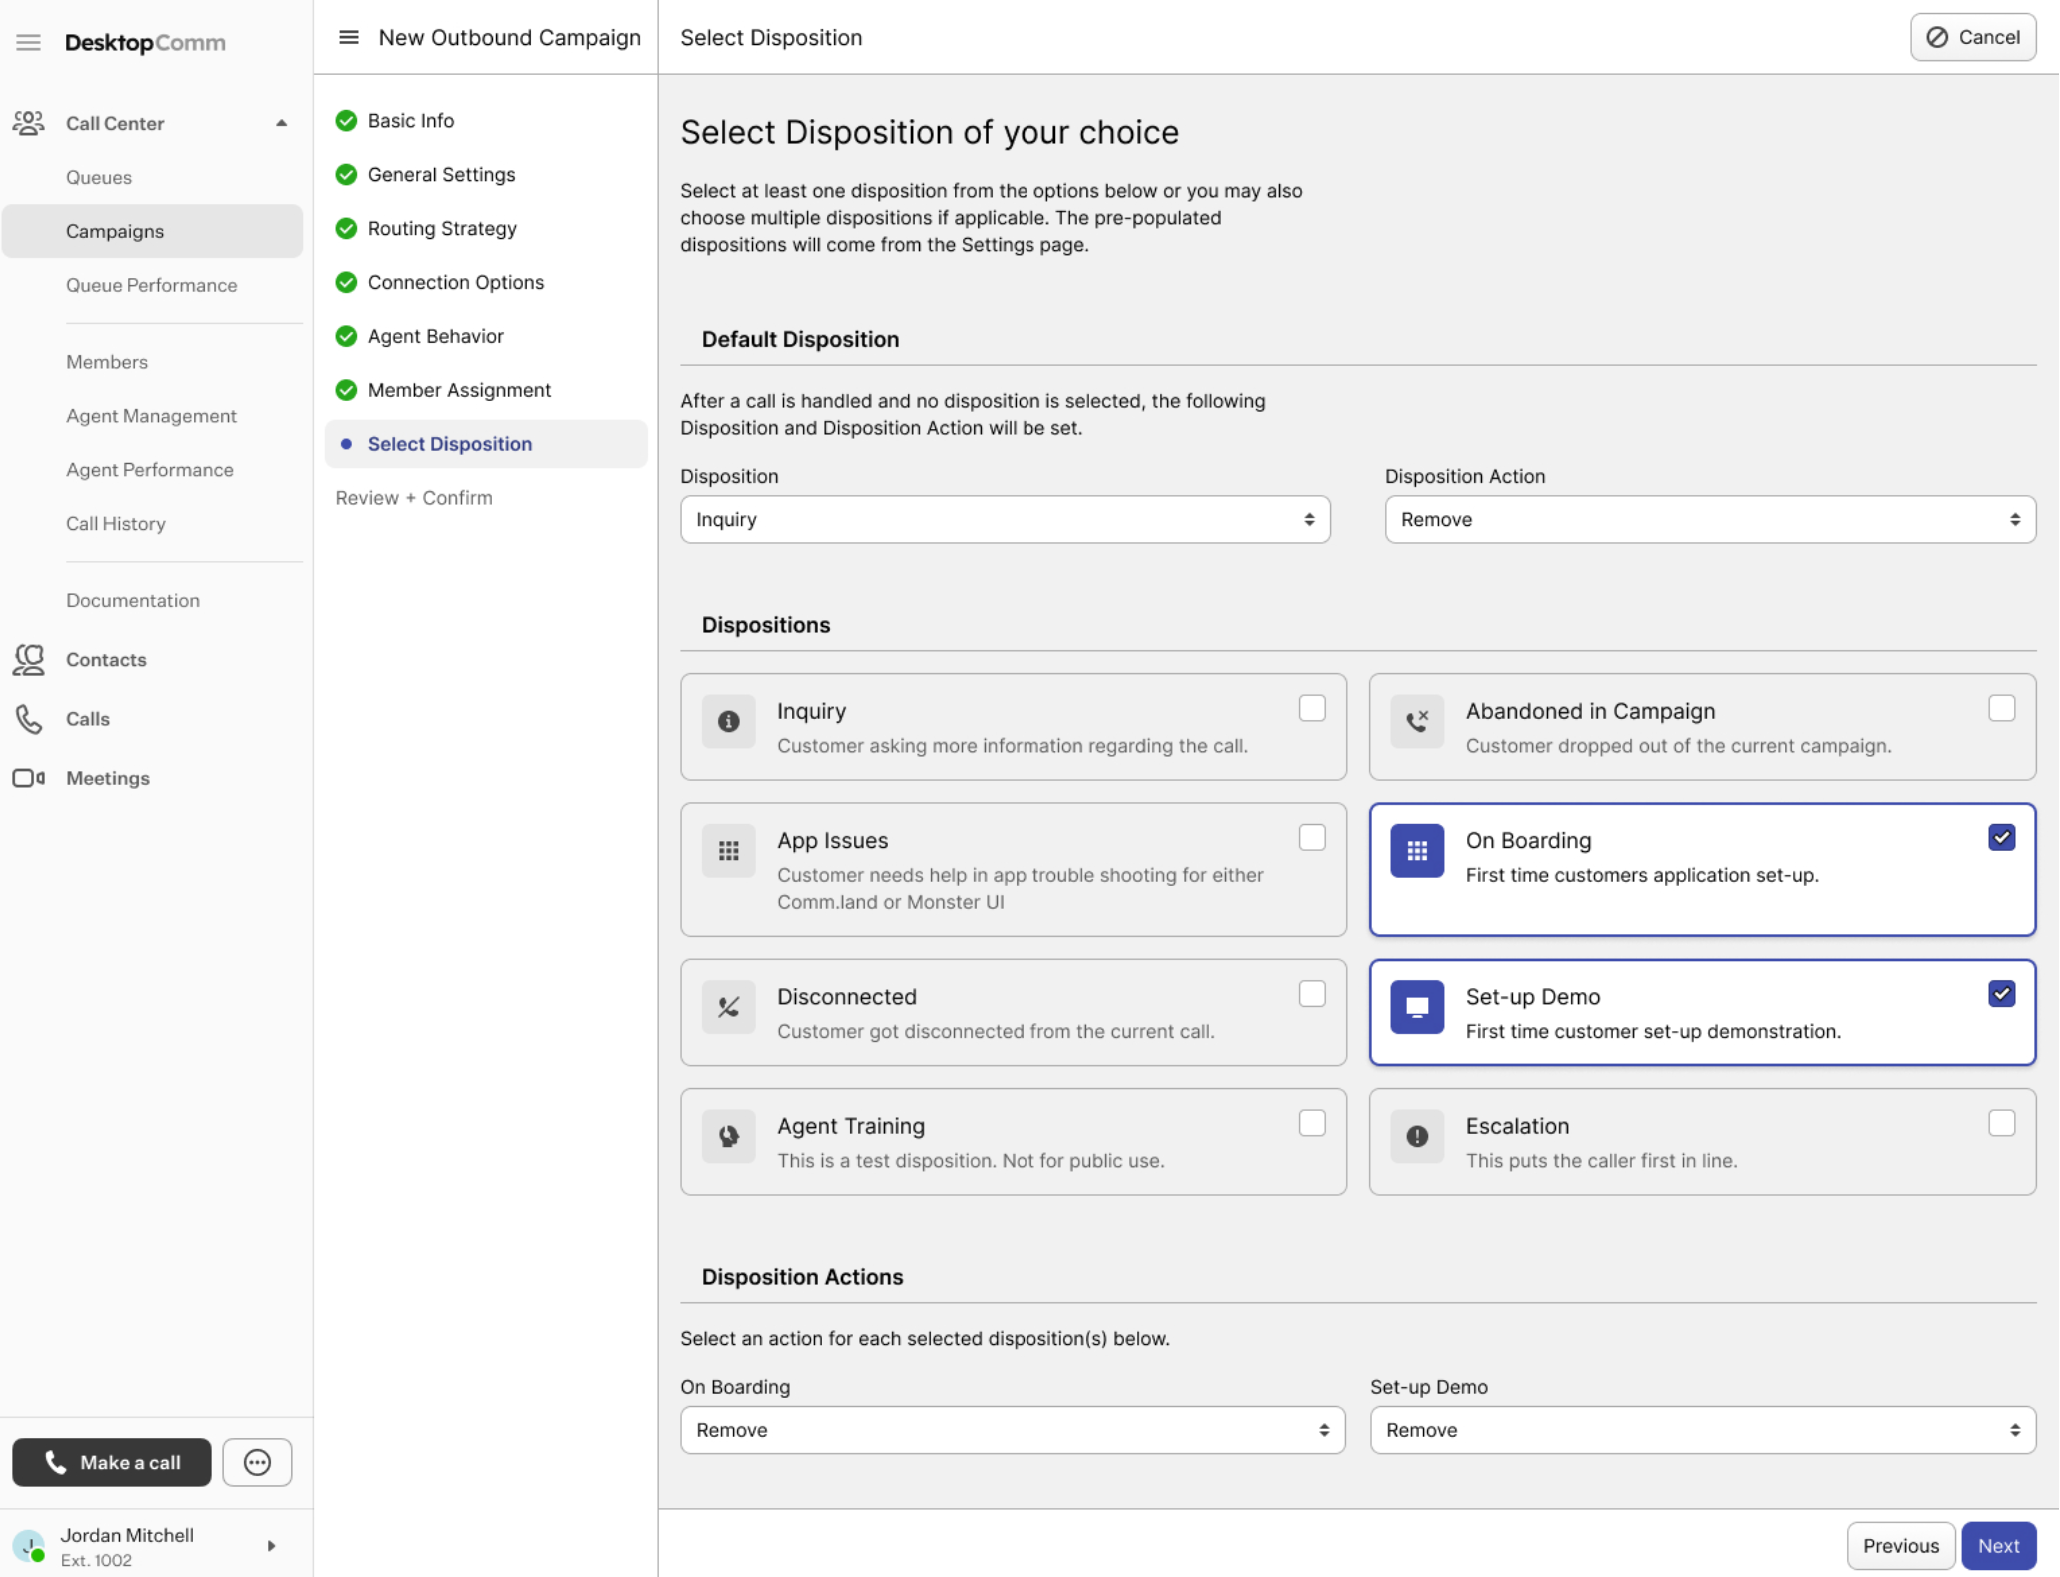 - **Default Disposition**: after a call is handled and no disposition is selected, the following disposition and action will be set. - **Disposition**: here, you can select a **disposition**. A list of **dispositions** available for selection will be provided below. - **Disposition Action**: here, you can select an action that defines what the system should do with the contact after the **disposition** is assigned. There are two action options here: - **Remove**: this action marks the call (or contact) as complete and removes it from the active **campaign** queue. - **Requeue**: if a call could not be completed or needs a follow-up, you can requeue it for a future call.
The dispositions shown in the screenshot above may differ from what other users see, as all dispositions are created by admins or users.
- **Disposition**: here, you can select a **disposition** or **dispositions** that the agents assigned to the configured **campaign may use.** - **Inquiry**: customer asking more information regarding the call. - **Abandoned in Campaign**: customer dropped out of the current **campaign**. - **App Issues**: customer needs help in app trouble shooting for either **Comm.Land** or **Monster UI**. - **On Boarding**: first time customers application set-up. - **Disconnected**: customer got disconnected from the current call. - **Set-up Demo**: first time customer set-up demonstration. - **Agent Training**: this is a test **disposition**. Not for public use. - **Escalation**: this puts the caller first in line. - **Disposition Actions**: select an action for each selected disposition(s) below. - **On Boarding**: here, you need to select an action for a case when a first time customer request an application set-up. - **Set-up Demo**: here, you need to select an action for a case when a first time customer request a set-up demonstration.By default, the Disposition Action will always be Remove.
-
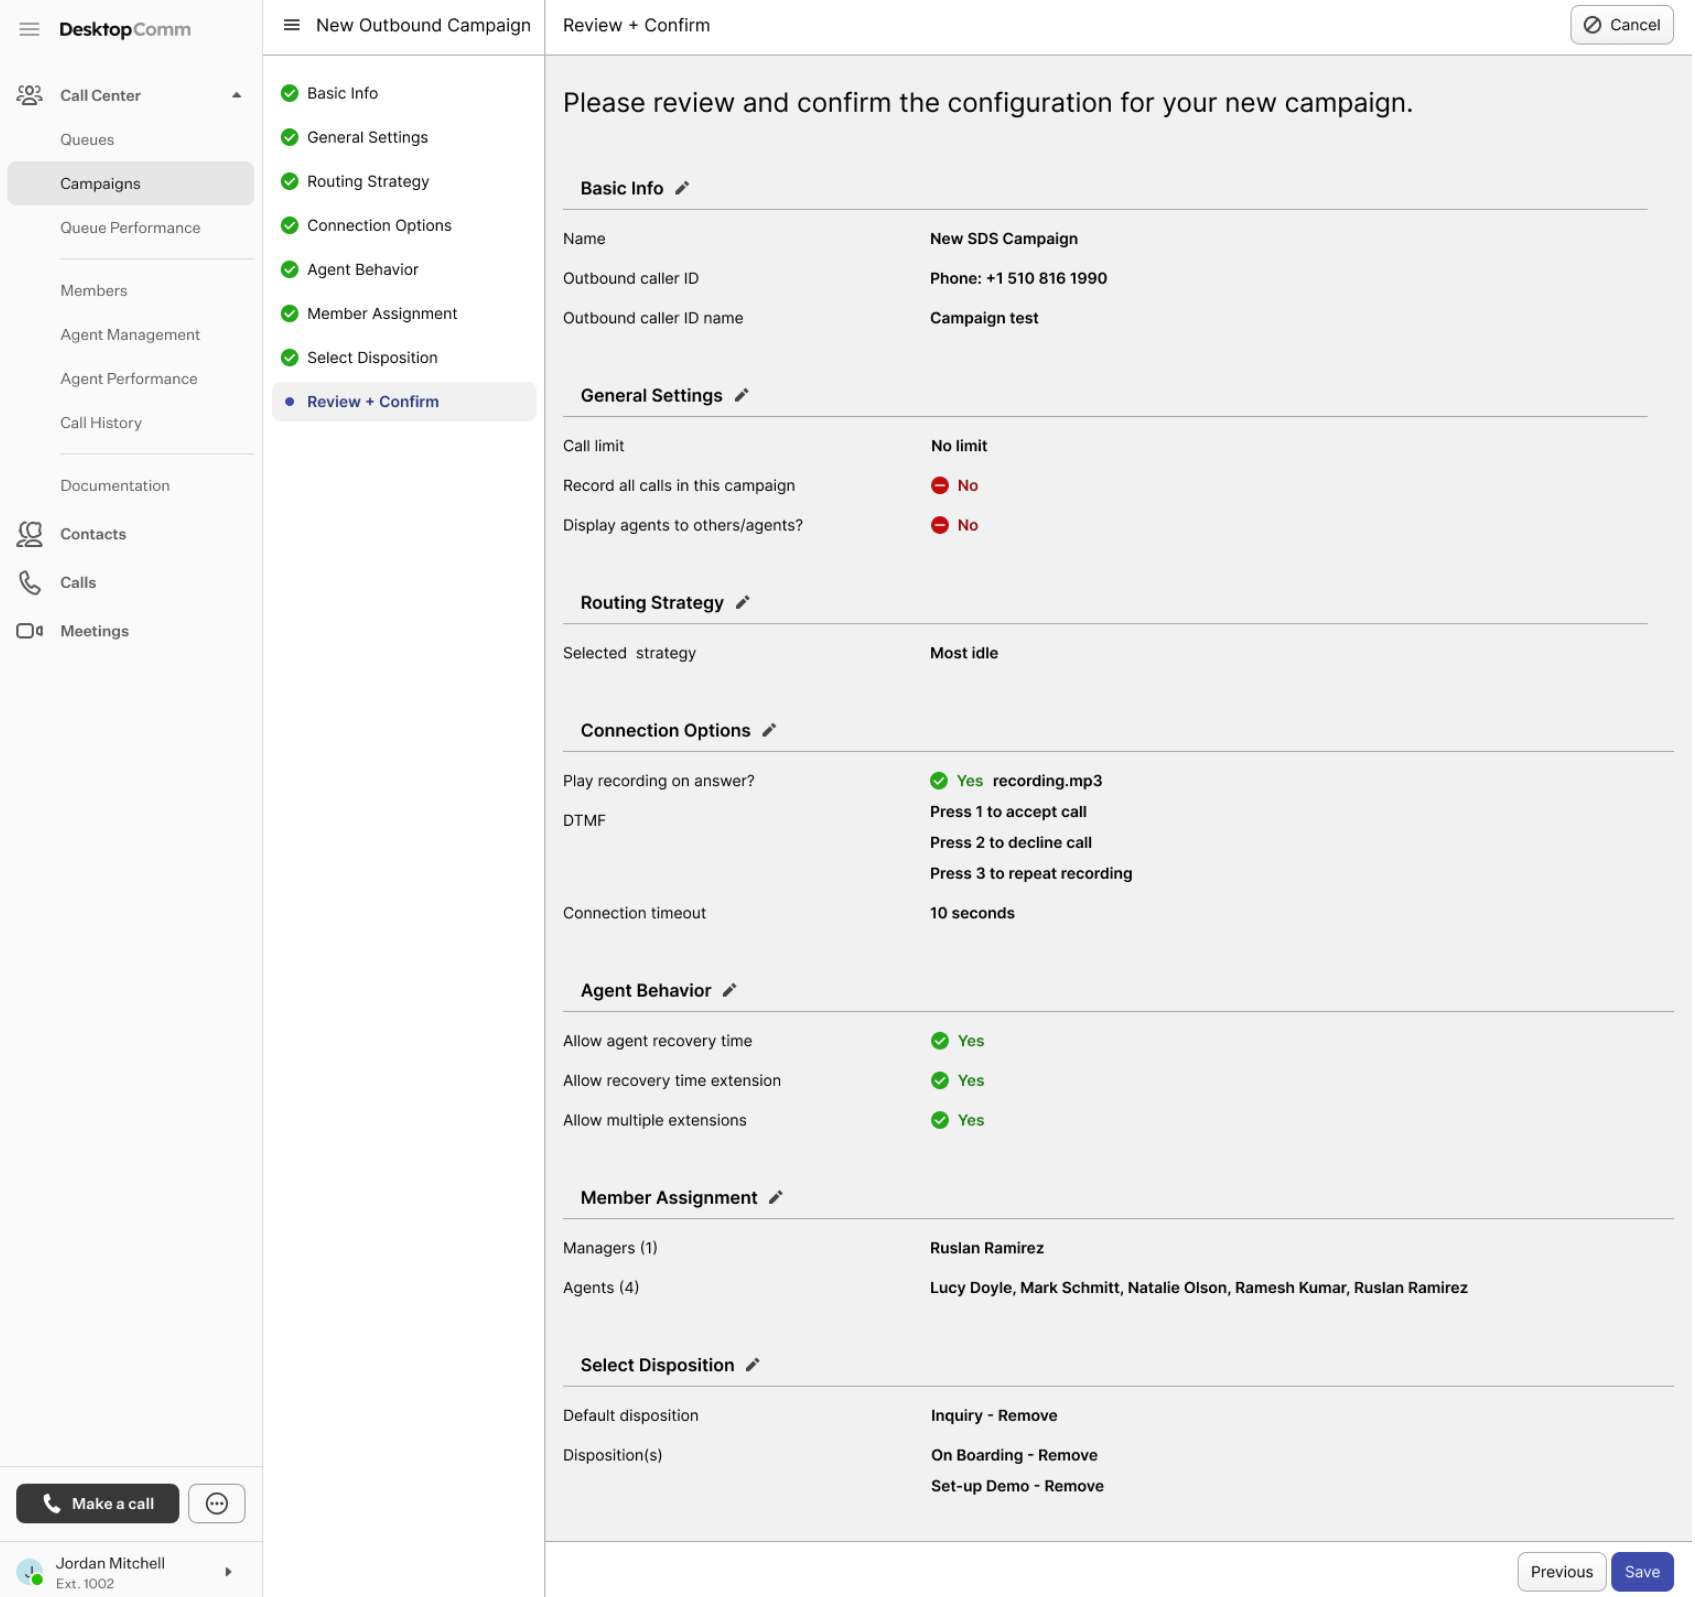
Review + Confirm tab: this tab provides an overview of all settings configured in the previous tabs. You can review them here and click the “Save Changes” button to apply, “Previous” to go back to an earlier tab, or “Cancel” to discard all changes.
Adding Numbers to Dial Lists
Clicking the “+ More Numbers” button opens a separate page where you can add numbers to the selected Dial List. You can add numbers to the dial list in two ways:
-
By uploading a CSV file: by choosing the “Upload CSV” tab, you can add phone numbers to the Dial List of the configured campaign by importing a CSV file.
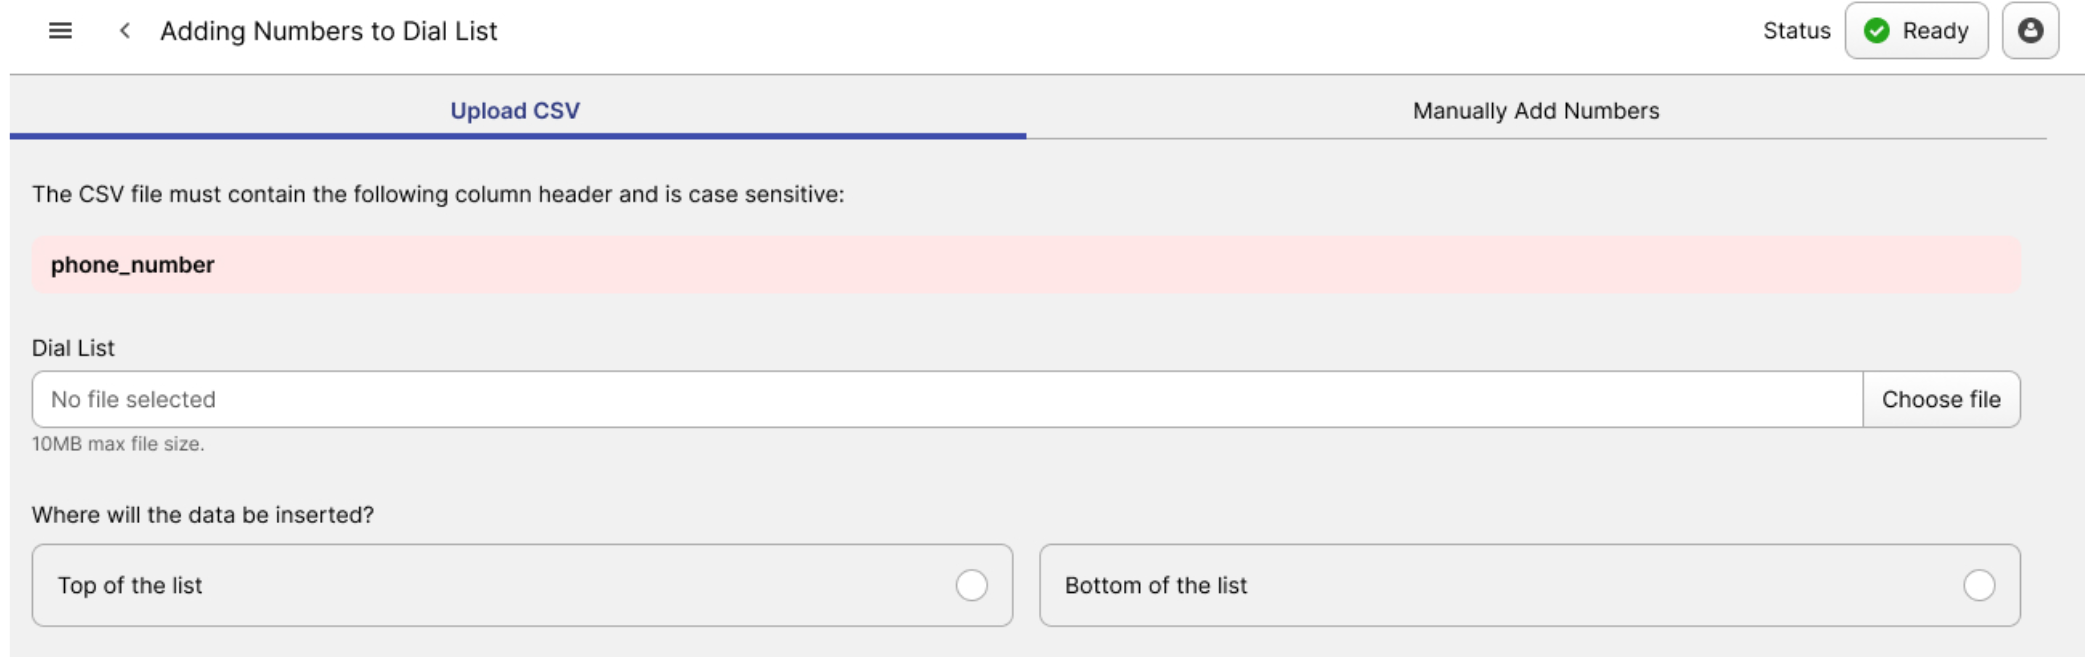
There are two parameters on this page that require your input:
- Dial List: use this field to upload a new CSV file.
- Where will the data be inserted: choose how the phone numbers from the uploaded CSV file should be added to the Dial List.
- Top of the list
- Bottom of the list
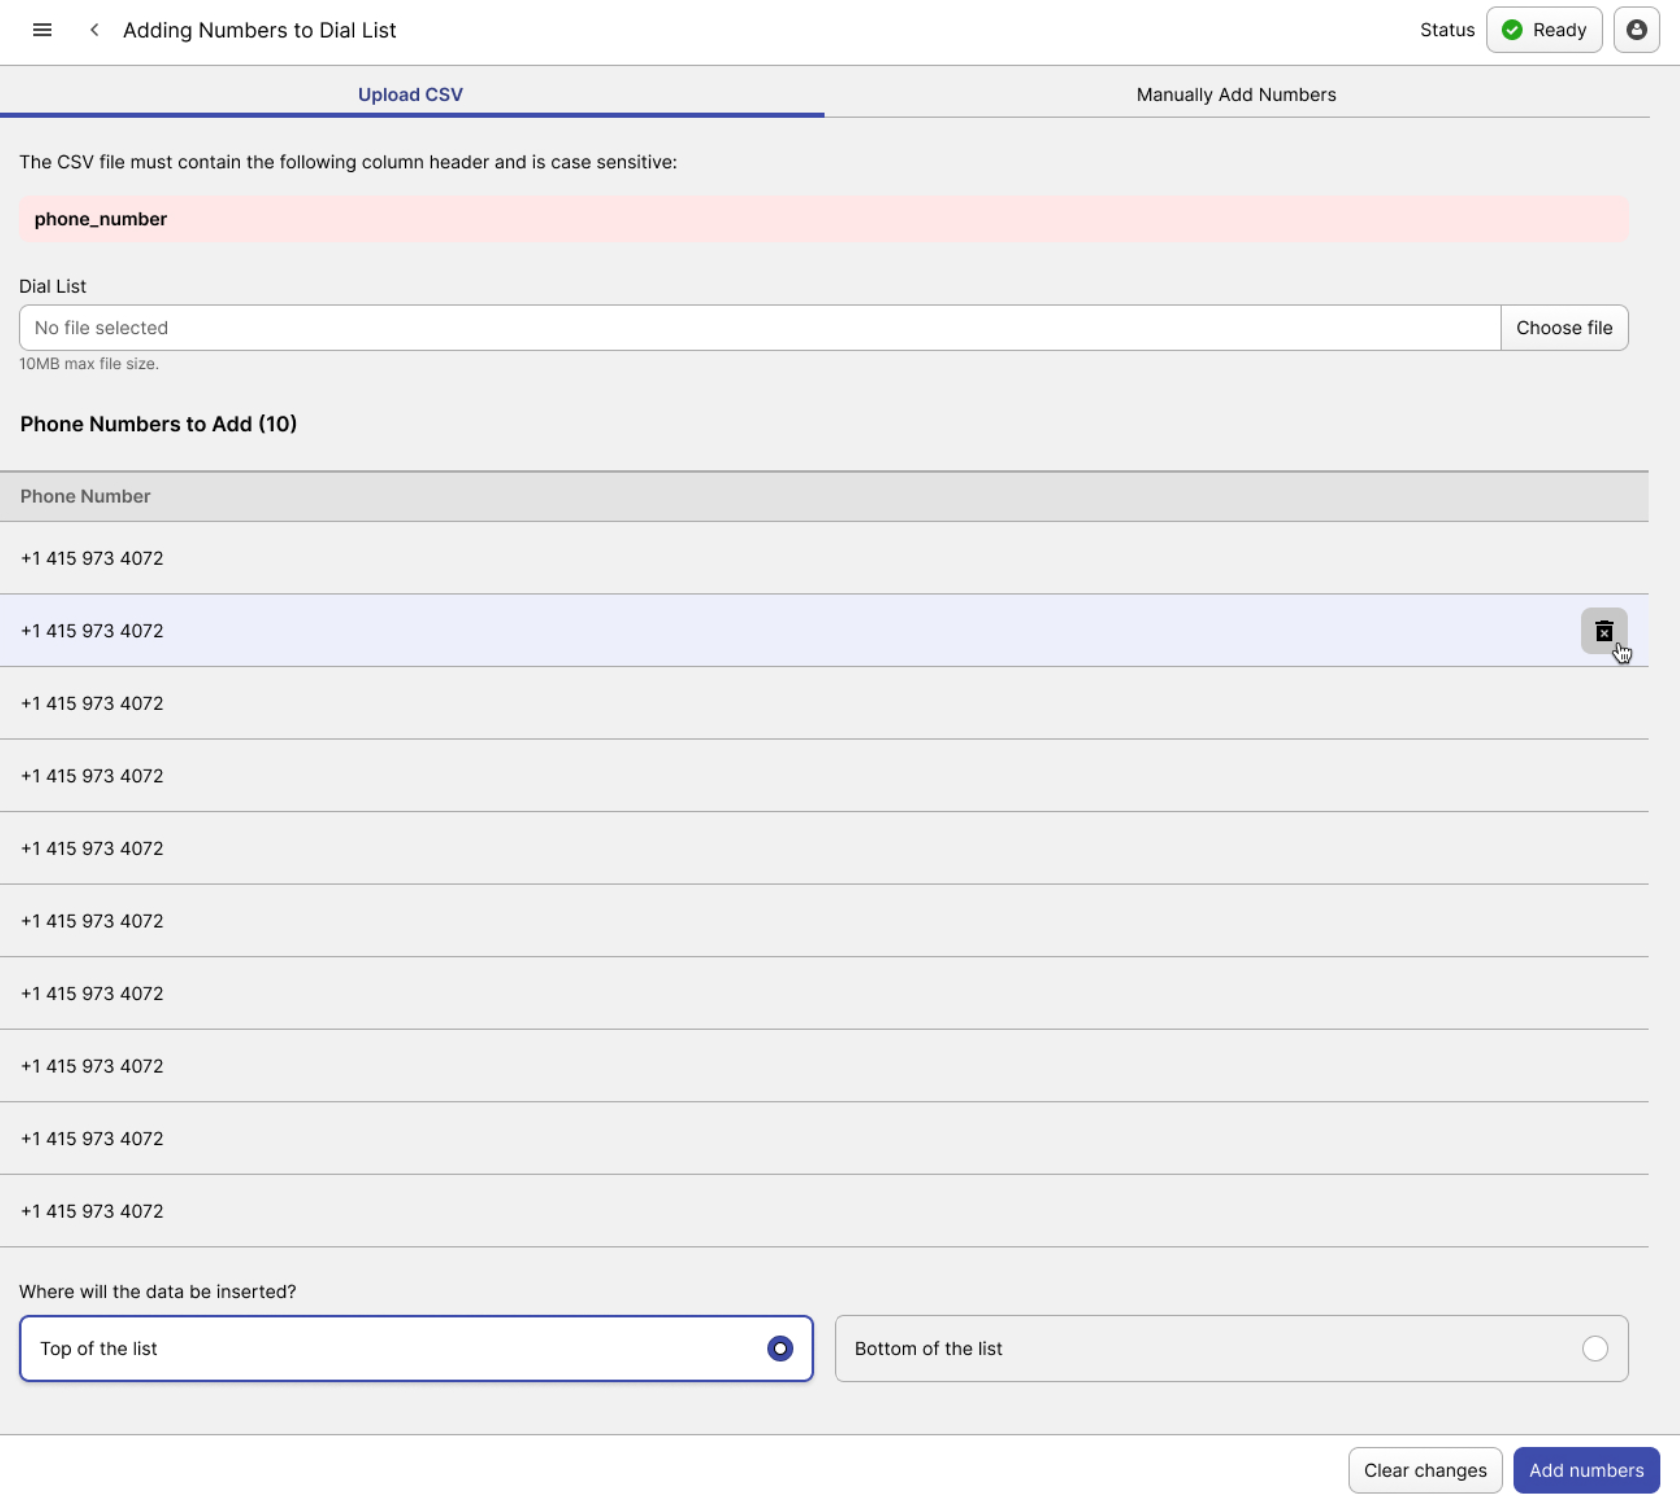
Once the new phone numbers are uploaded, they will be displayed on the page. To delete any number, click the trash bin icon on its row.
-
By manually adding numbers: by choosing the “Manually Add Numbers” tab, you can add phone numbers to the Dial List by entering them manually.
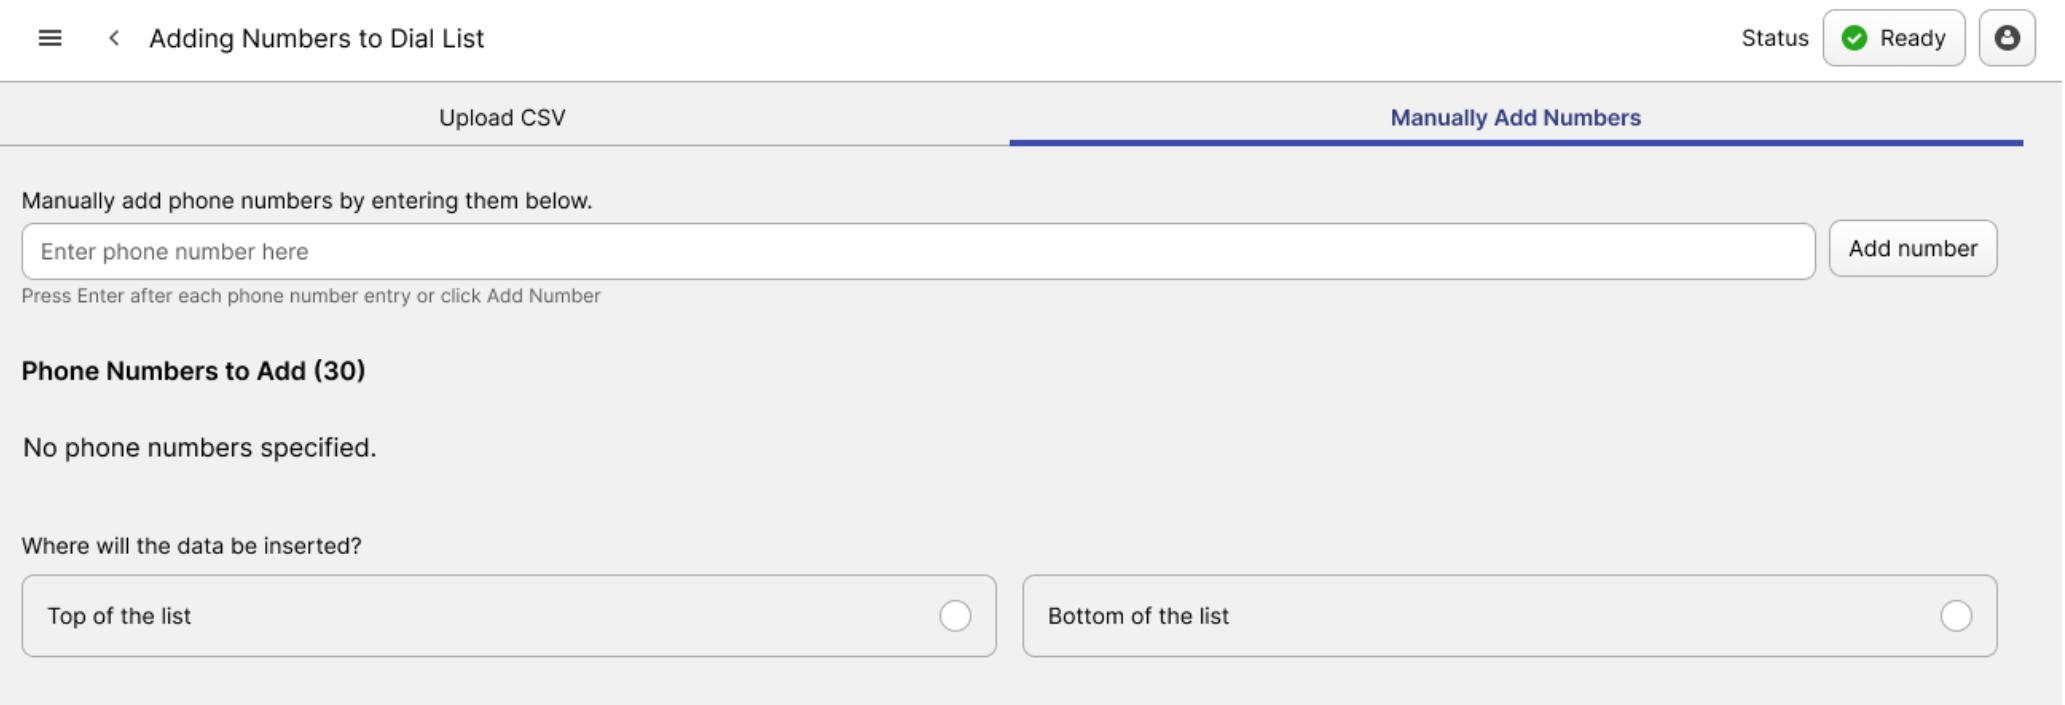
- Manually add phone number by entering them below: use this field to input phone numbers you want to add to the Dial List.
- Where will the data be inserted: choose how the entered phone numbers should be added to the Dial List.
- Top of the list
- Bottom of the list
Once the new phone numbers are uploaded, they will be displayed on the page. To delete any number, click the trash bin icon on its row.
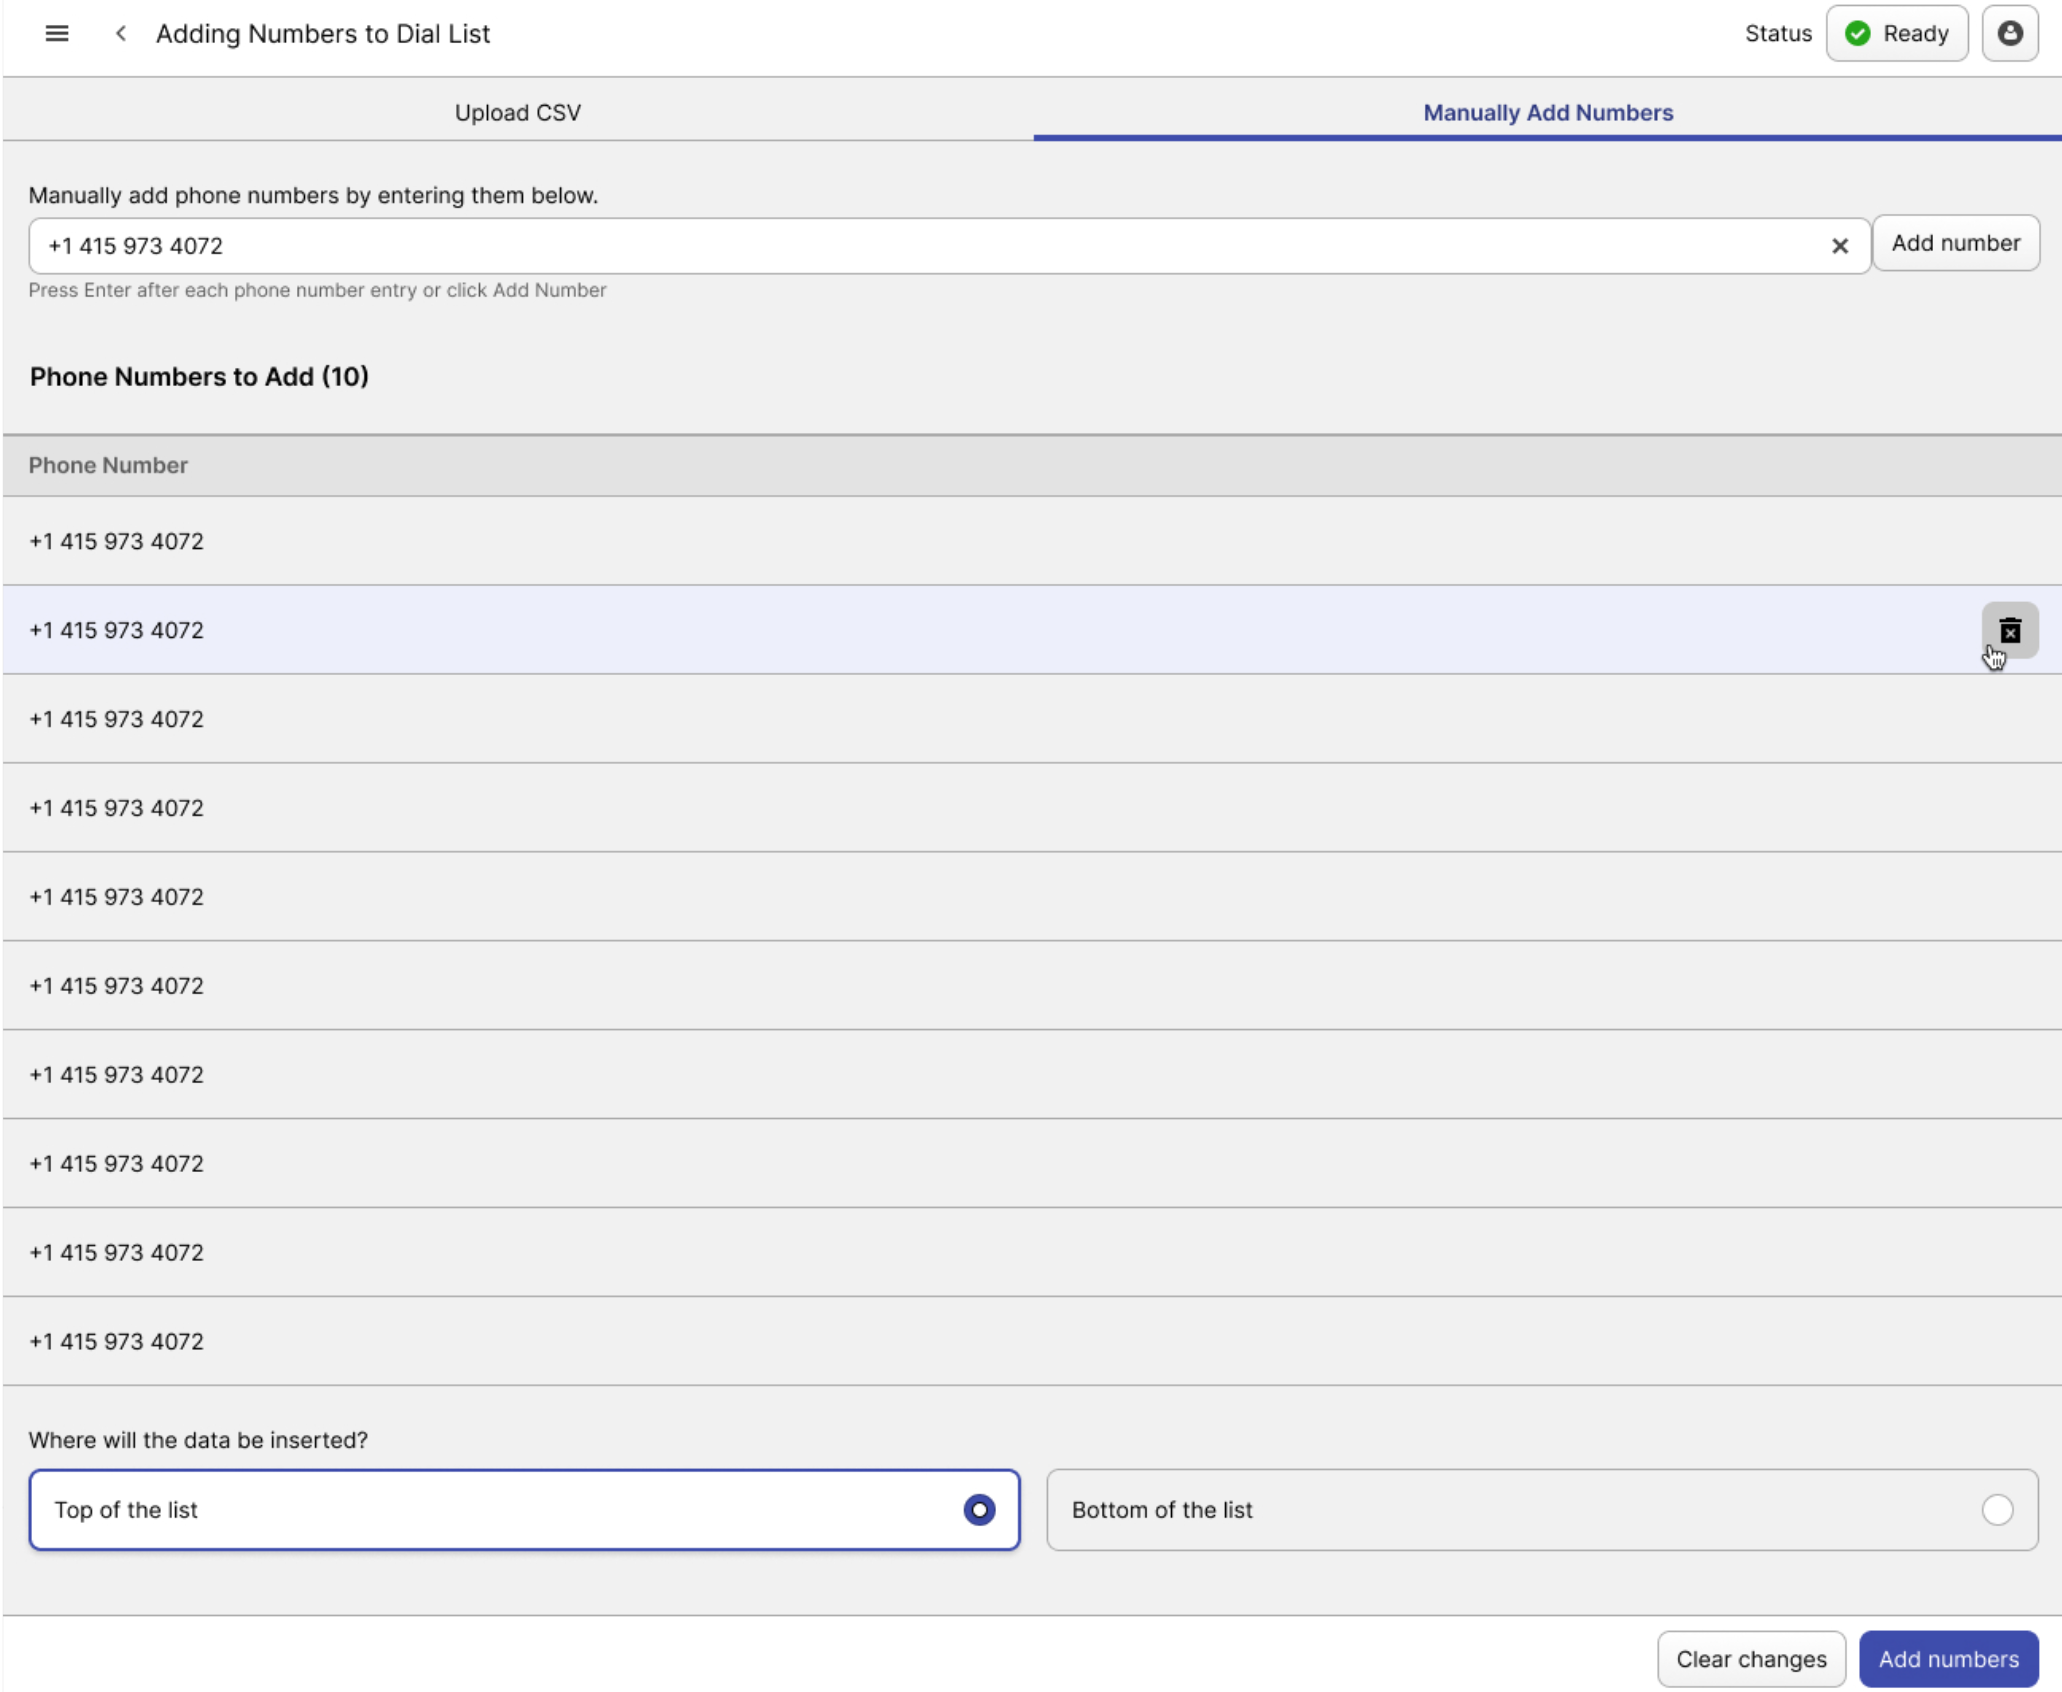
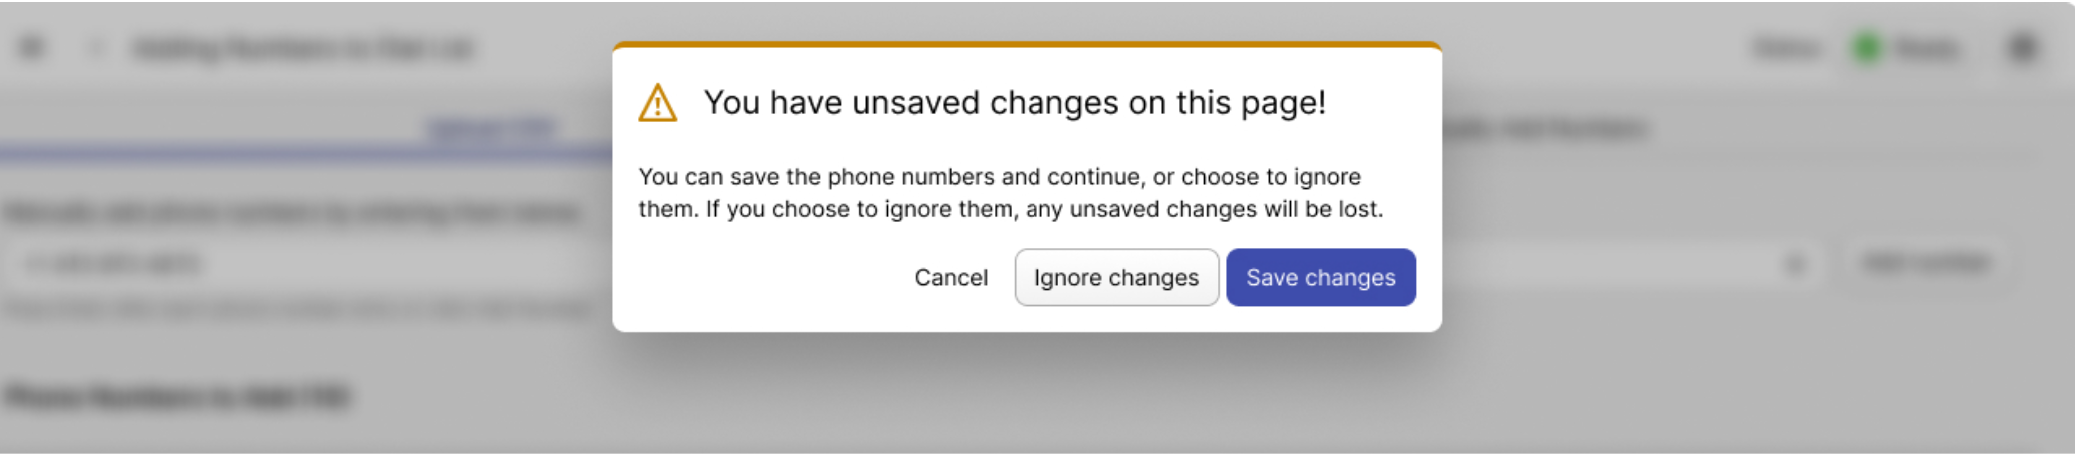
Regardless of the method used to add numbers to the dial list, make sure to press the “Add Numbers” button. If you navigate to another tab or click outside the window, the system will notify you that your changes haven’t been saved and prompt you to either save the changes, discard them, or cancel.