User Portal - User Settings Section
Upon accessing the User Portal, you will encounter the “User Settings” section, which contains essential information about the user account under which the User Portal is launched and provides access to the app’s settings for its primary parameters and feature settings.
This section has just one element:
![]()
-
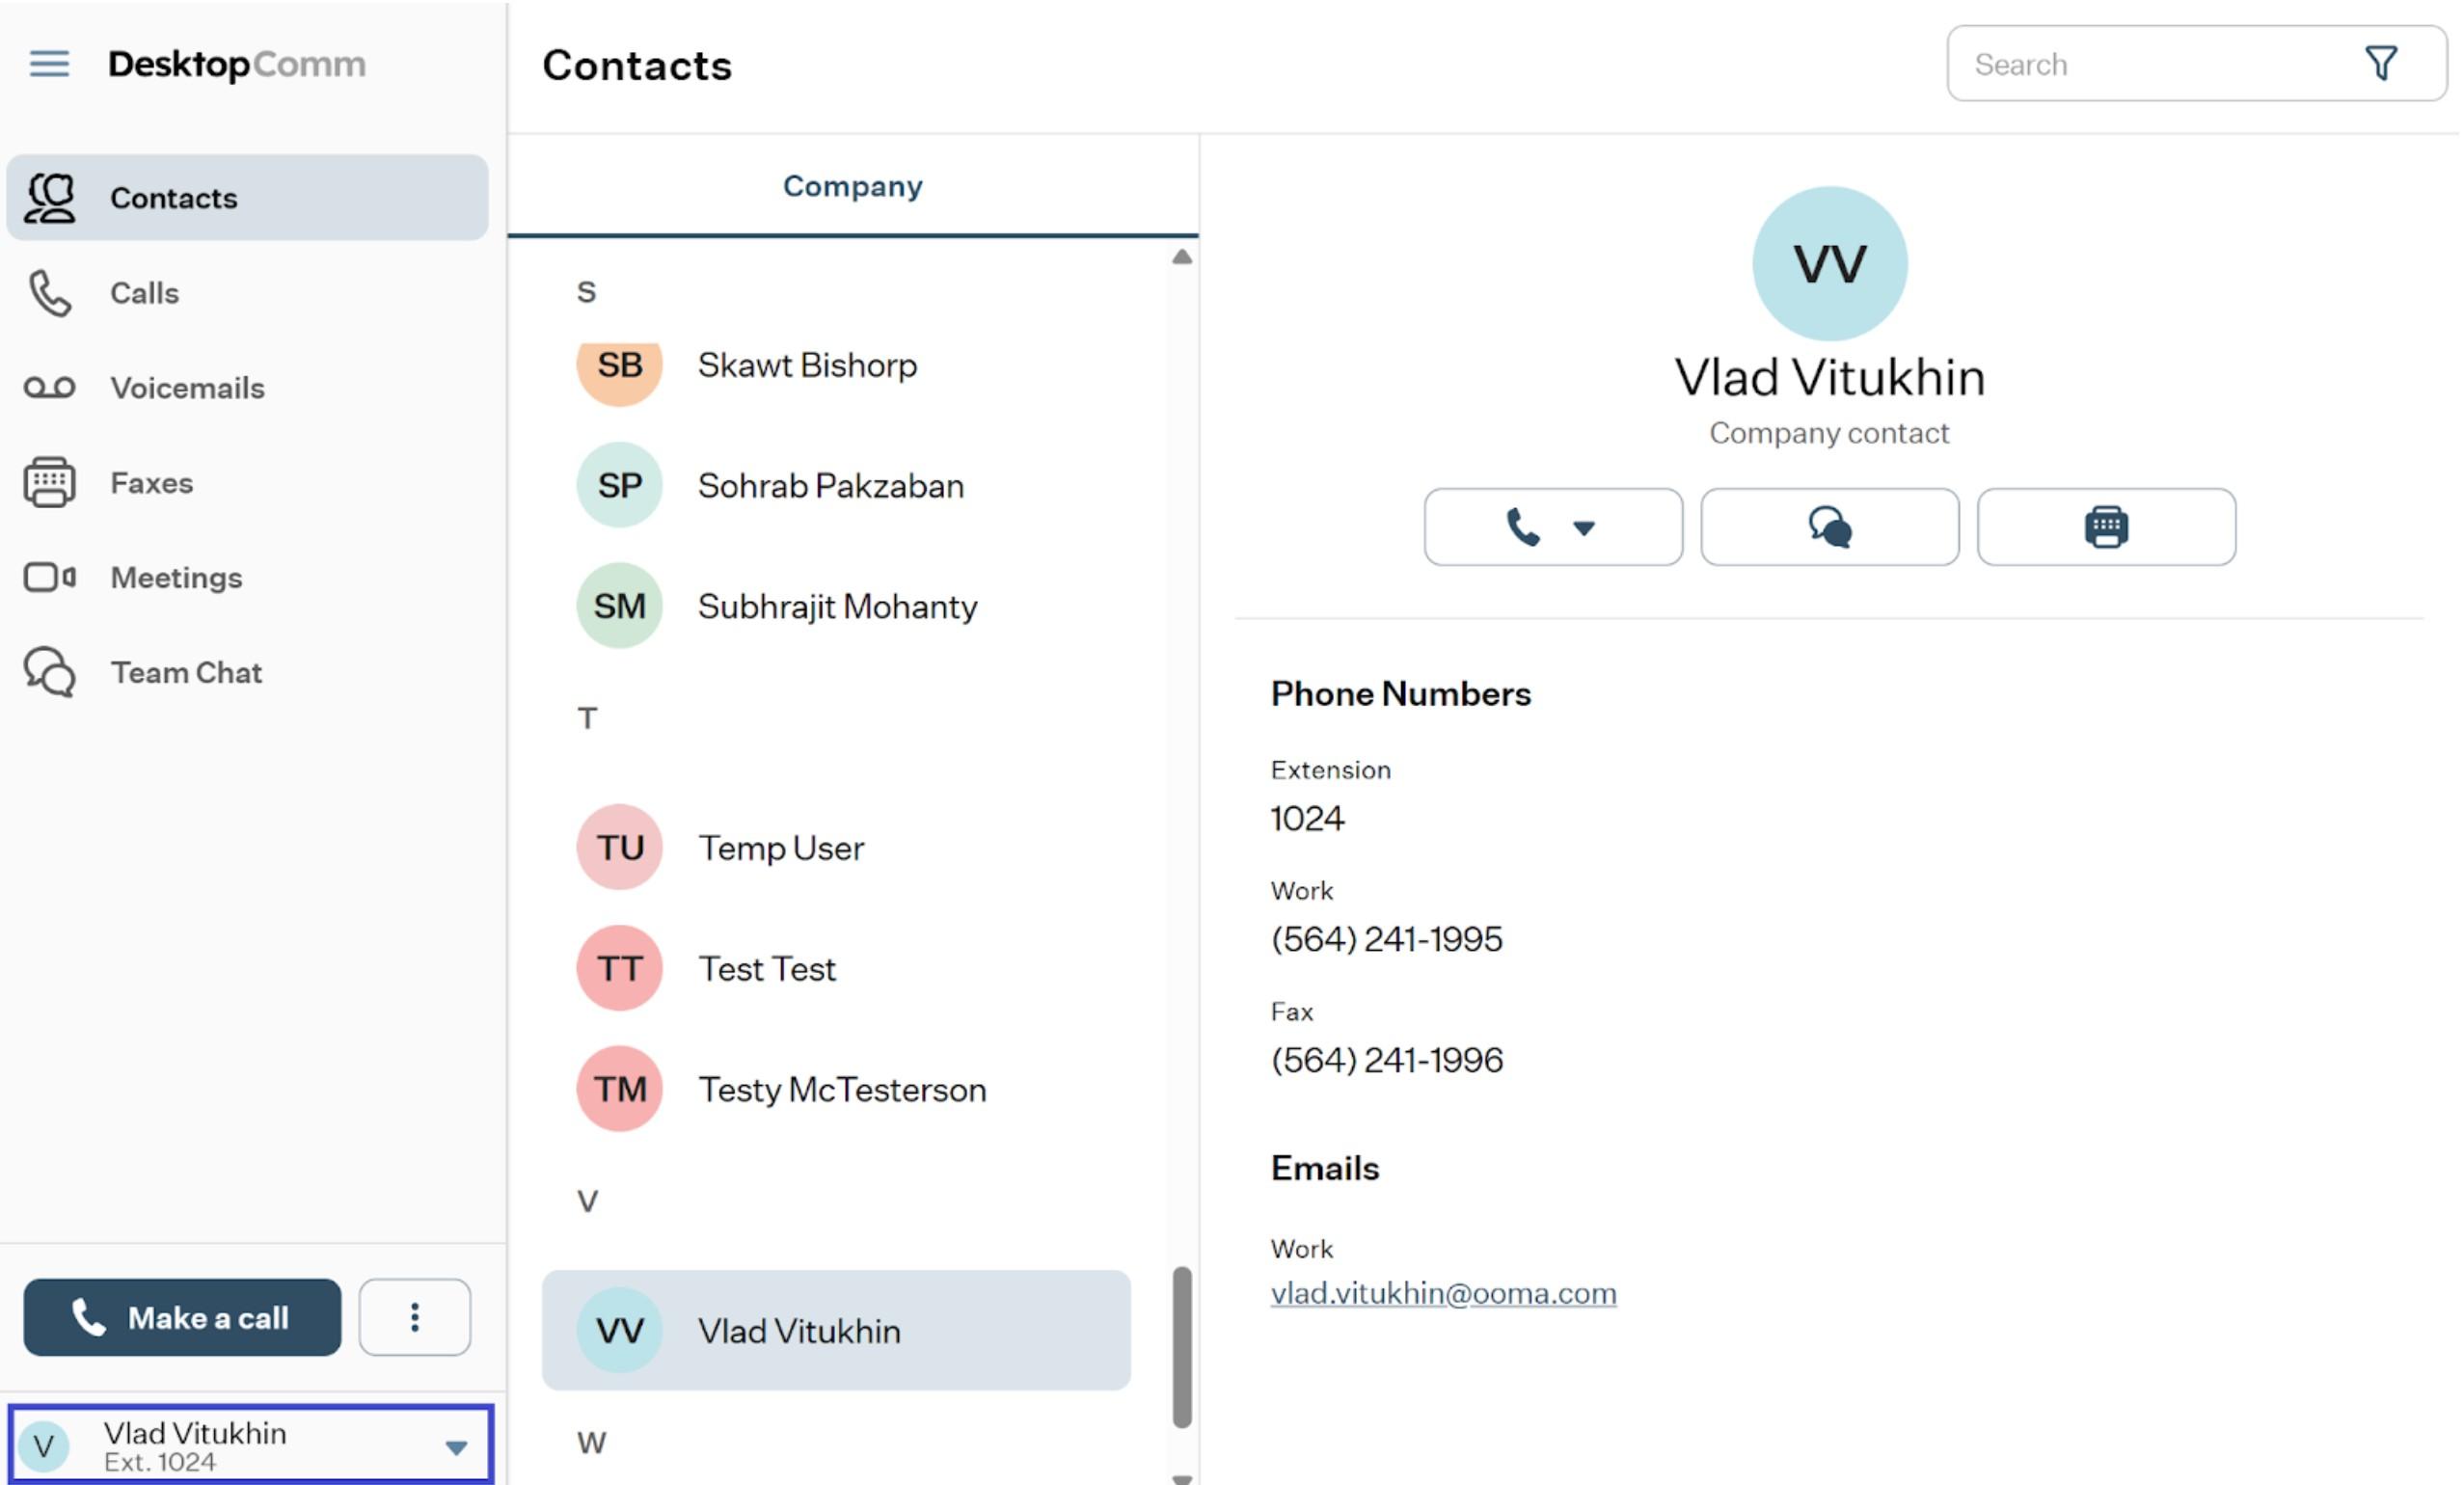
User Button: this interactive element presents the name of the user account along with its assigned extension number.
Clicking on this element triggers a drop-up menu to appear, revealing these options:
- Right-pointed arrow: clicking this button will expand a drop-up window, revealing an additional section that lists all the numbers associated with your account.
- Disable call to this device: when enabled, the app prevents calls from ringing or being received on that specific device.
- Pause push notifications: when enabled, it prevents push notifications from appearing.
- Settings: select this option to access the User Portal’s settings section.
- Help: select this option to open the Help widget.
- Log out: by selecting this option, you will log out of the User Portal.
Settings
Let’s examine all the subsections available here:
-
Profile: this group of settings allows you to manage your personal information, configure your Caller ID, and manage connected devices.
-
My Info: here, you can copy one of your personal or company numbers, edit your notification email, and change your password.
-
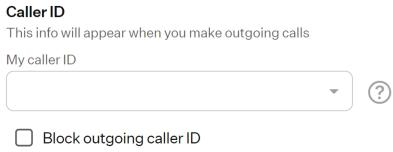
Caller ID: here, you can choose your Caller ID from a drop-down list of options and block outgoing Caller ID by enabling the corresponding toggle switch.
-
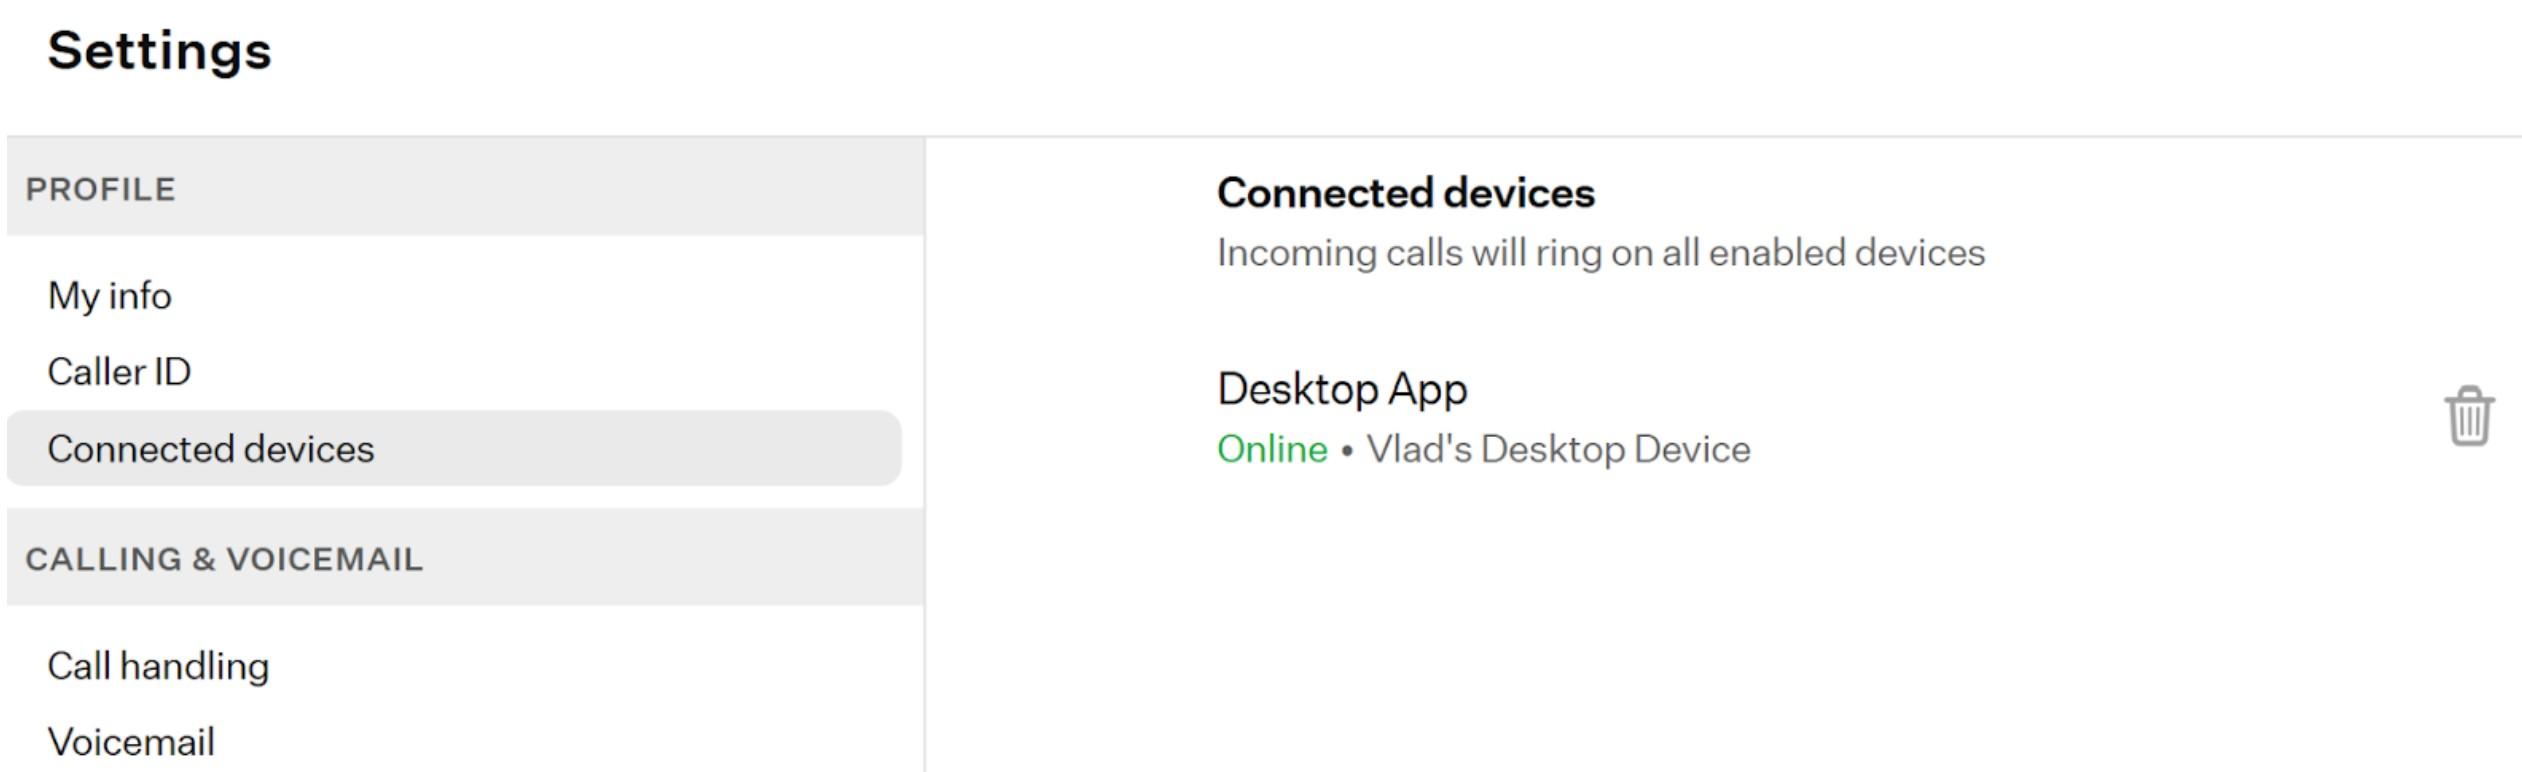
Connected devices: on this page, you can find a list of all devices connected to your account. The given devices cannot be managed, but you can delete them.

-
-
Calling & Voicemail: this group of settings allows you to manage the related parameters and set custom caller info match rules for handling calls.
-
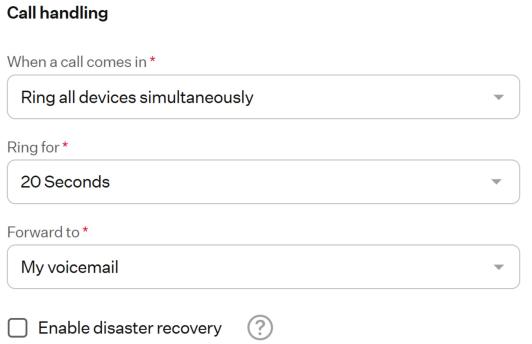
Call handling: here, you can set the app’s behavior when a call comes in, choose the duration of the rings, specify where to send missed calls, and enable disaster recovery and select the phone number and incoming Caller ID to use.
-
Voicemail: in this section, you can set a voicemail greeting, skip default voicemail instructions, set the voicemail/hot desk PIN, and configure email notifications.
-
