2. Manager Level - Call Center Feature - Queues Tab
After you click the “Begin Session” button, the session will start and the Queues tab will appear in the main space of the app.

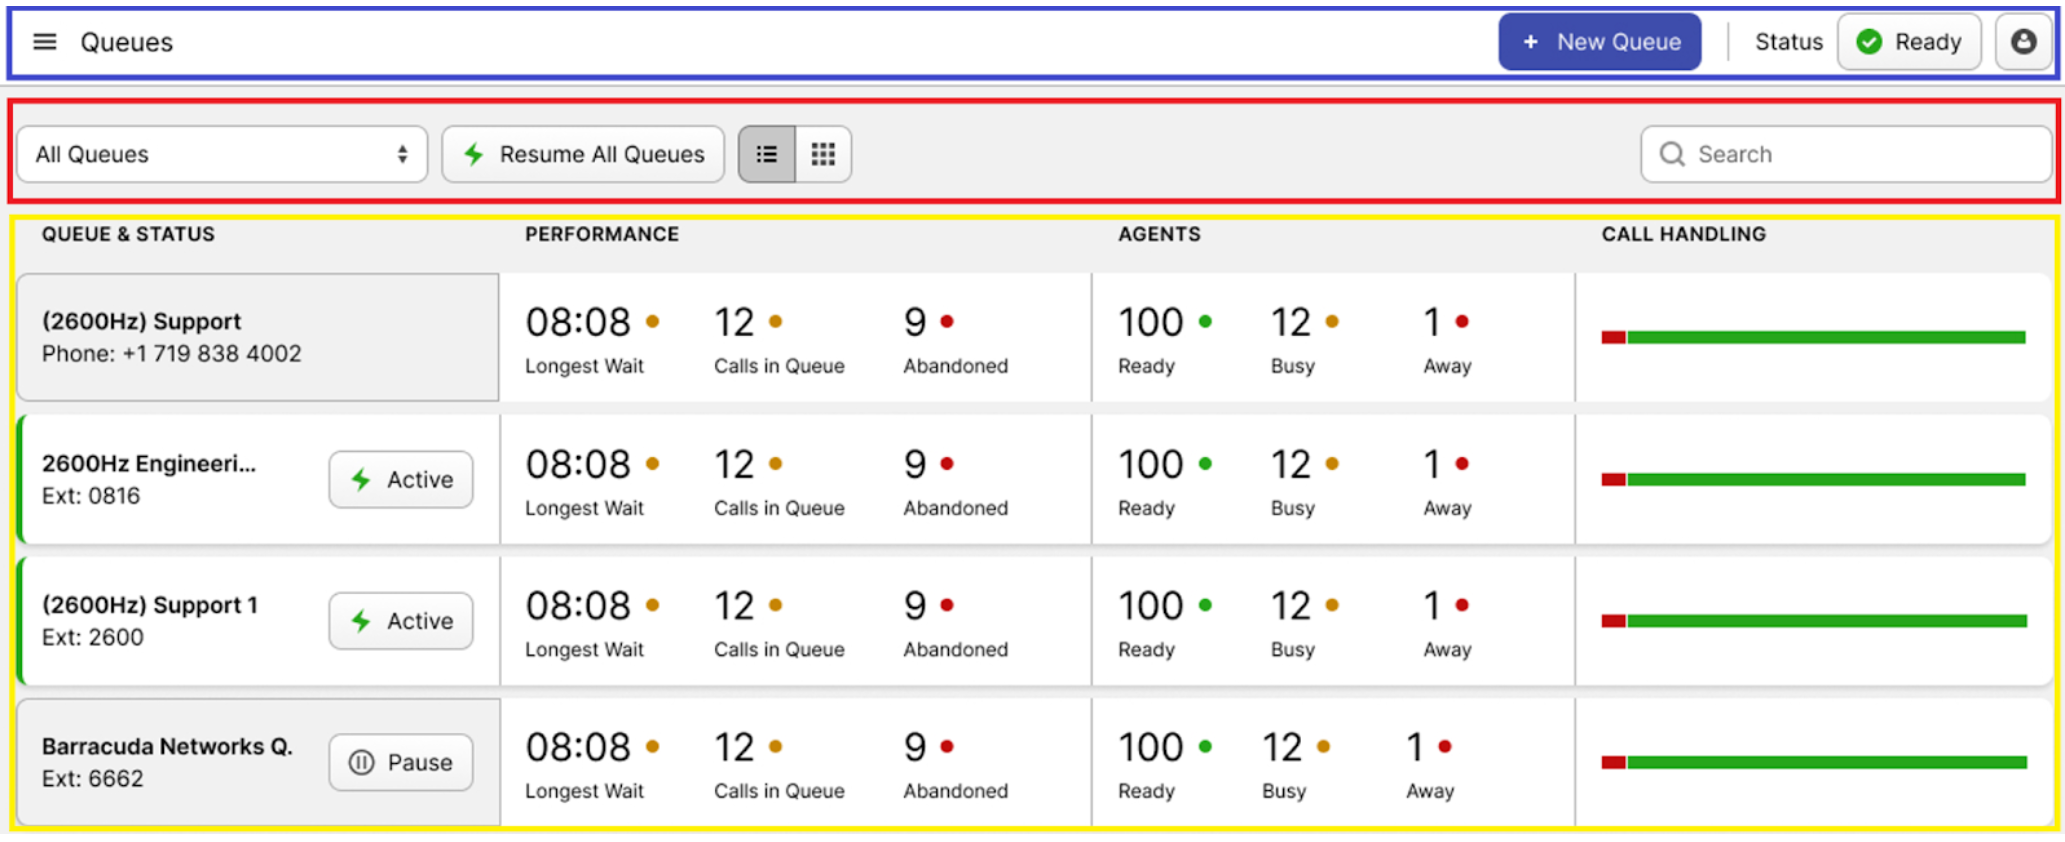
The interface of the Queues tab can be divided into three primary sections:
-
Queues Status Bar (blue rectangle): this bar allows you to control the status of your session.
-
+ New Queue: by pressing this button, a form for creating a new queue will appear.

All the parameters that need to be configured are organized across several tabs.
- The **status button** lets you update your account’s status. Clicking it opens a drop-down list with options such as “Ready,” “Away,” or “End Session.”This topic is extensive and will be covered in detail in the following sections of the user guide.
-
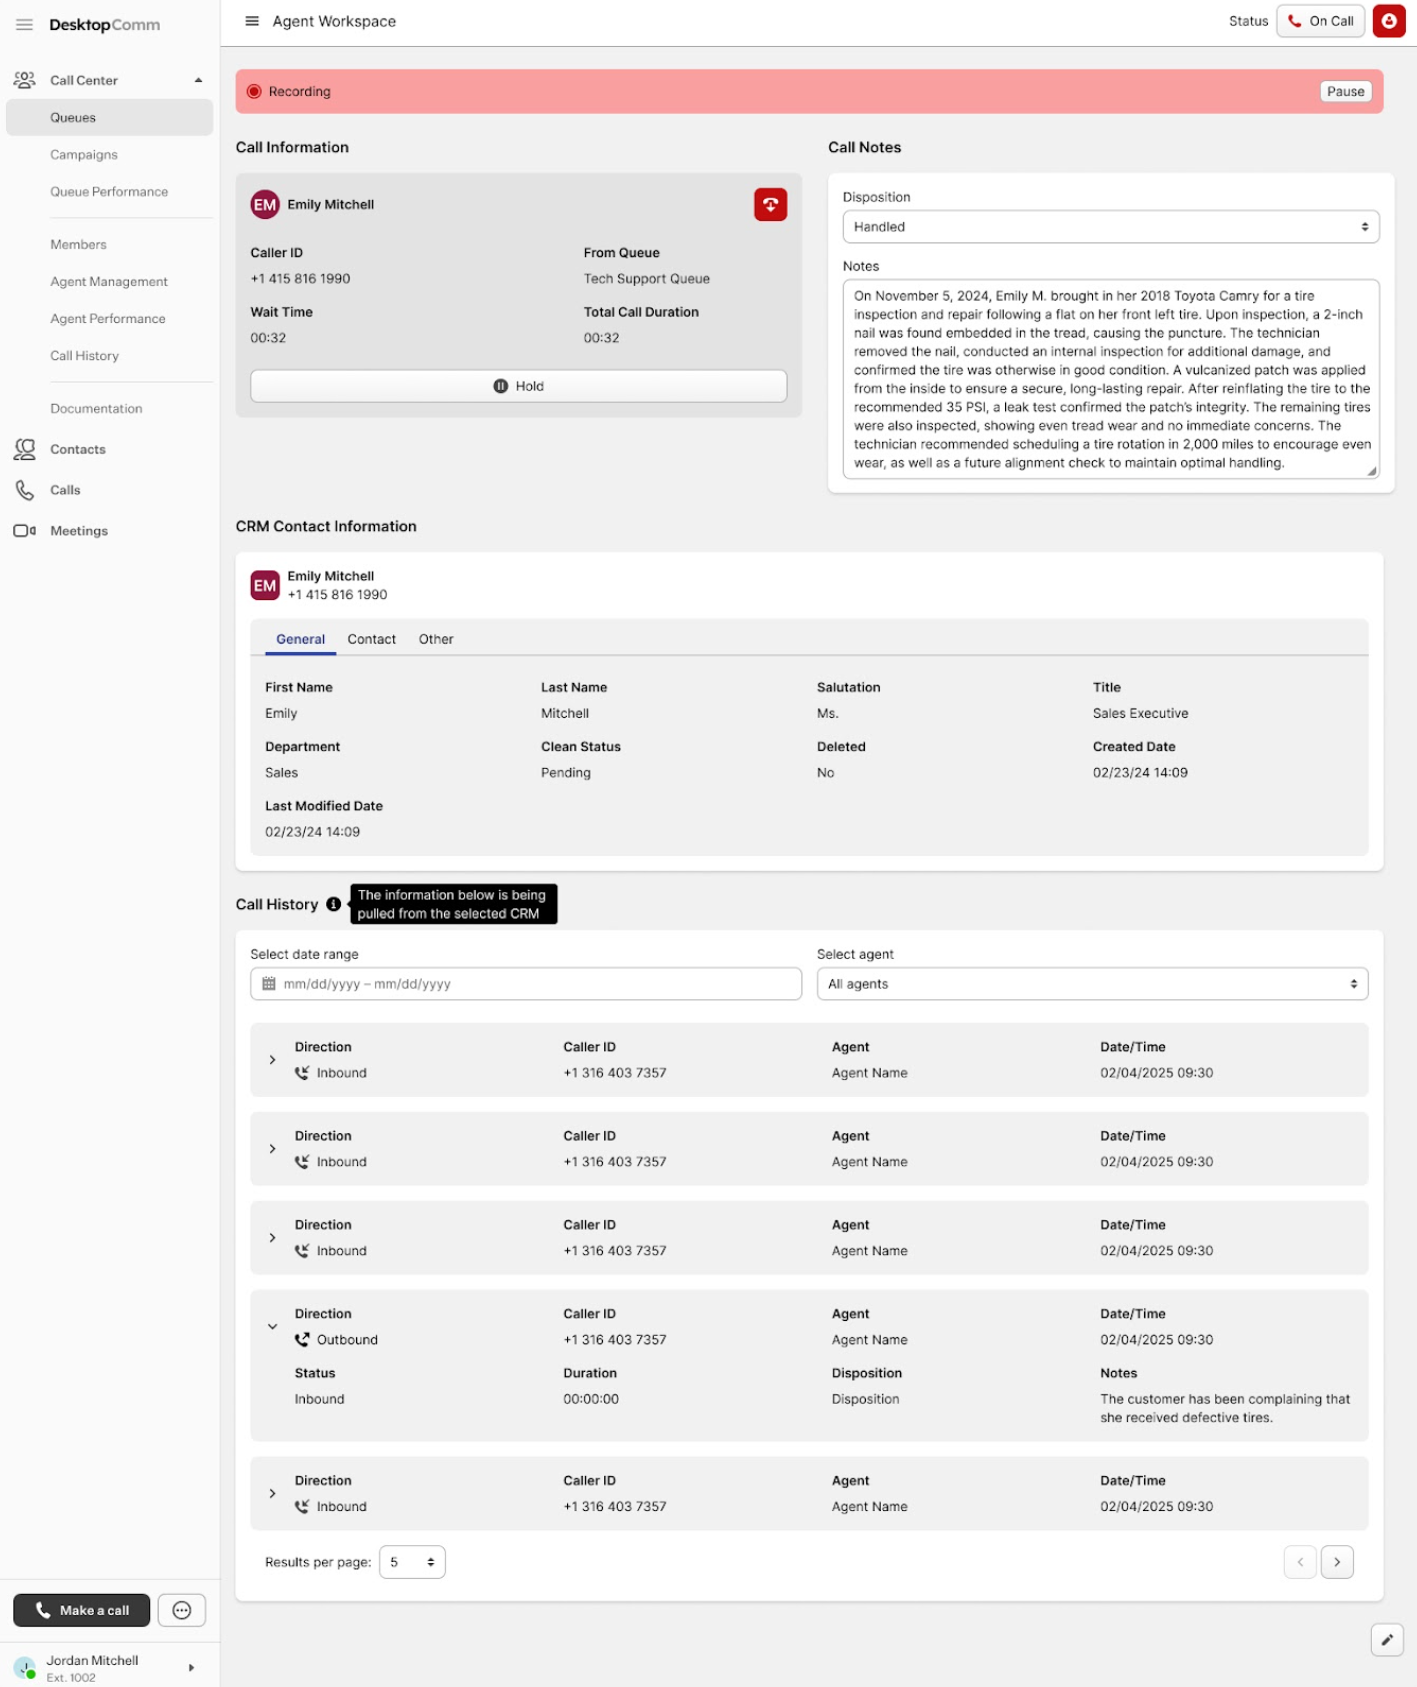
The button with the human icon provides access to the agent workspace, where you can enter call details, notes, and other related information.
-
-
Action Bar (red rectangle): this bar contains all the action controls used to sort queues, switch the view, and pause or resume all queues simultaneously.

-
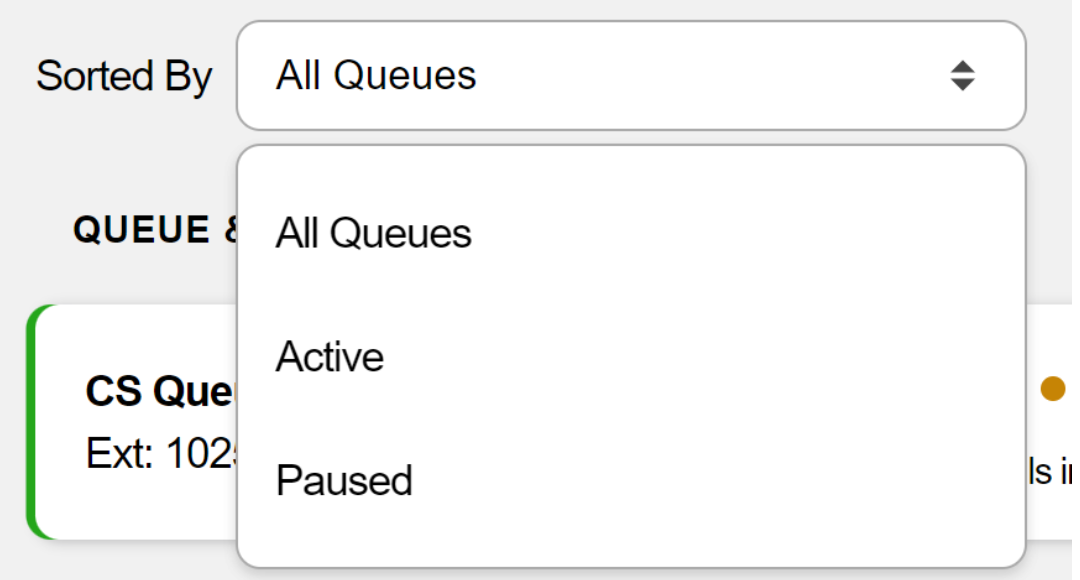
Sorted By: clicking this field allows you to sort the queues in the list by status, choosing between “Active” or “Paused.”
-
Pause/Resume All Queues: when you click the “Pause All Queues” button, every queue in the list will be paused. The button will then switch to “Resume All Queues,” which you can click to reactivate all queues.

-
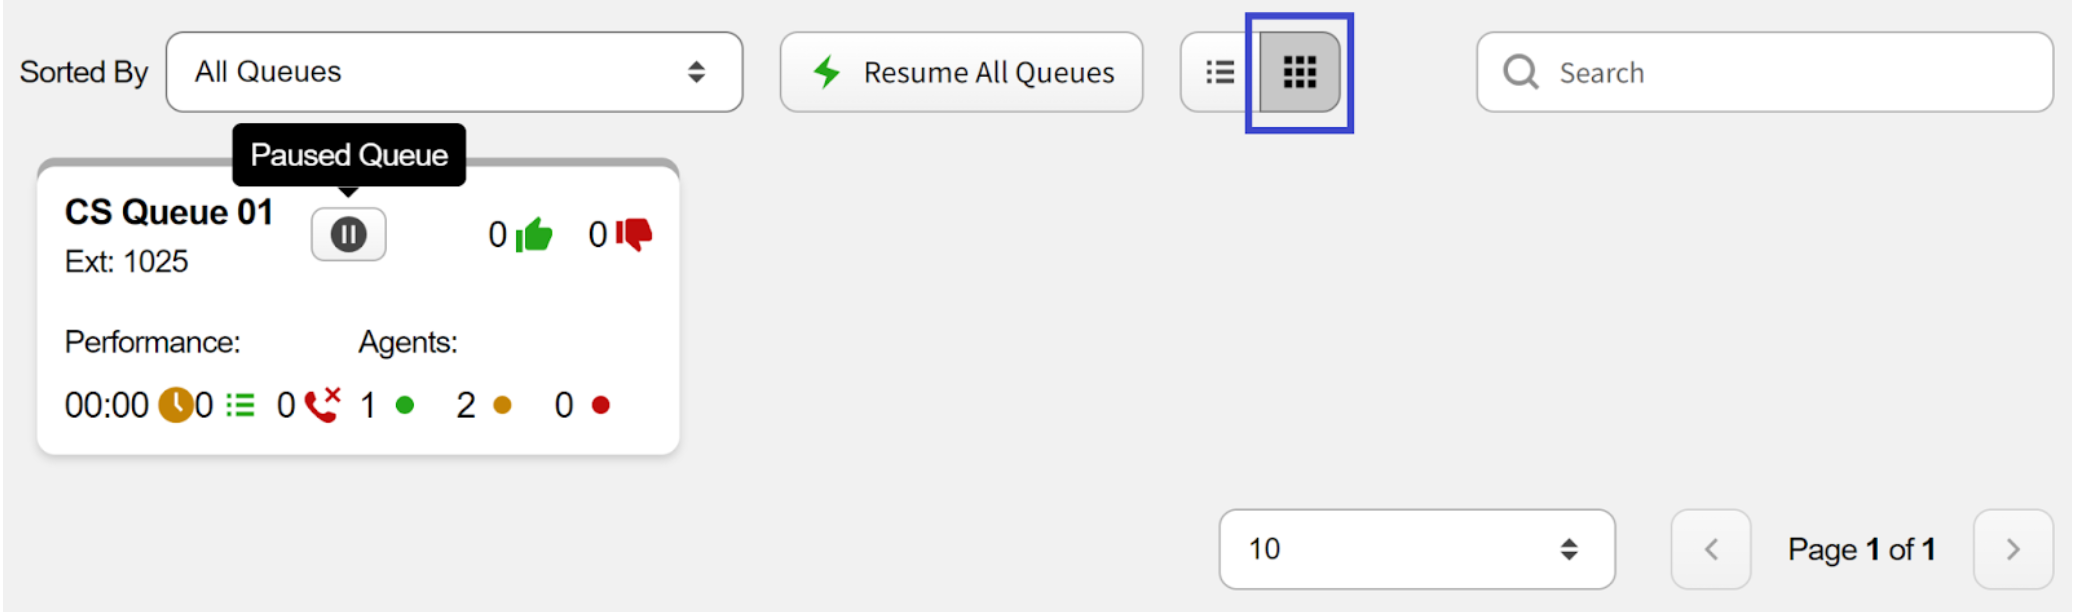
List / Grid View: clicking the “List View” button displays all queues in this tab in a list format.
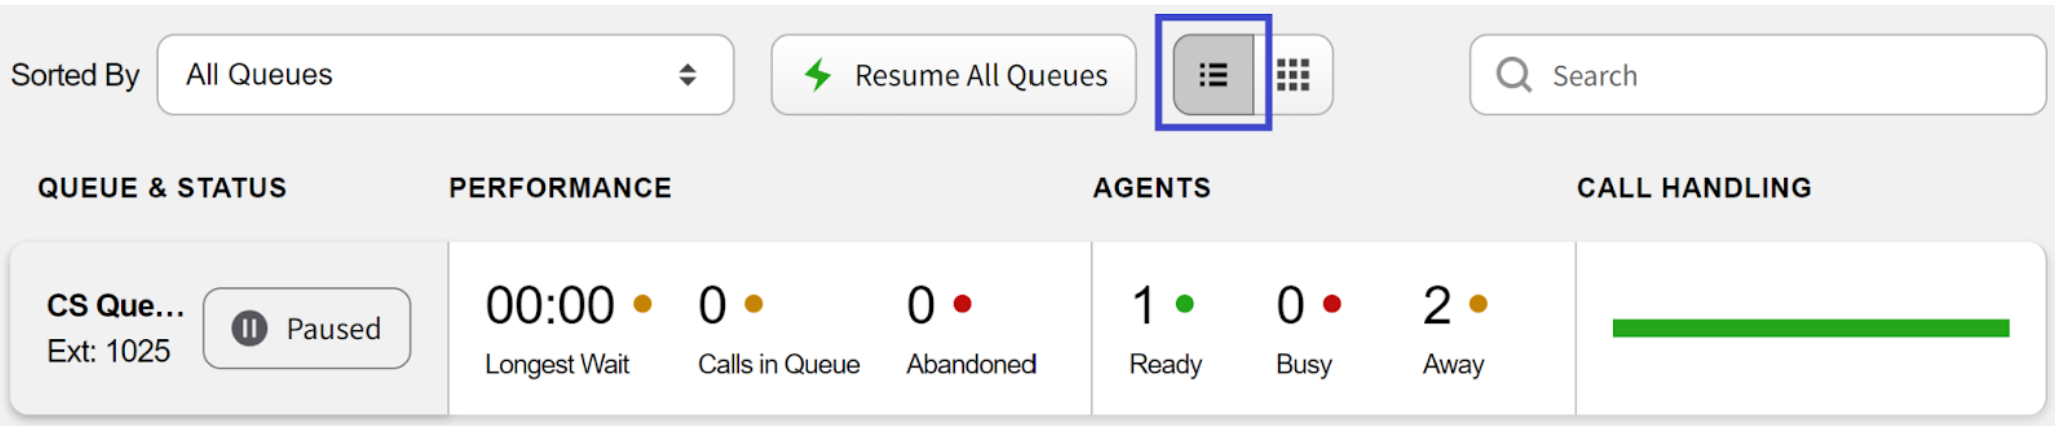
Selecting the “Grid View” button shows the same queues as a grid of tiles.
-
Search Bar: it functions as a typical search field, helping you locate a particular queue or narrow down the list.
-
-
Queues (yellow rectangle): each queue in the section is displayed as a tile. Depending on the selected View, it will appear either as a long horizontal tile or a smaller rectangular one. Each tile contains useful information such as the queue name, its status, performance metrics, assigned agents, and key call-handling details.

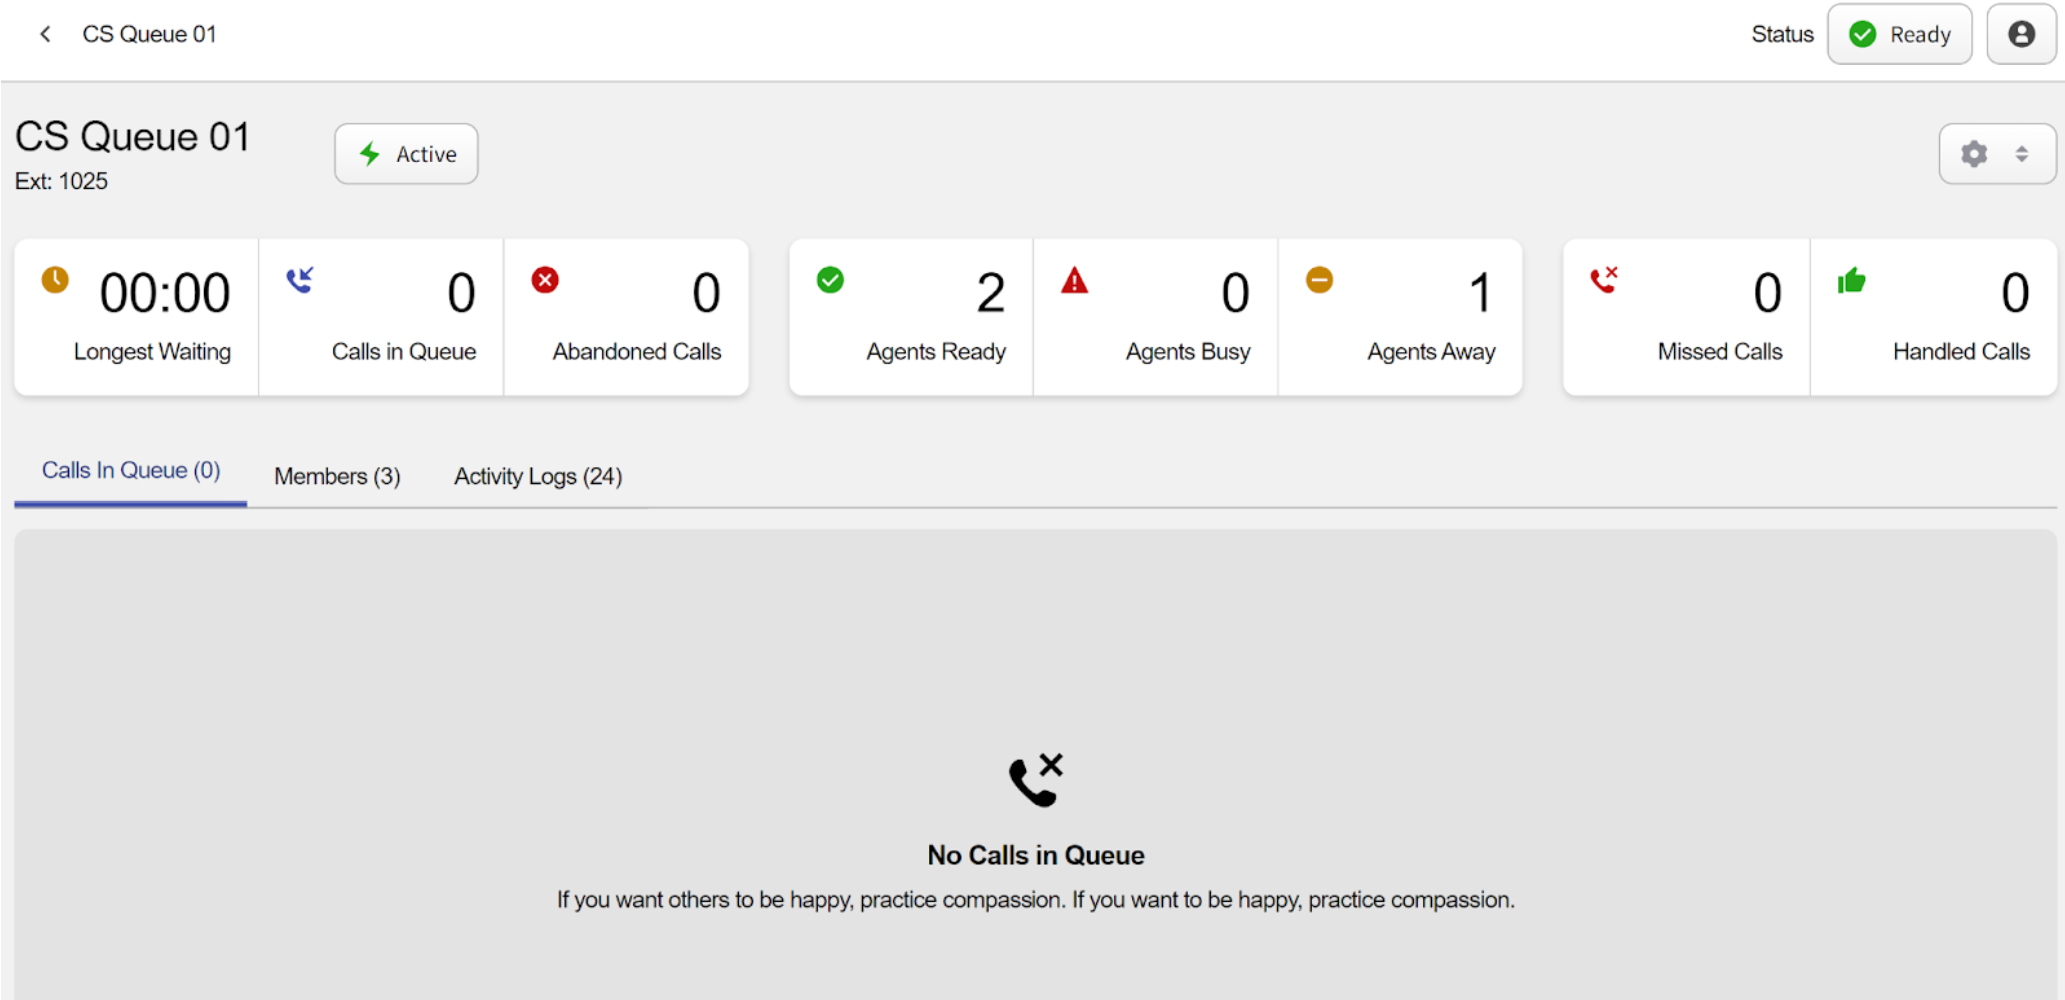
If a tile displays a status button, it indicates that the queue currently has an active session. Clicking this button allows you to change the session’s status from “active” to “paused.” Clicking any queue in the list opens its dedicated page, where you’ll find the same information in greater detail, along with action buttons and tabs for calls, members, and activity logs.
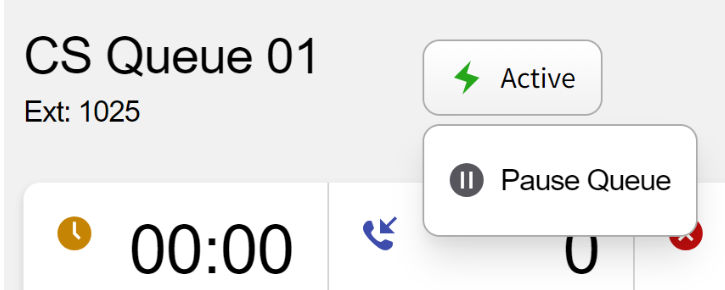
The action buttons include:
-
Activity button: clicking this button allows you to enable or pause the selected queue.
-
Settings button: clicking this button allows you to edit the queue’s settings.

A separate page opens where you can modify all parameters of the selected queue.
This topic is extensive and will be covered in detail in the following sections of the user guide.
The lower half of the selected queue’s personal page contains three tabs:
-
Calls in Queue tab: this tab displays all calls currently waiting in the queue.
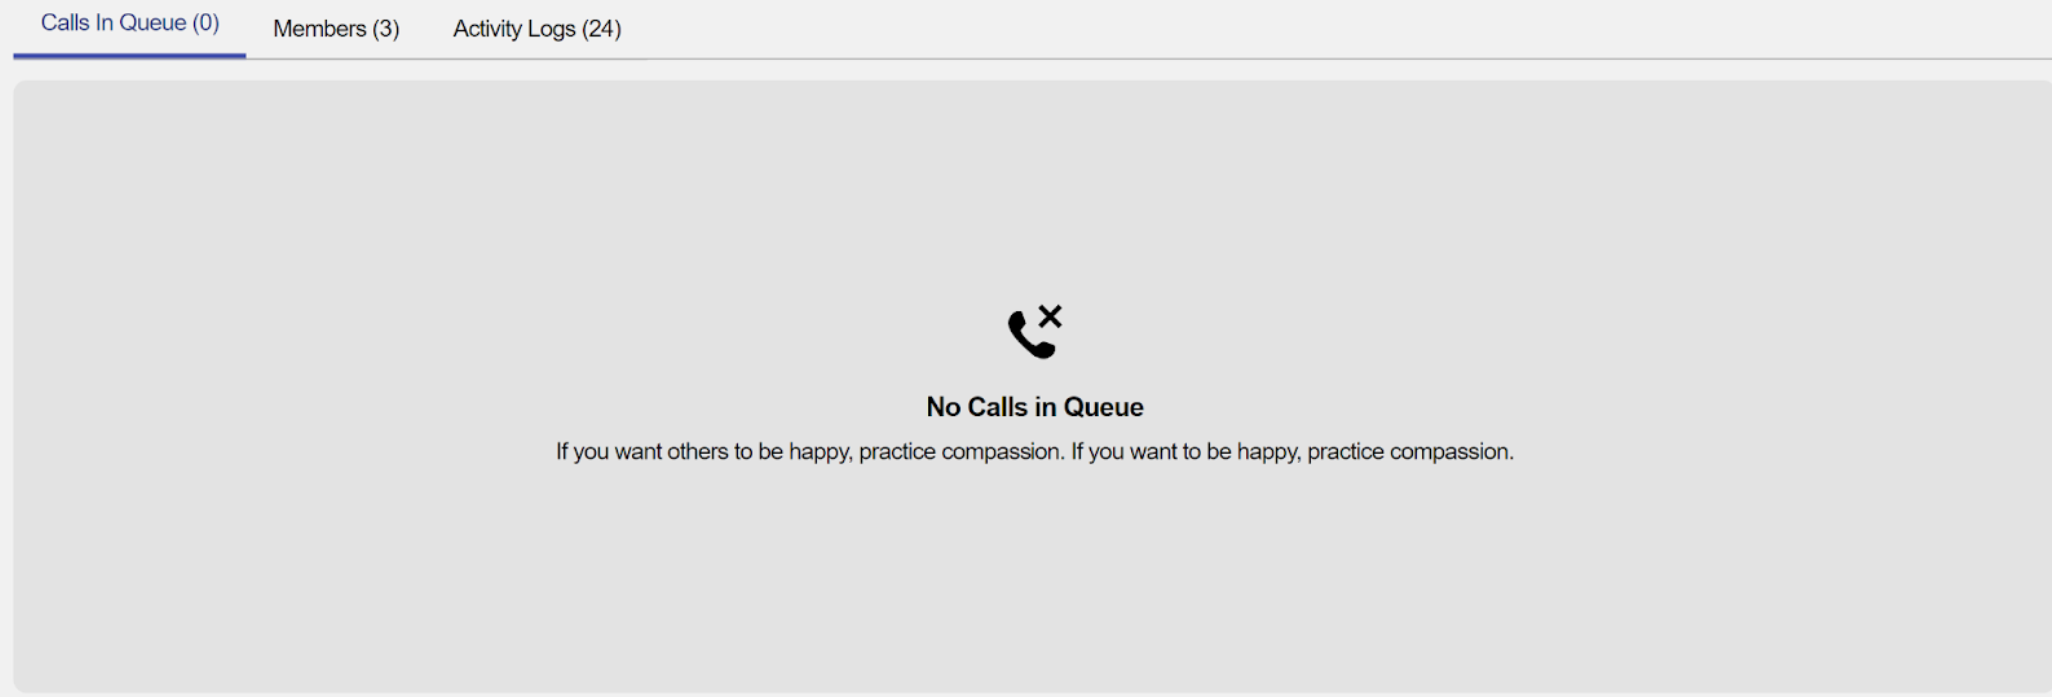
- **Members tab**: this tab displays all agents assigned to this **queue**. You can view their names, roles, status, and key statistics, including call handling data, current session duration, time spent in “away” status, and a list of their skills.If this tab is empty, it means there are no calls in the selected queue.
 By clicking the **“Manage Members” button**, you will enter the member managing mode.  Here, you can manage the agents assigned to the configured **queue**. The agents in the left list represent all call center members, while the agents in the right list are assigned to this **queue**. To add a member, select an agent from the left list and click the **“Assign to Queue” button**. To remove an agent, select them from the right list and click the **“Unassign from Queue” button**.-
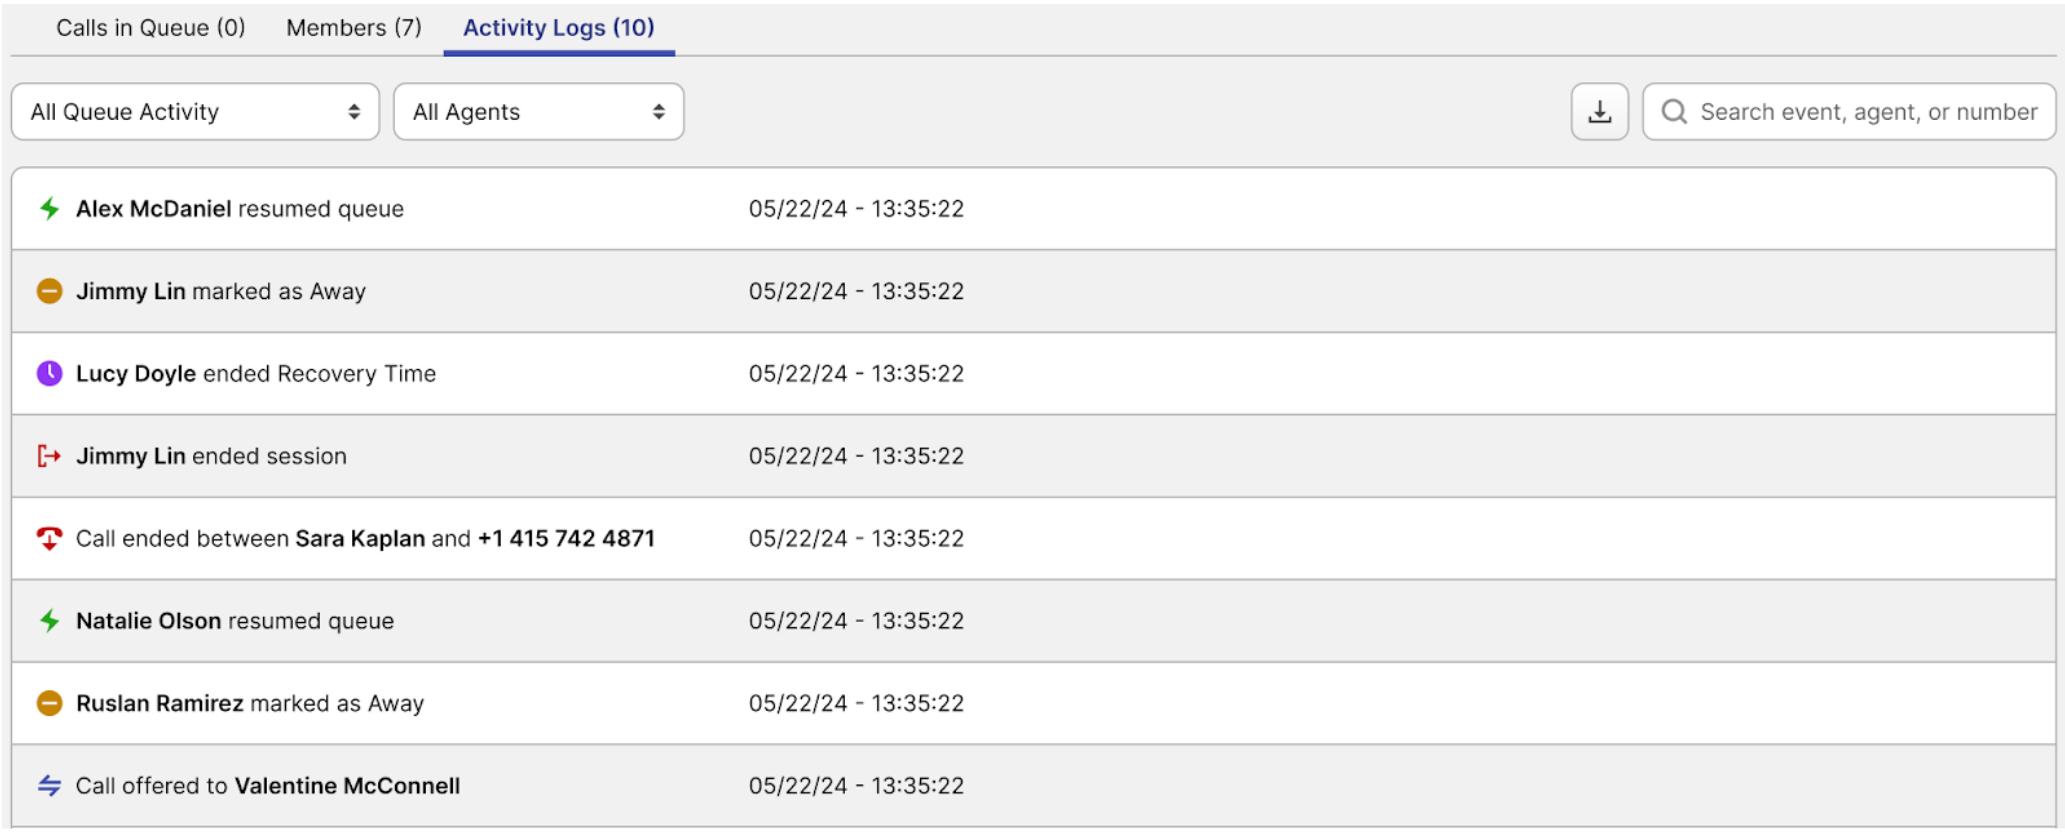
Activity Logs tab: this tab contains all logs related to the current queue. You can filter logs by activity status or agent name, search by event, agent, or phone number, and download the entire log history.
-
Creating / Editing Queues
Clicking the “Edit Queue Settings” button opens a separate page where you can adjust all parameters of the selected queue. These parameters are organized across several tabs:
-
Basic Info Tab: here, you can modify the selected queue’s name, number or extension.
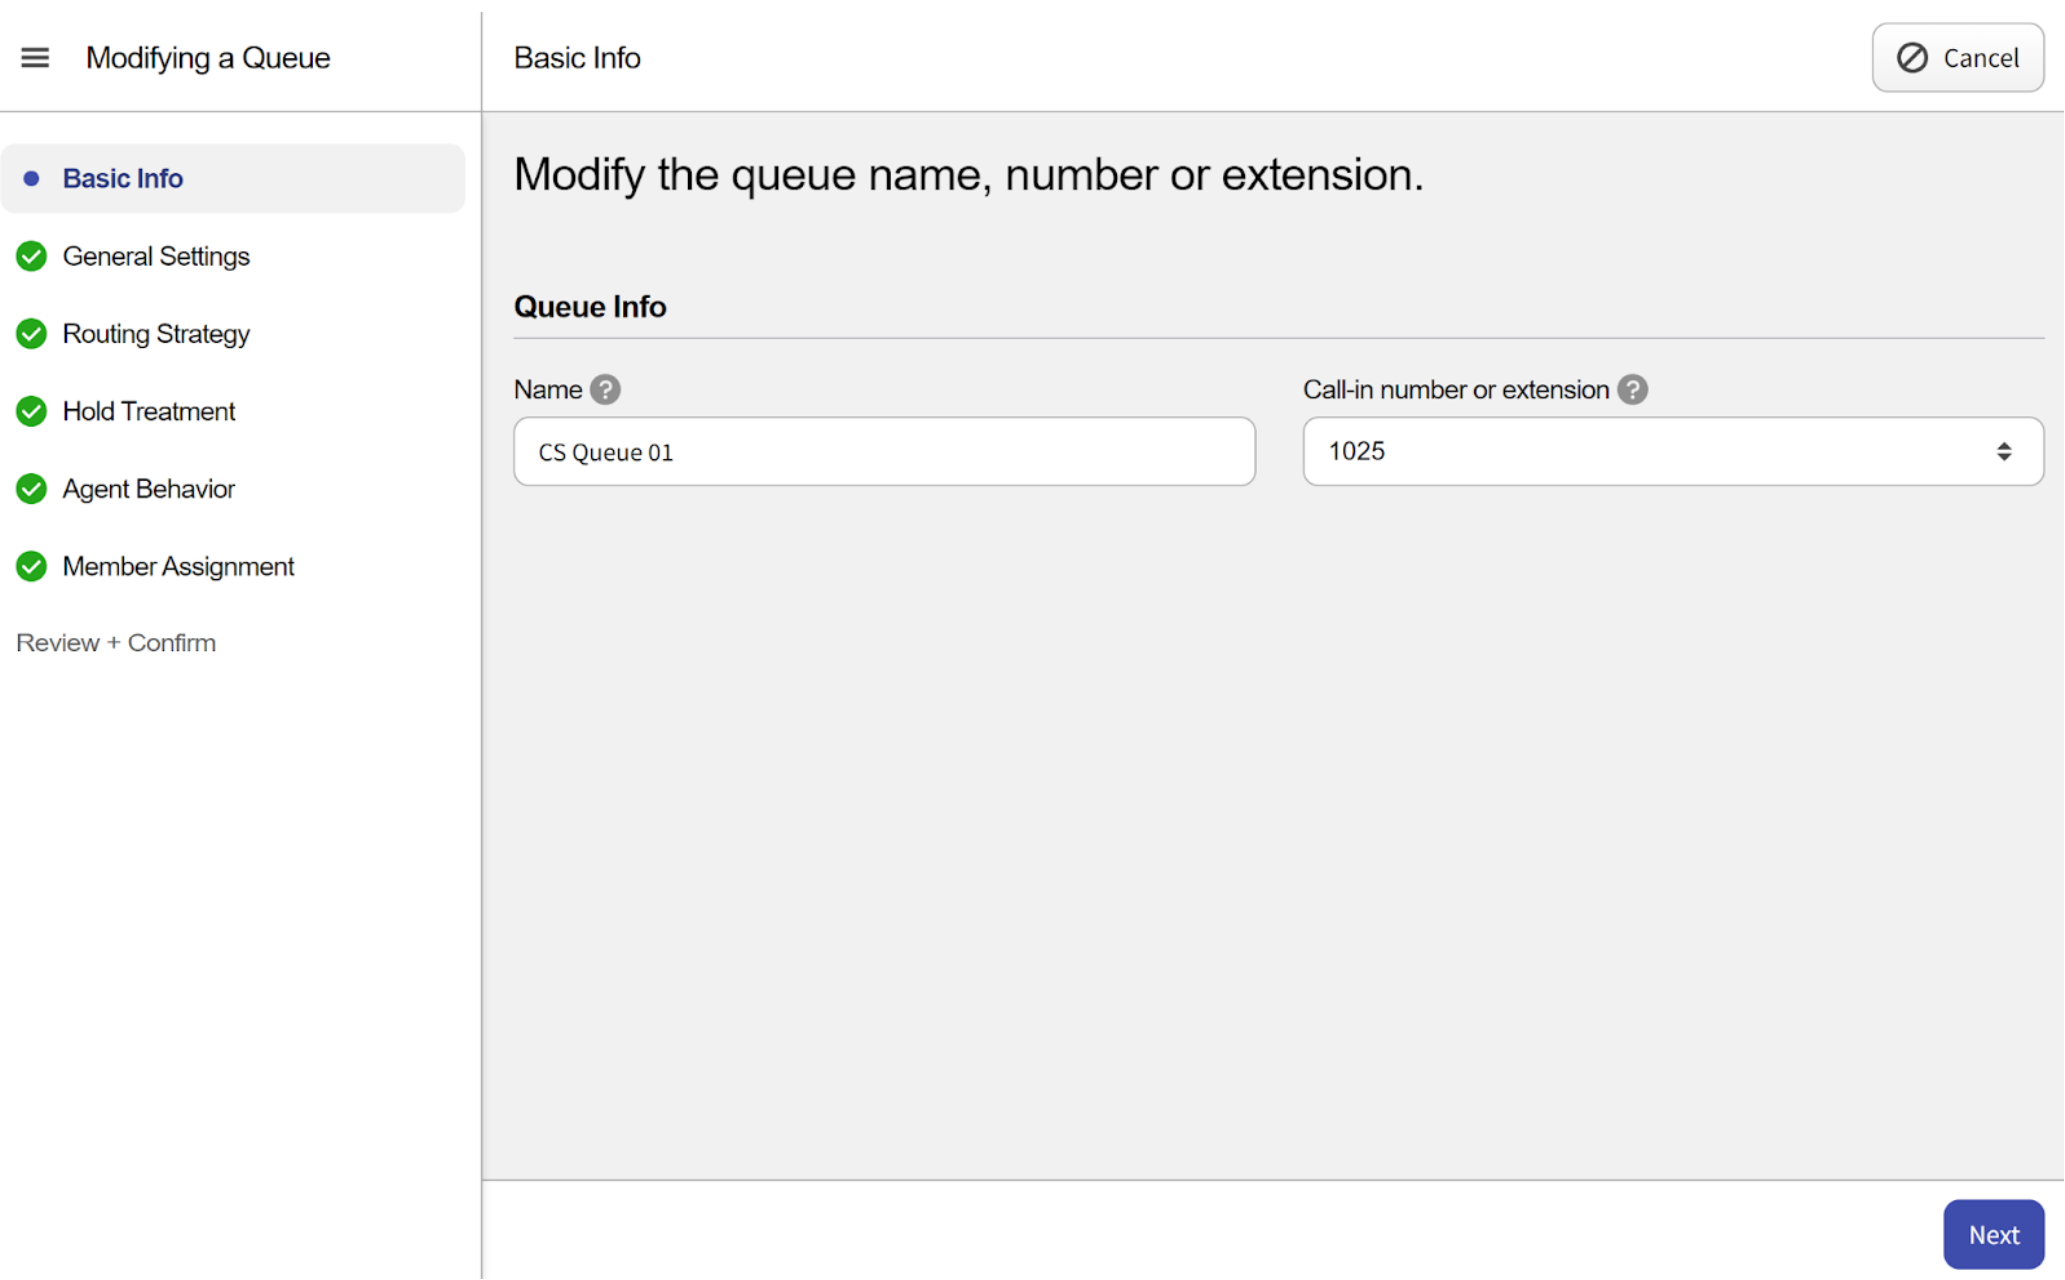
- Name: here, you can set a custom queue name.
- Call-in number or extension: here, you can set a custom queue number to call in.
-
General Settings Tab: here, you can configure the main settings of the selected queue.
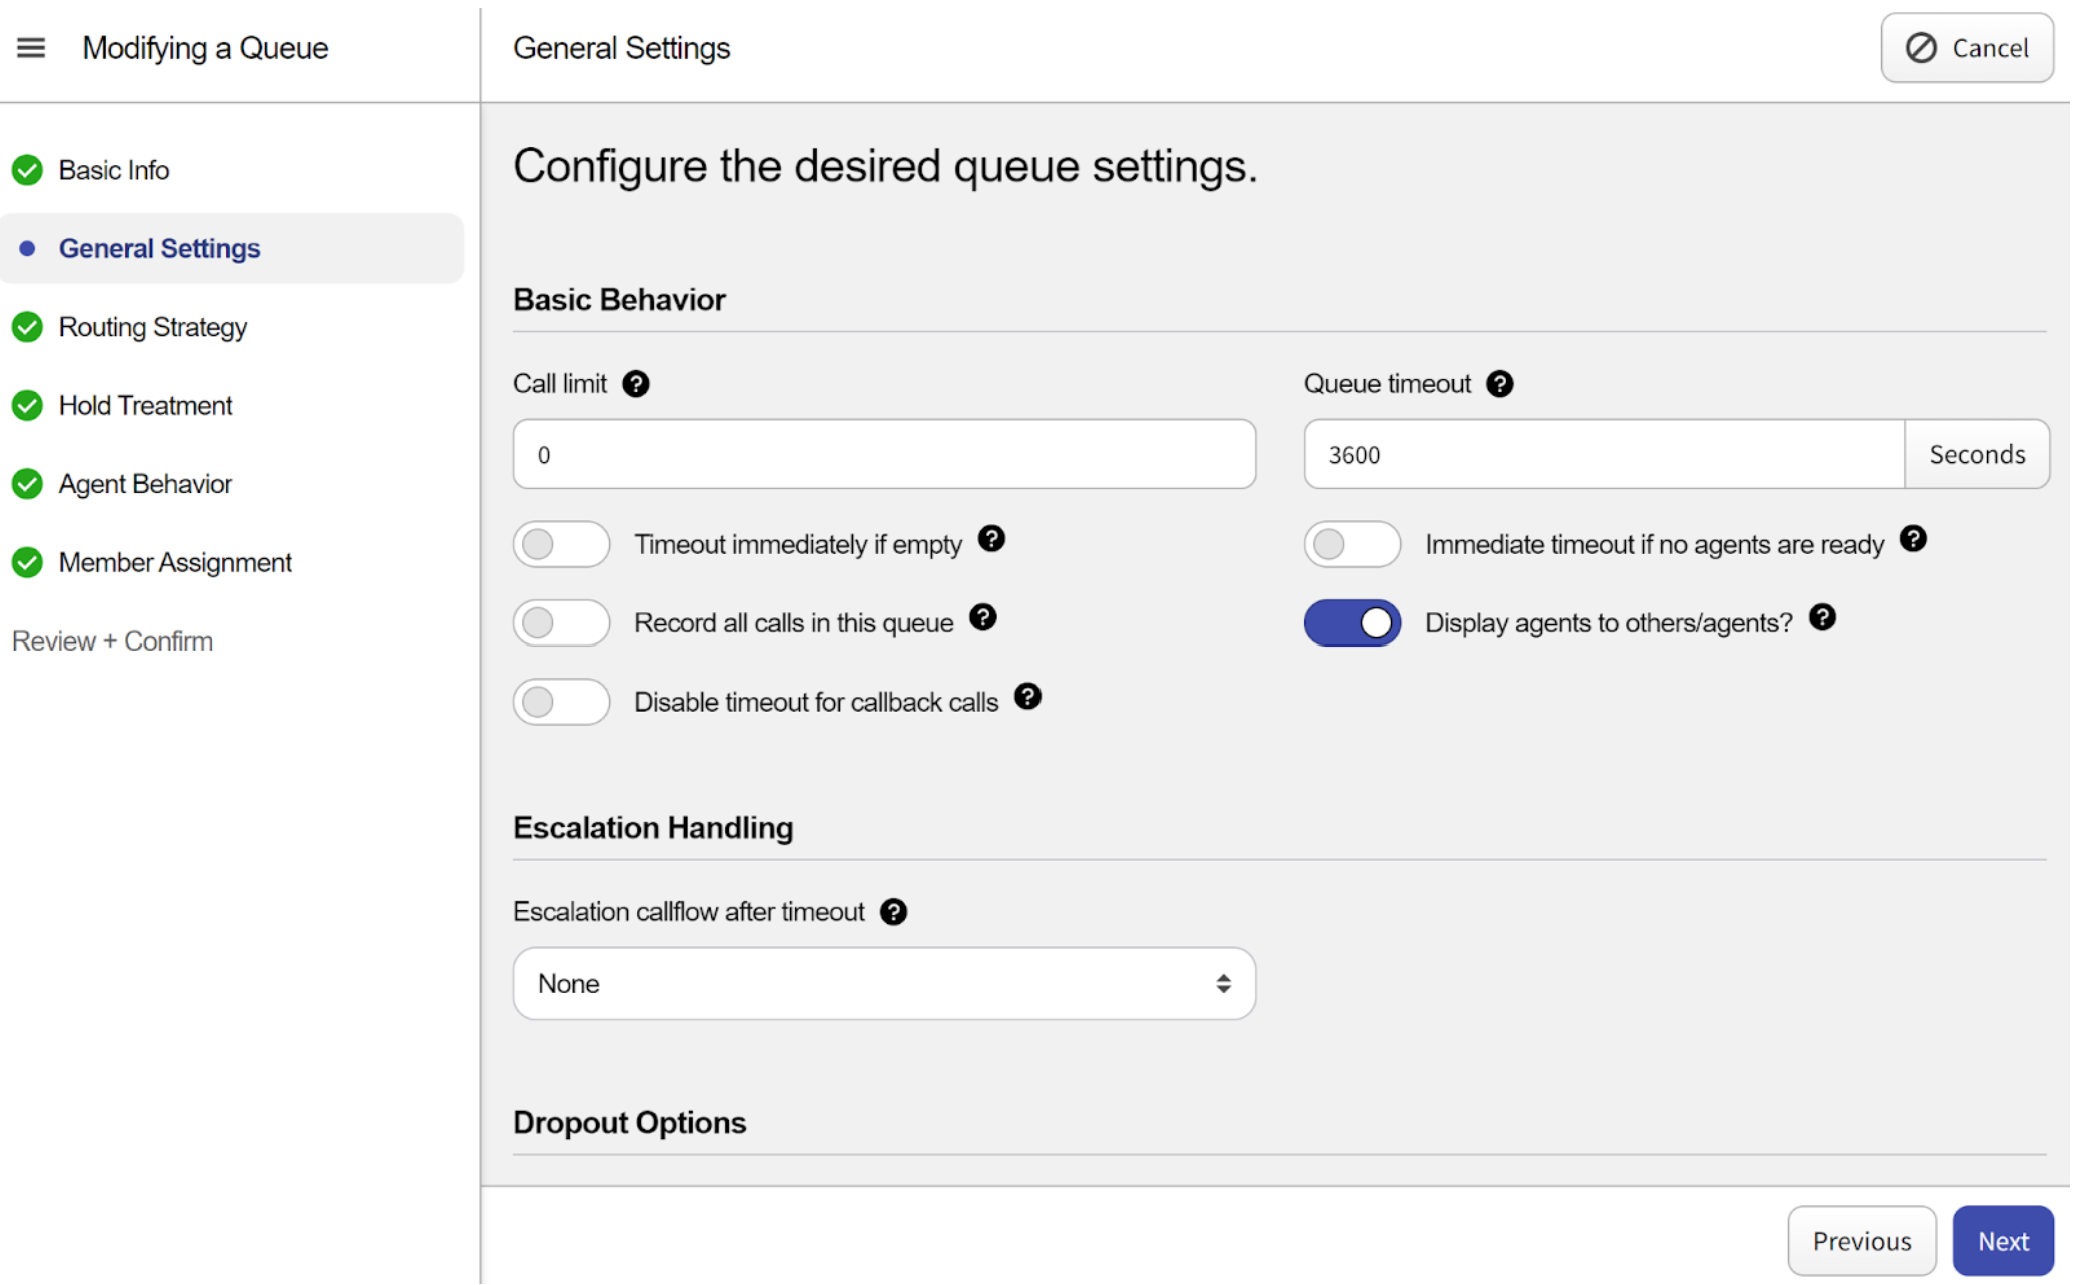
- Basic Behavior section: here, you can configure the basic behavior of the queue.
- Call limit: this parameter sets the numbers of calls that can be in a queue before the calls time out. If the call limit is greater than 1 and Escalation Handling is configured, the call will be routed to the specified timeout redirect. If the call limit is 1, any new call that tries to enter the queue will be terminated (dropped). If the call limit is 0, the number of calls that can enter the queue is infinite (or limit to incoming trunk limitation). Any incoming call that is dropped will be counted toward Missed Calls for that queue, since it has entered the queue and subsequently terminated.
- Timeout immediately if empty: if turned on and the queue is empty (meaning no agents are logged in) the call will immediately be routed to the specified timeout redirect.
- **Record all calls in this queue:** if turned on, all calls will be recorded by default. Alternatively you can set “record all calls” for individual agents under the Call Center Members tab. - **Disable timeout for callback calls**: turning on this option will bypass the timeout configuration for callback calls. - **Queue timeout**: the number of seconds the call will sit in a **queue** before timing out. If Escalation Handling is configured, the call will be routed to the specified timeout redirect. If No Escalation is configured, the call will terminate or drop. Maximum **queue** timeout is 7200 seconds - **Immediate timeout if no agents are ready**: if turned on and the **queue** doesn't have any agents ready (meaning no agents are available to take calls) the call will immediately be routed to the specified timeout redirect.Please note: the queue is not considered Empty if an agent in a queue is Globally in an Away state or on a call.
- **Display agents to others/agents**: enable this to allow Agents to see other Agents who are members of the **queue** on the **Queue** Details page > Members tab. By default, this is not enabled; agents will see only themselves on the Members tab.Please note: an agent is considered ready when set to Ready Globally AND per Queue.
- **Escalation Handling Section**: here, you can configure a custom handling behavior when a call in this **queue** times out. - **Escalation callflow after timeout**: If a call in this **queue** times out, it will be placed in the selected callflow/device/VM box selected from the drop-down list of options. - **Dropout Options Section**: allows inbound callers to drop out of this **queue** by pressing a digit. - **Add Redirect**: clicking this button adds a new line as a dropout option, allowing you to select the button that will redirect the call to one of the devices in the list.Please note: admins assigned through Smart PBX can see all queue members’ status.
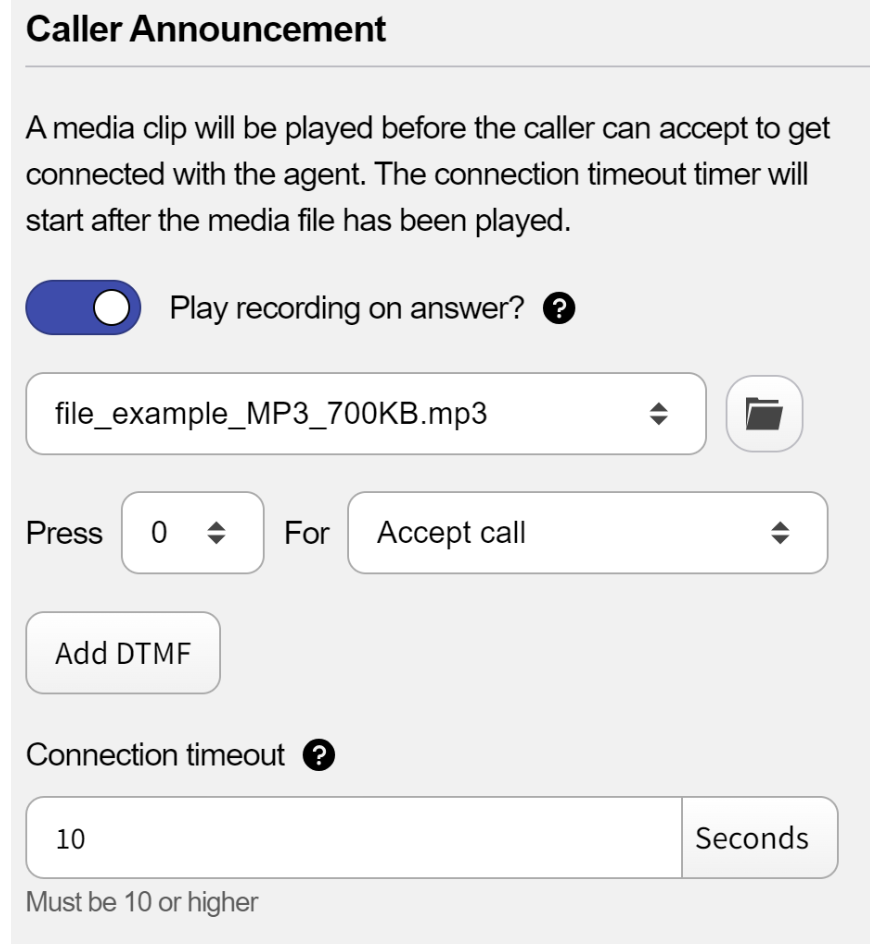
 - **Initiate Callback**: clicking this button adds a new drop-down line, allowing you to choose the button that will trigger a callback and select the audio file to be used. - Caller Announcement Section: a media clip will be played before the caller can accept to get connected with the agent. The connection timeout timer will start after the media file has been played.
-
Play recording on answer: turning on this toggle switch allows the queue to use the call announcement feature. Enabling it will display a list of additional fields.
-
Select a file: use this field to choose an audio file for the caller announcement.
-
Add DTMF: select a button and assign an action to it. You can also click the “Add DTMF” button to add additional actions, which can be assigned to other key presses.
-
Connection timeout: here, you can set the callee connection timeout. It should be at least 10 seconds long.
-
- Basic Behavior section: here, you can configure the basic behavior of the queue.
-
Routing Strategy Tab: here, you can set a strategy of how the calls should be routed to agents.
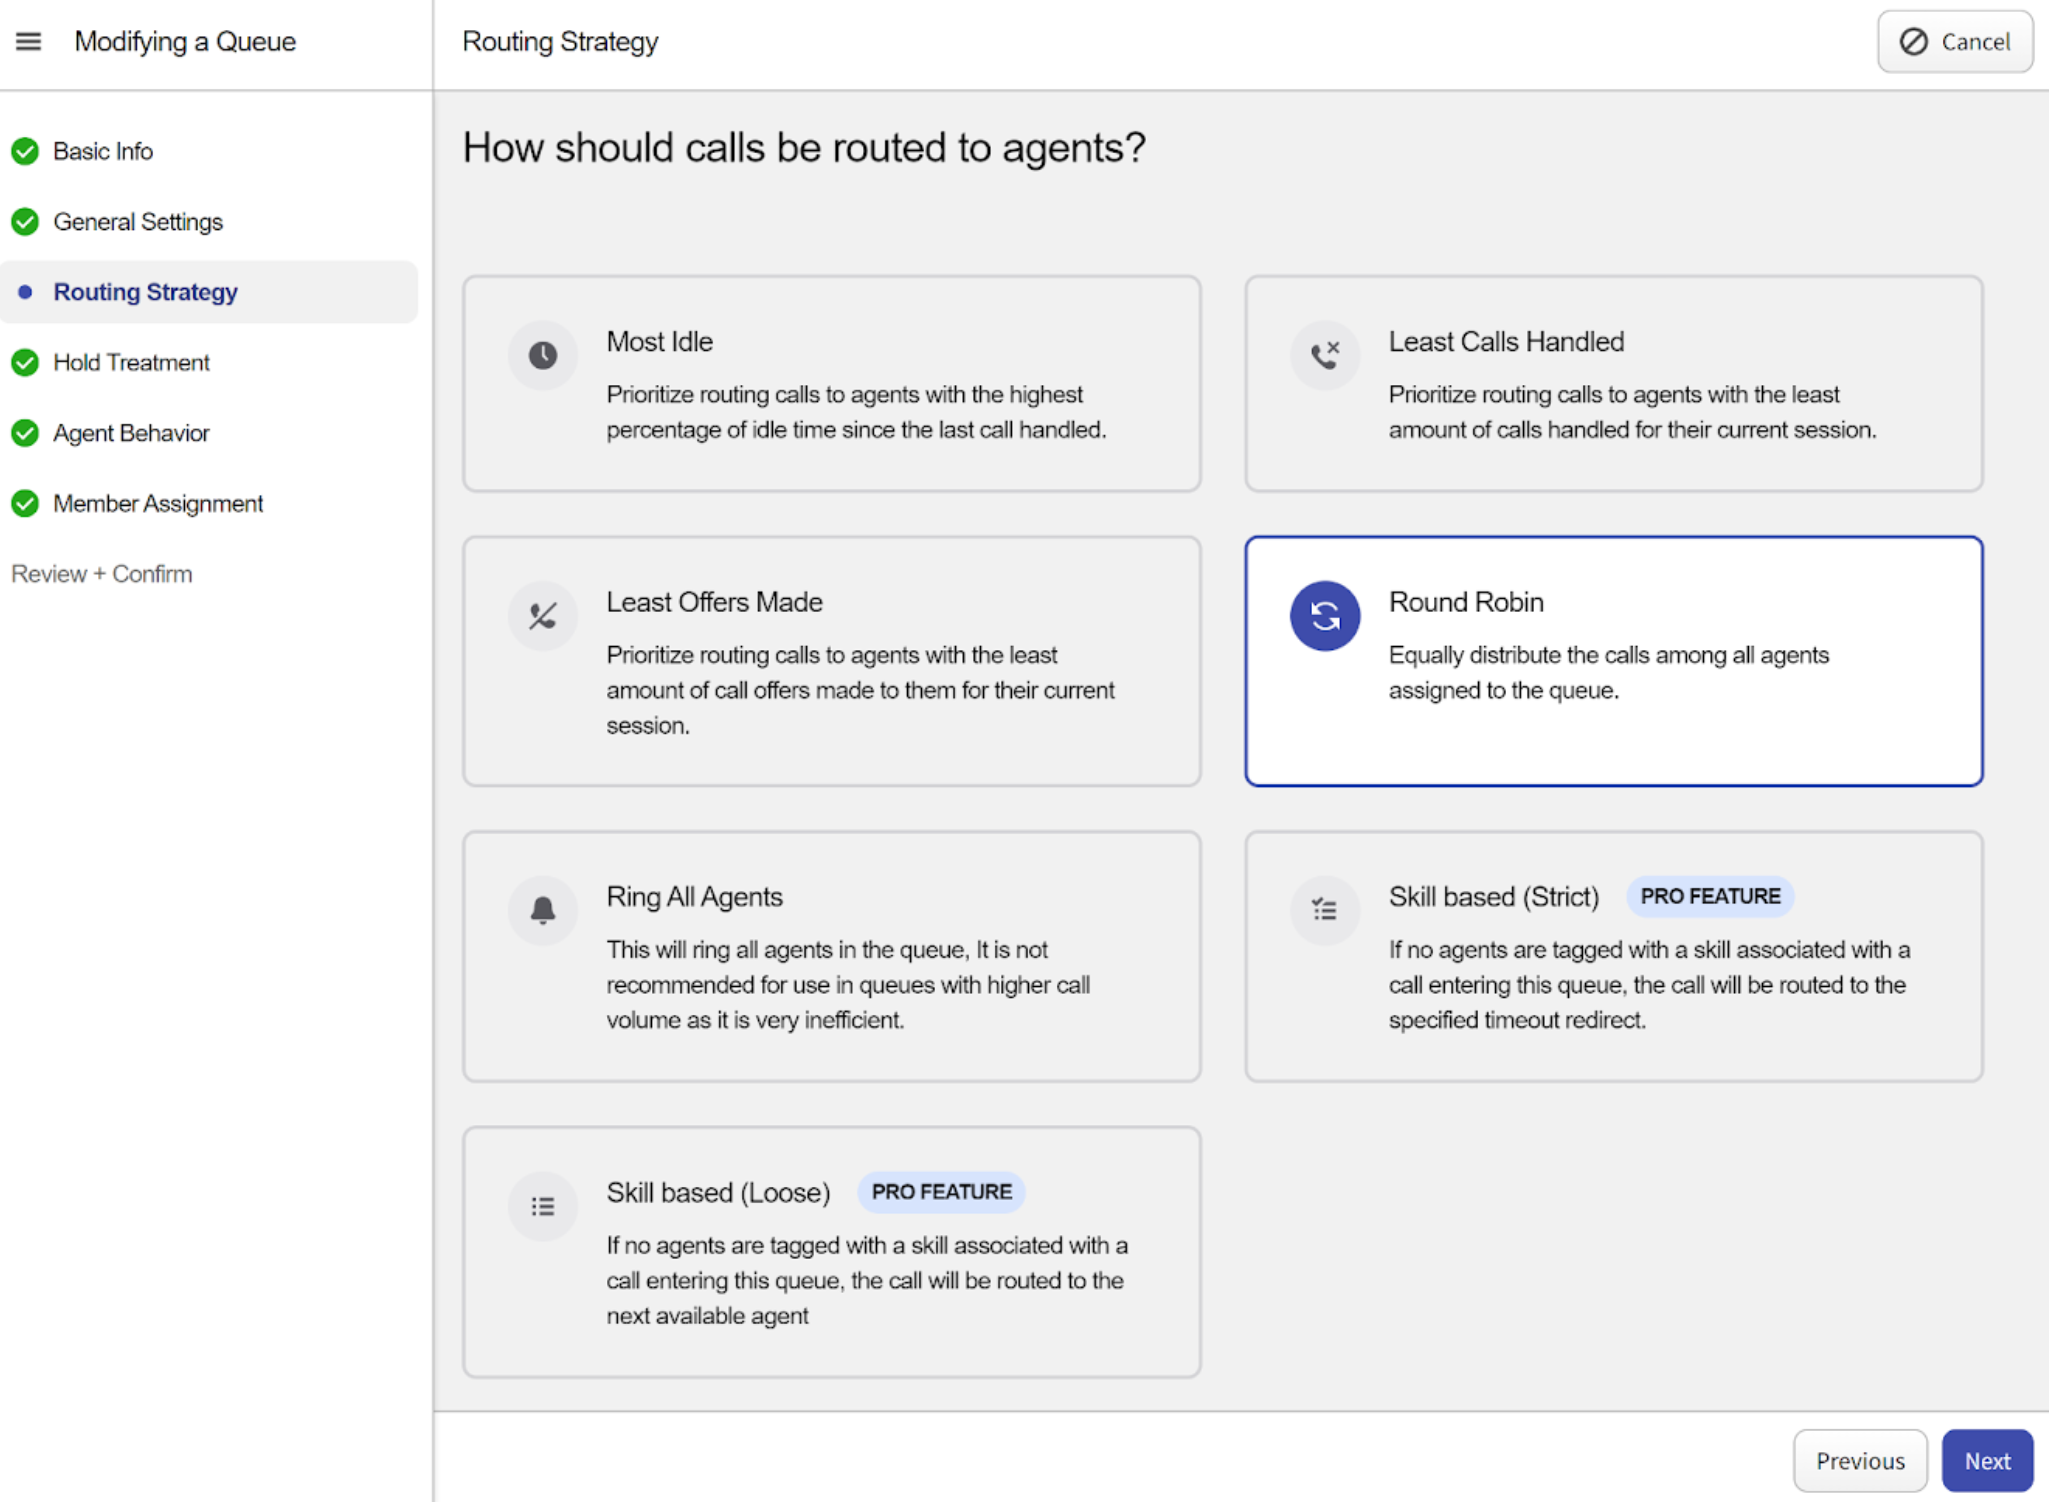
- Most Idle: prioritize routing calls to agents with the highest percentage of idle time since the last call handled.
- Least Calls Handled: prioritize routing calls to agents with the least amount of calls handled for their current session.
- Least Offers Made: prioritize routing calls to agents with the least amount of call offers made to them for their current session.
- Round Robin: equally distribute the calls among all agents assigned to the queue.
- Ring All Agents: this will ring all agents in the queue, It is not recommended for use in queues with higher call volume as it is very inefficient.
- Skill Based (Strict): if no agents are tagged with a skill associated with a call entering this queue, the call will be routed to the specified timeout redirect.
- Skill Based (Loose): if no agents are tagged with a skill associated with a call entering this queue, the call will be routed to the next available agent.
-
Hold Treatment Tab: here, you can design a media loop that will play for callers who are waiting to connect.
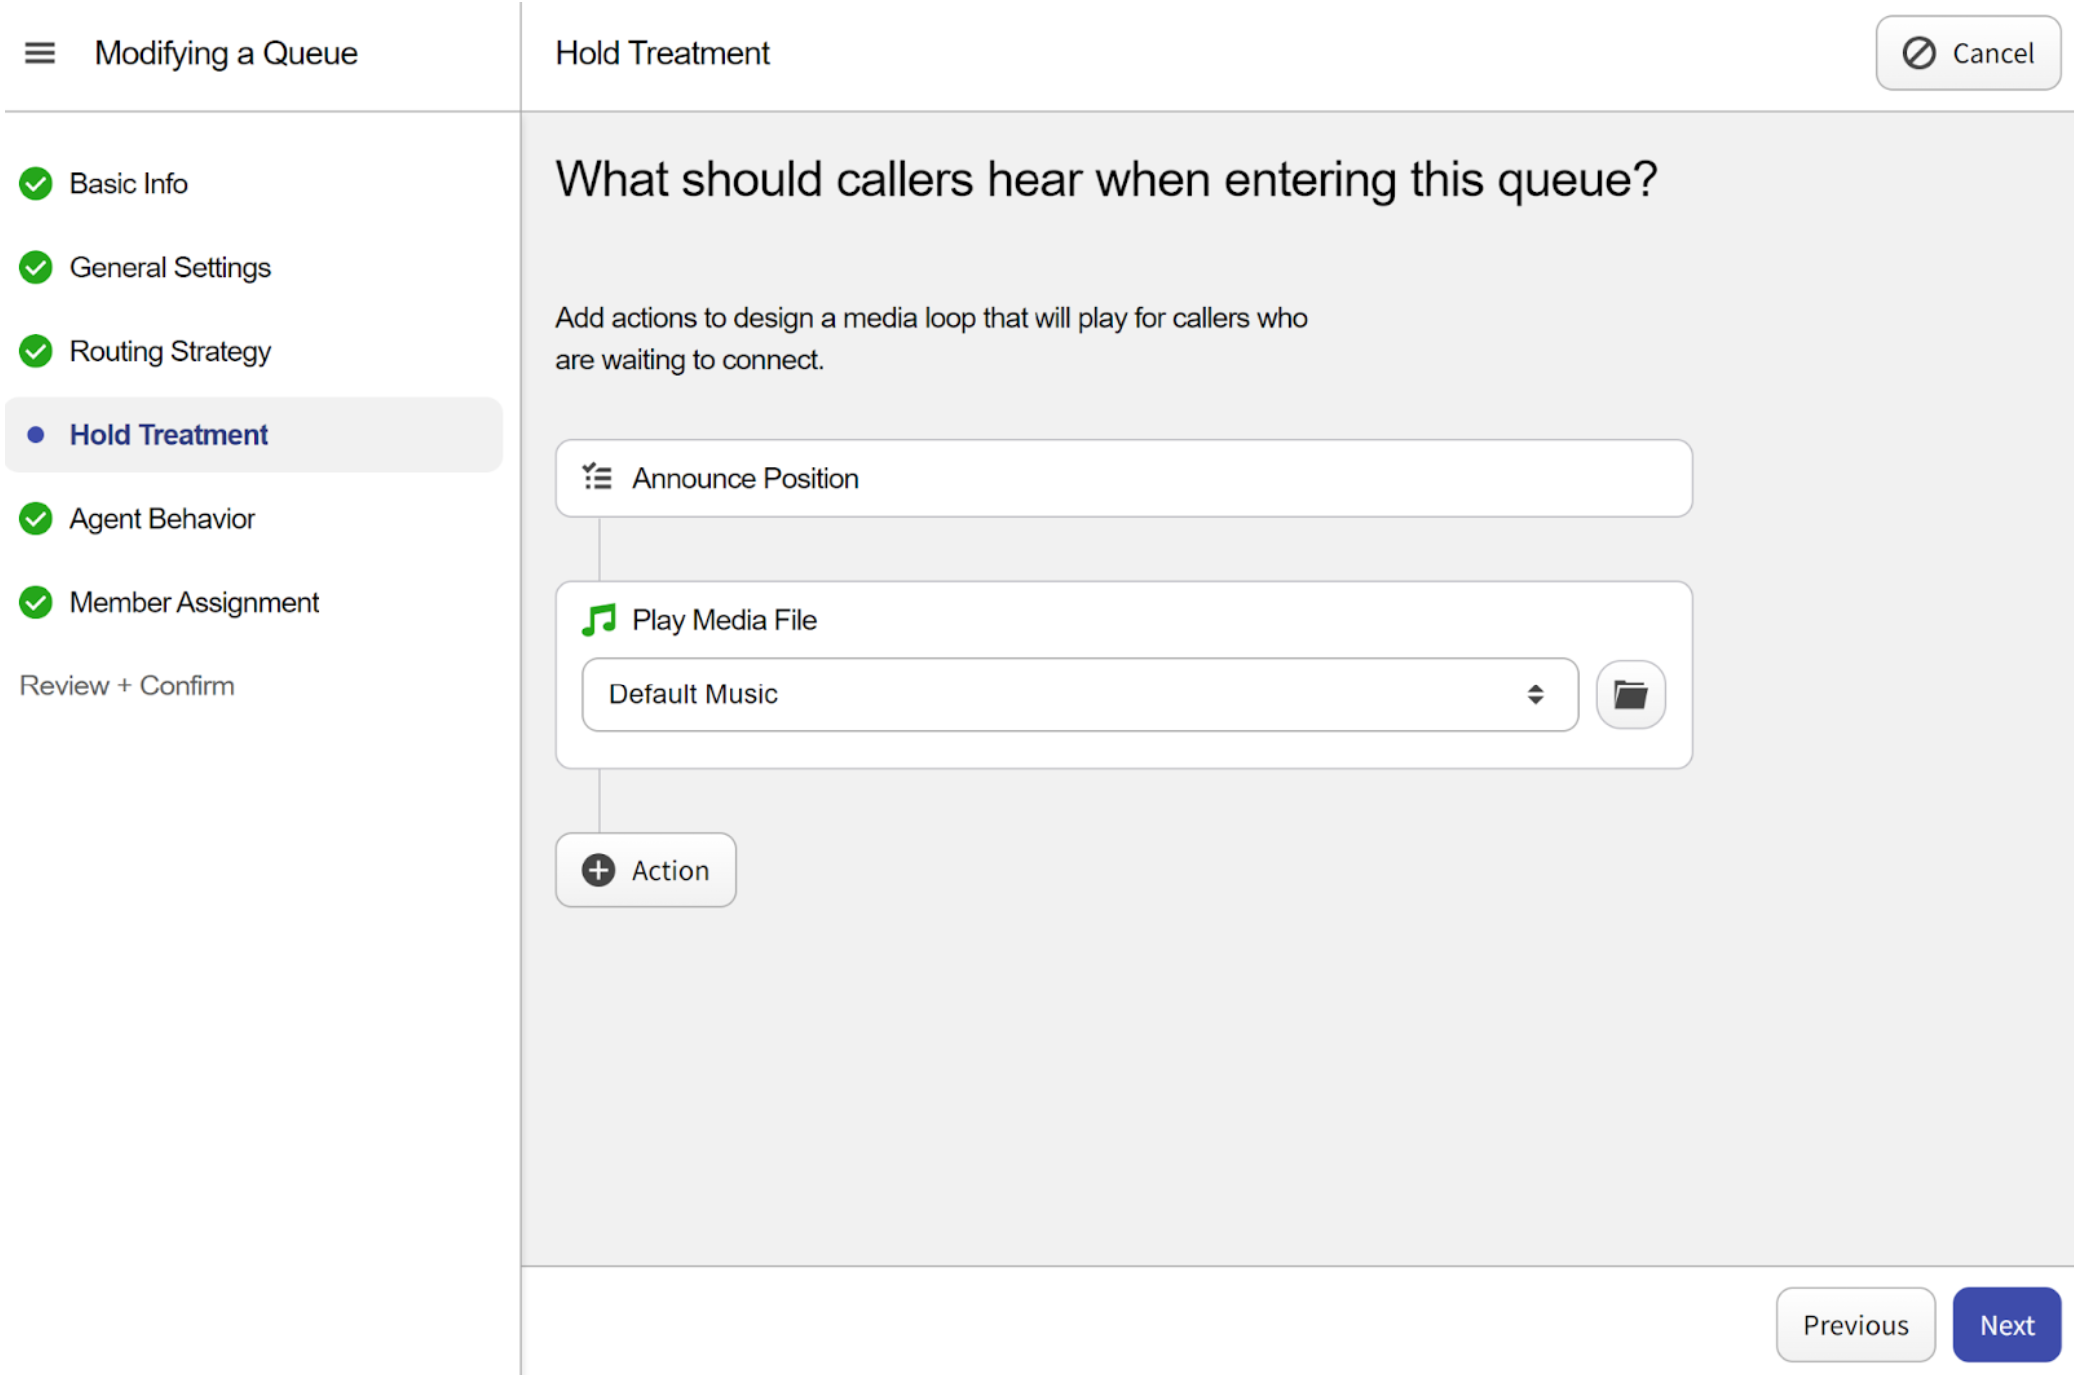
By default, the media loop constructor includes three elements: the “Announce Position” box, the “Play Media File” box, and the action box, which can be used to set other actions such as “Announce Position,” “Announce Wait,” “Pause,” or “Play Media File.”

You can drag and drop these elements to change their order within the loop.
-
Agent Behavior Tab: here, you can configure the way how the agents should handle the calls.
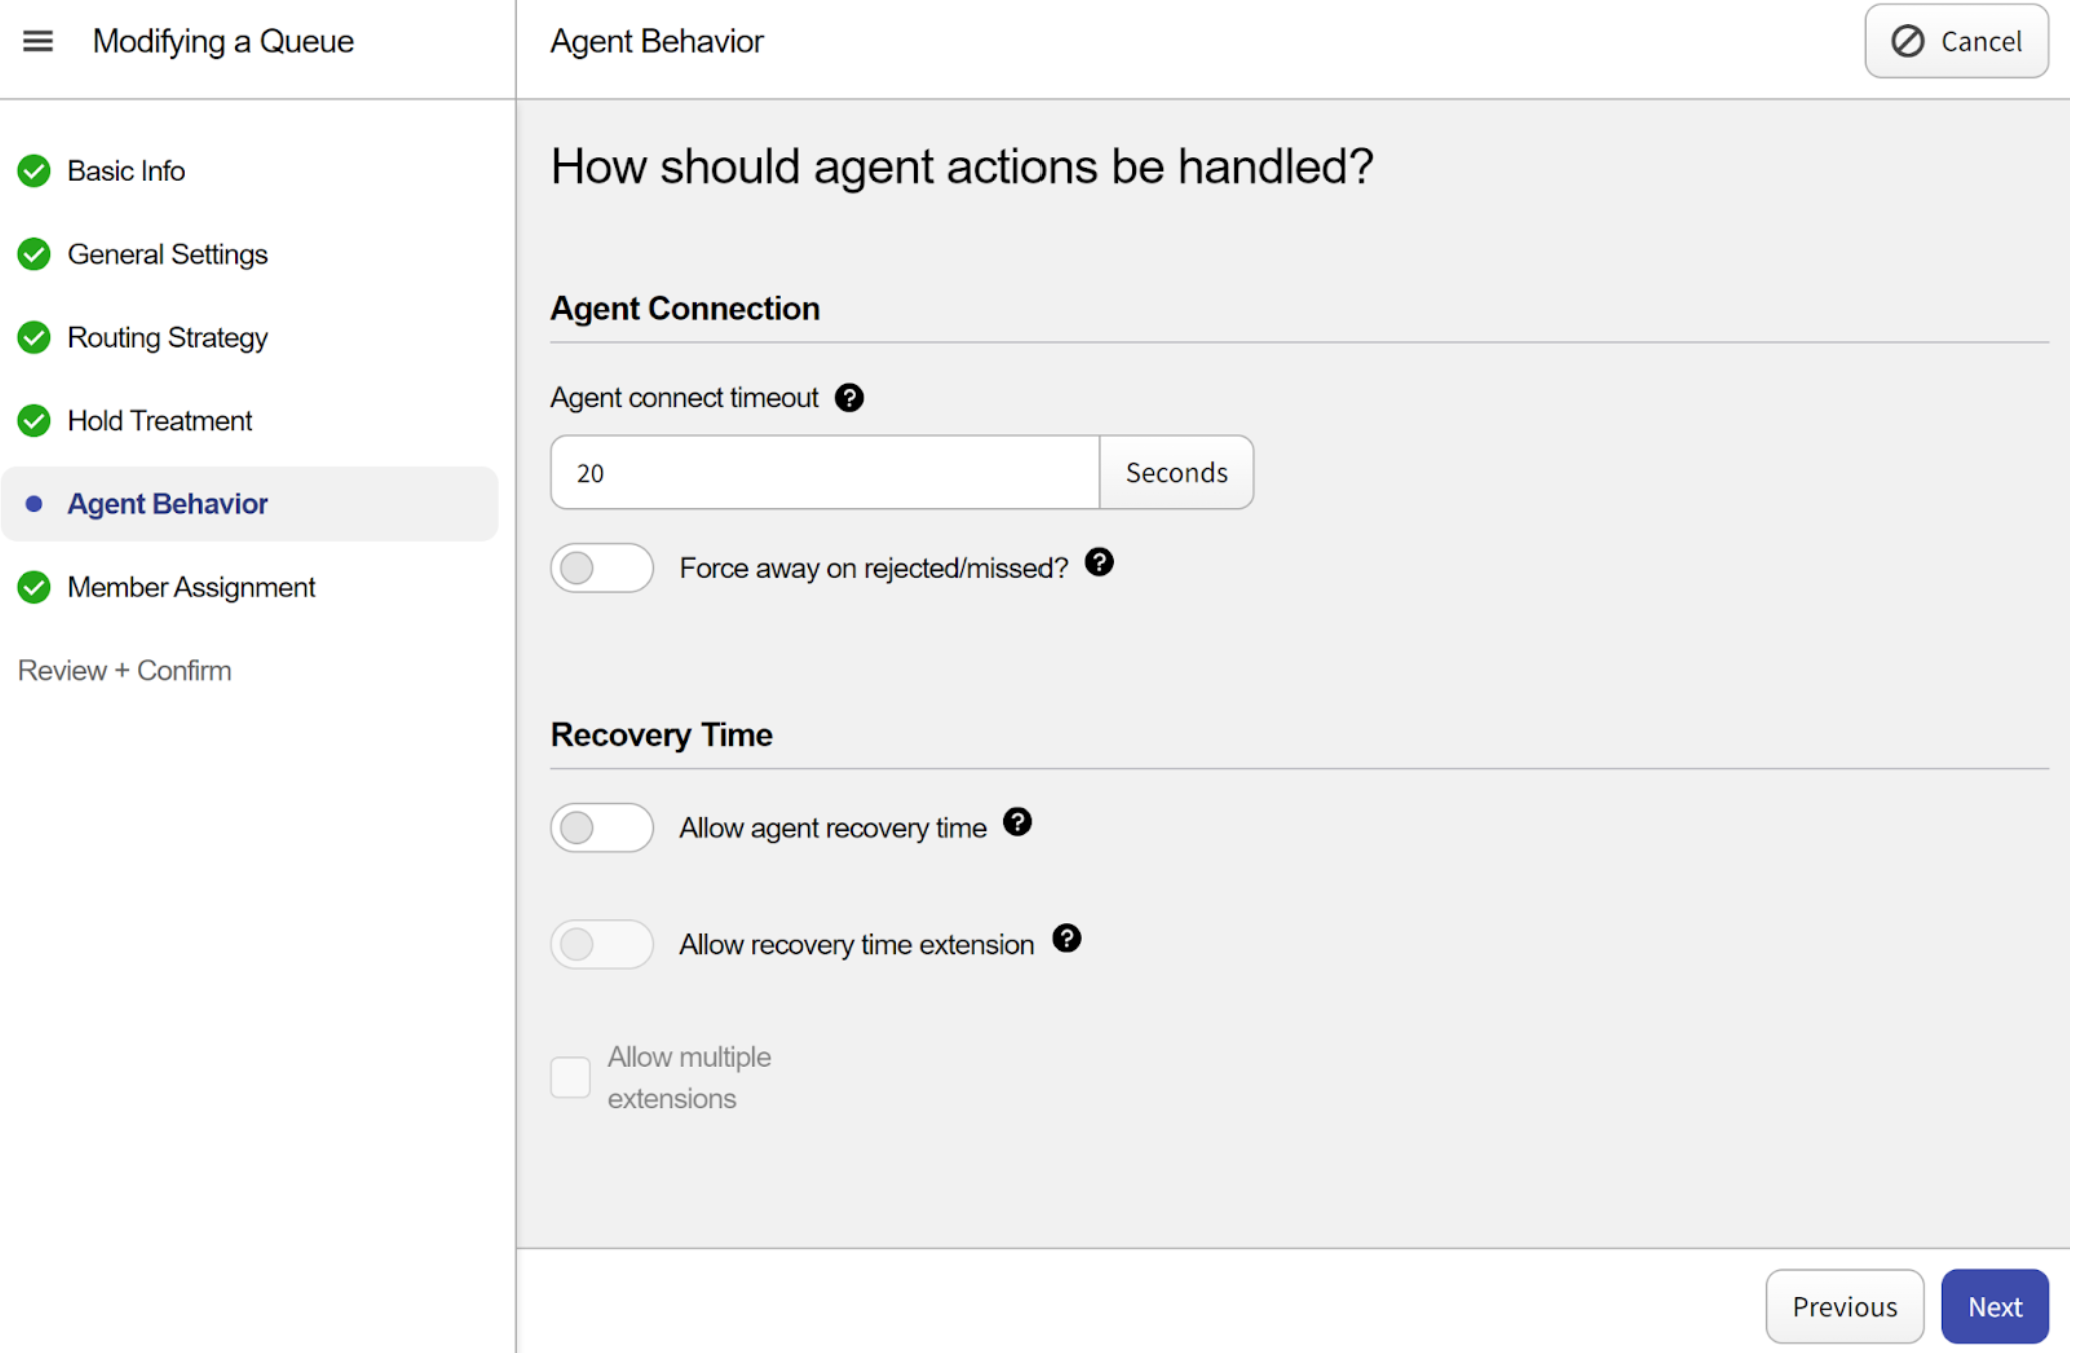
- Agent Connection Section: here, you can set up agents’ behavior.
-
Agent connect timeout: here, you can configure the duration of the agent connect timeout.
-
Force away on rejected/missed: if turned on and a recipient rejects a call, they will be forced to Away state.
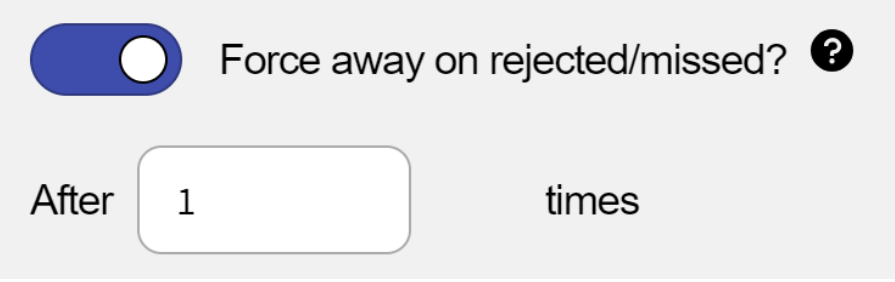
- After _ times: here, you can set up the number of rejections a call has to have before being forced to Away state.
-
- Recovery Time Section: here, you can set agents’ recovery time.
-
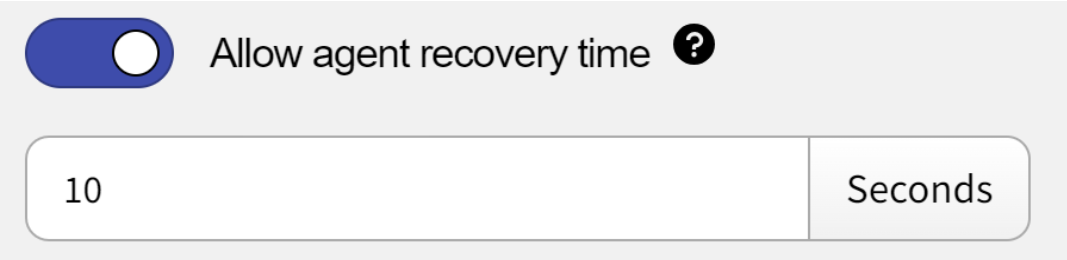
Allow agent recovery time: activating this toggle gives agents recovery time, which can be set in seconds using the field below. The recovery time starts after the agent’s call with the customer ends.
-
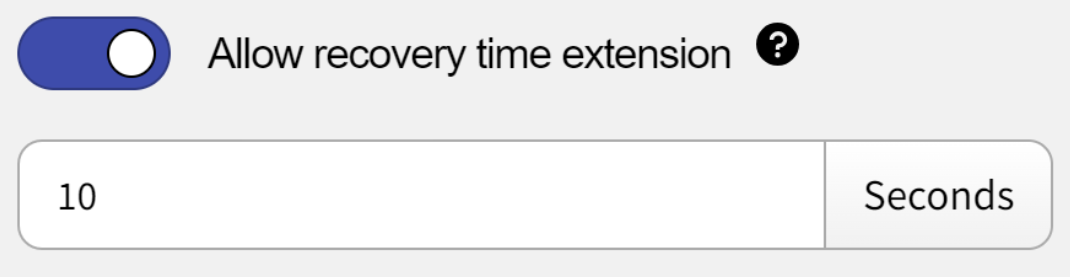
Allow recovery time extensions: enabling this toggle switch allows agents to have an extended recovery time. You can specify the additional duration in seconds in the field below.
-
Allow multiple extensions: by checking this box, you allow agents to have multiple recovery time extensions.
-
- Agent Connection Section: here, you can set up agents’ behavior.
-
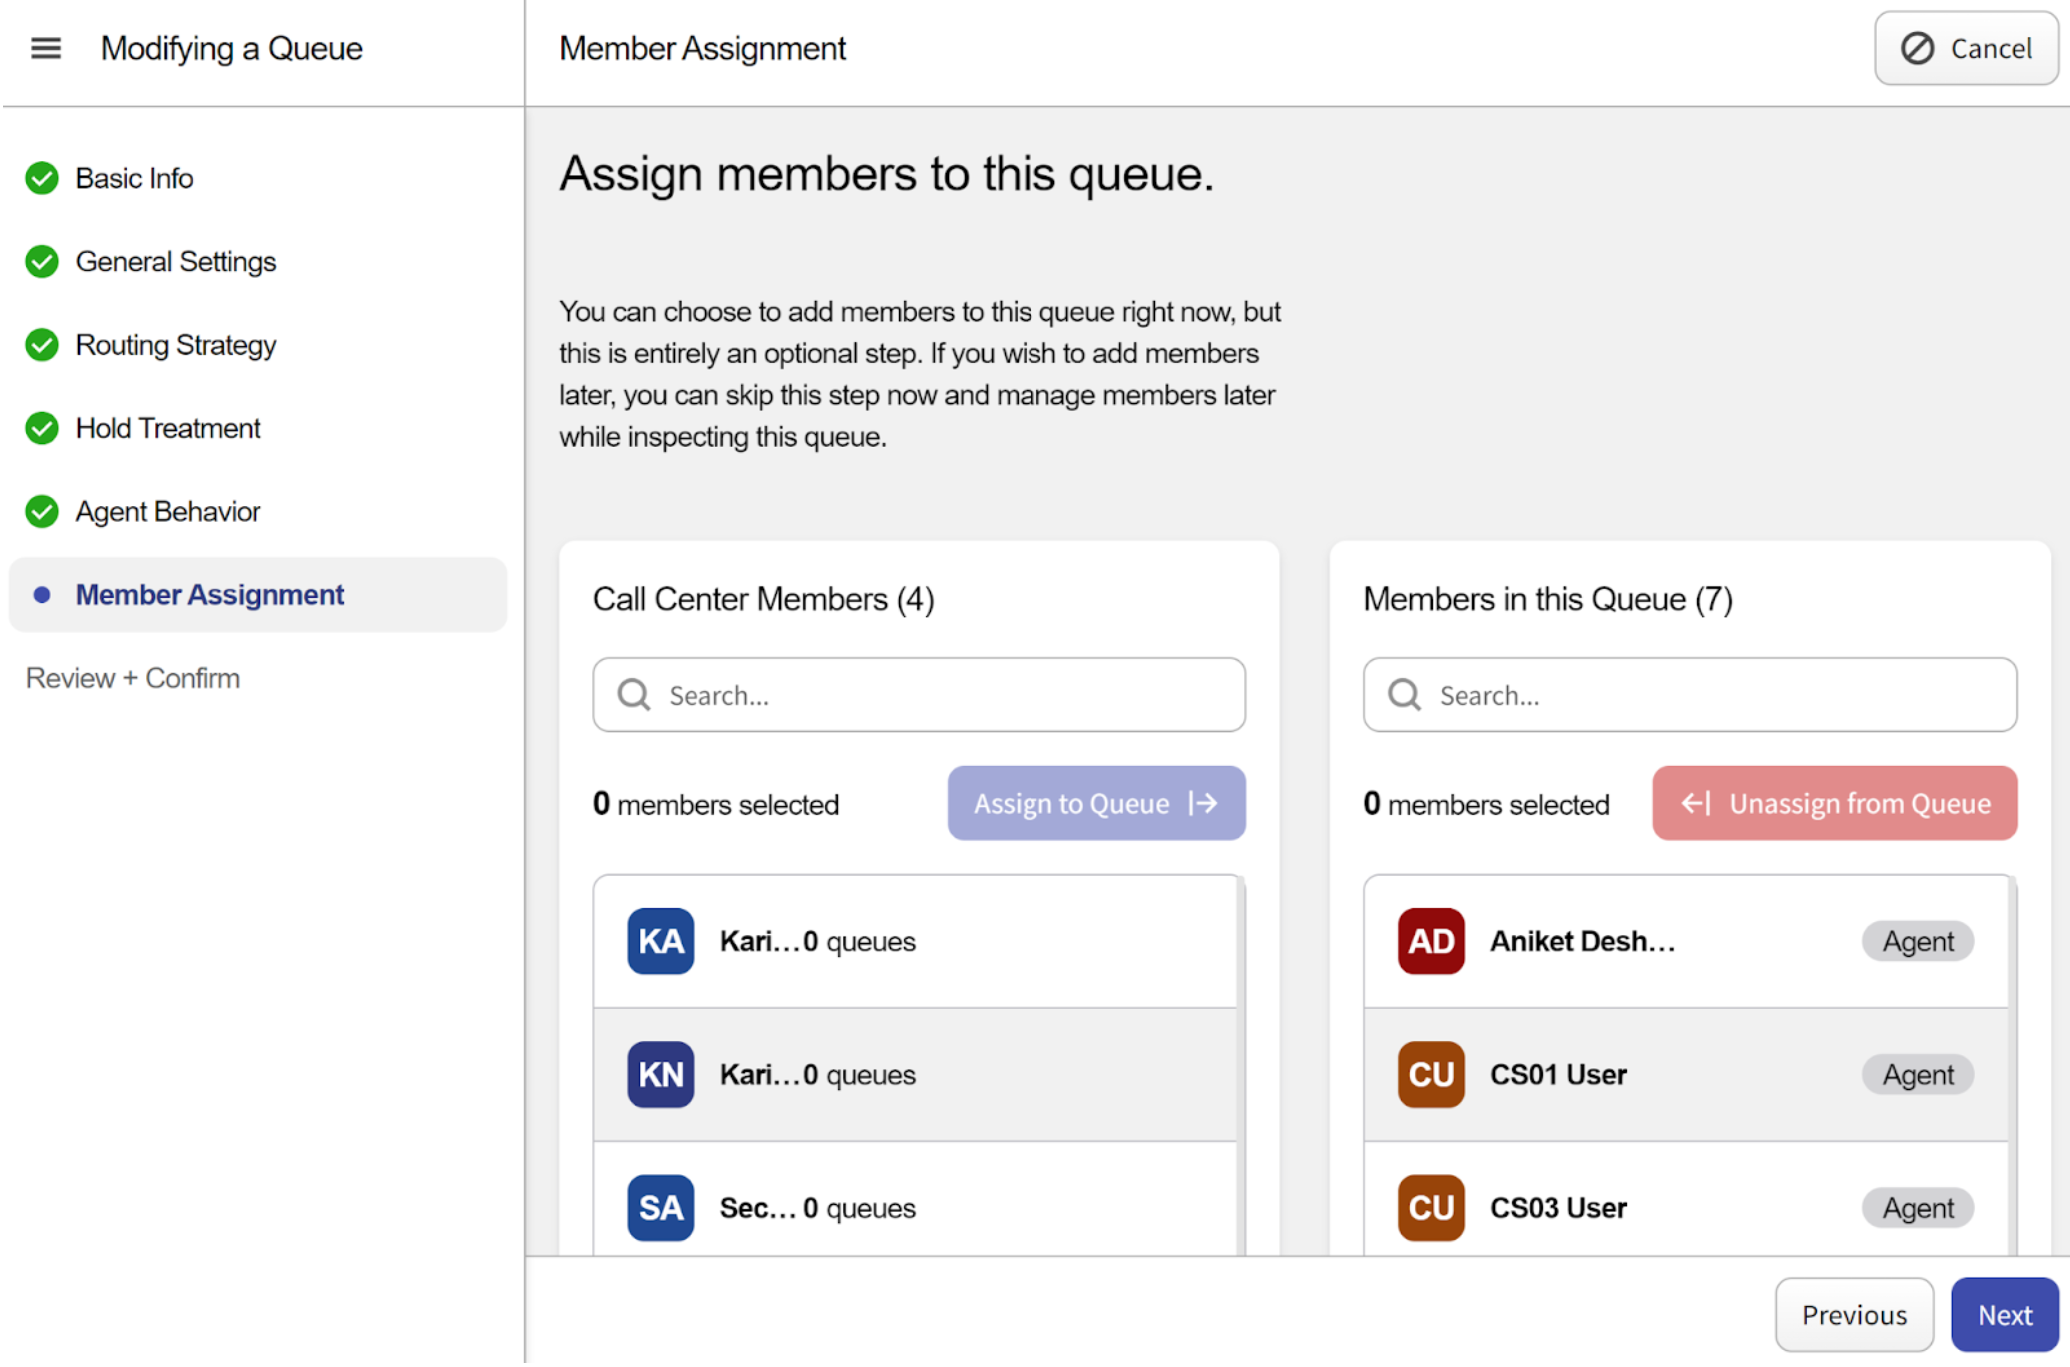
Member Assignment Tab: in this tab, you can manage the agents assigned to the configured queue. The agents in the left list represent all call center members, while the agents in the right list are assigned to this queue. To add a member, select an agent from the left list and click the “Assign to Queue” button. To remove an agent, select them from the right list and click the “Unassign from Queue” button.
-
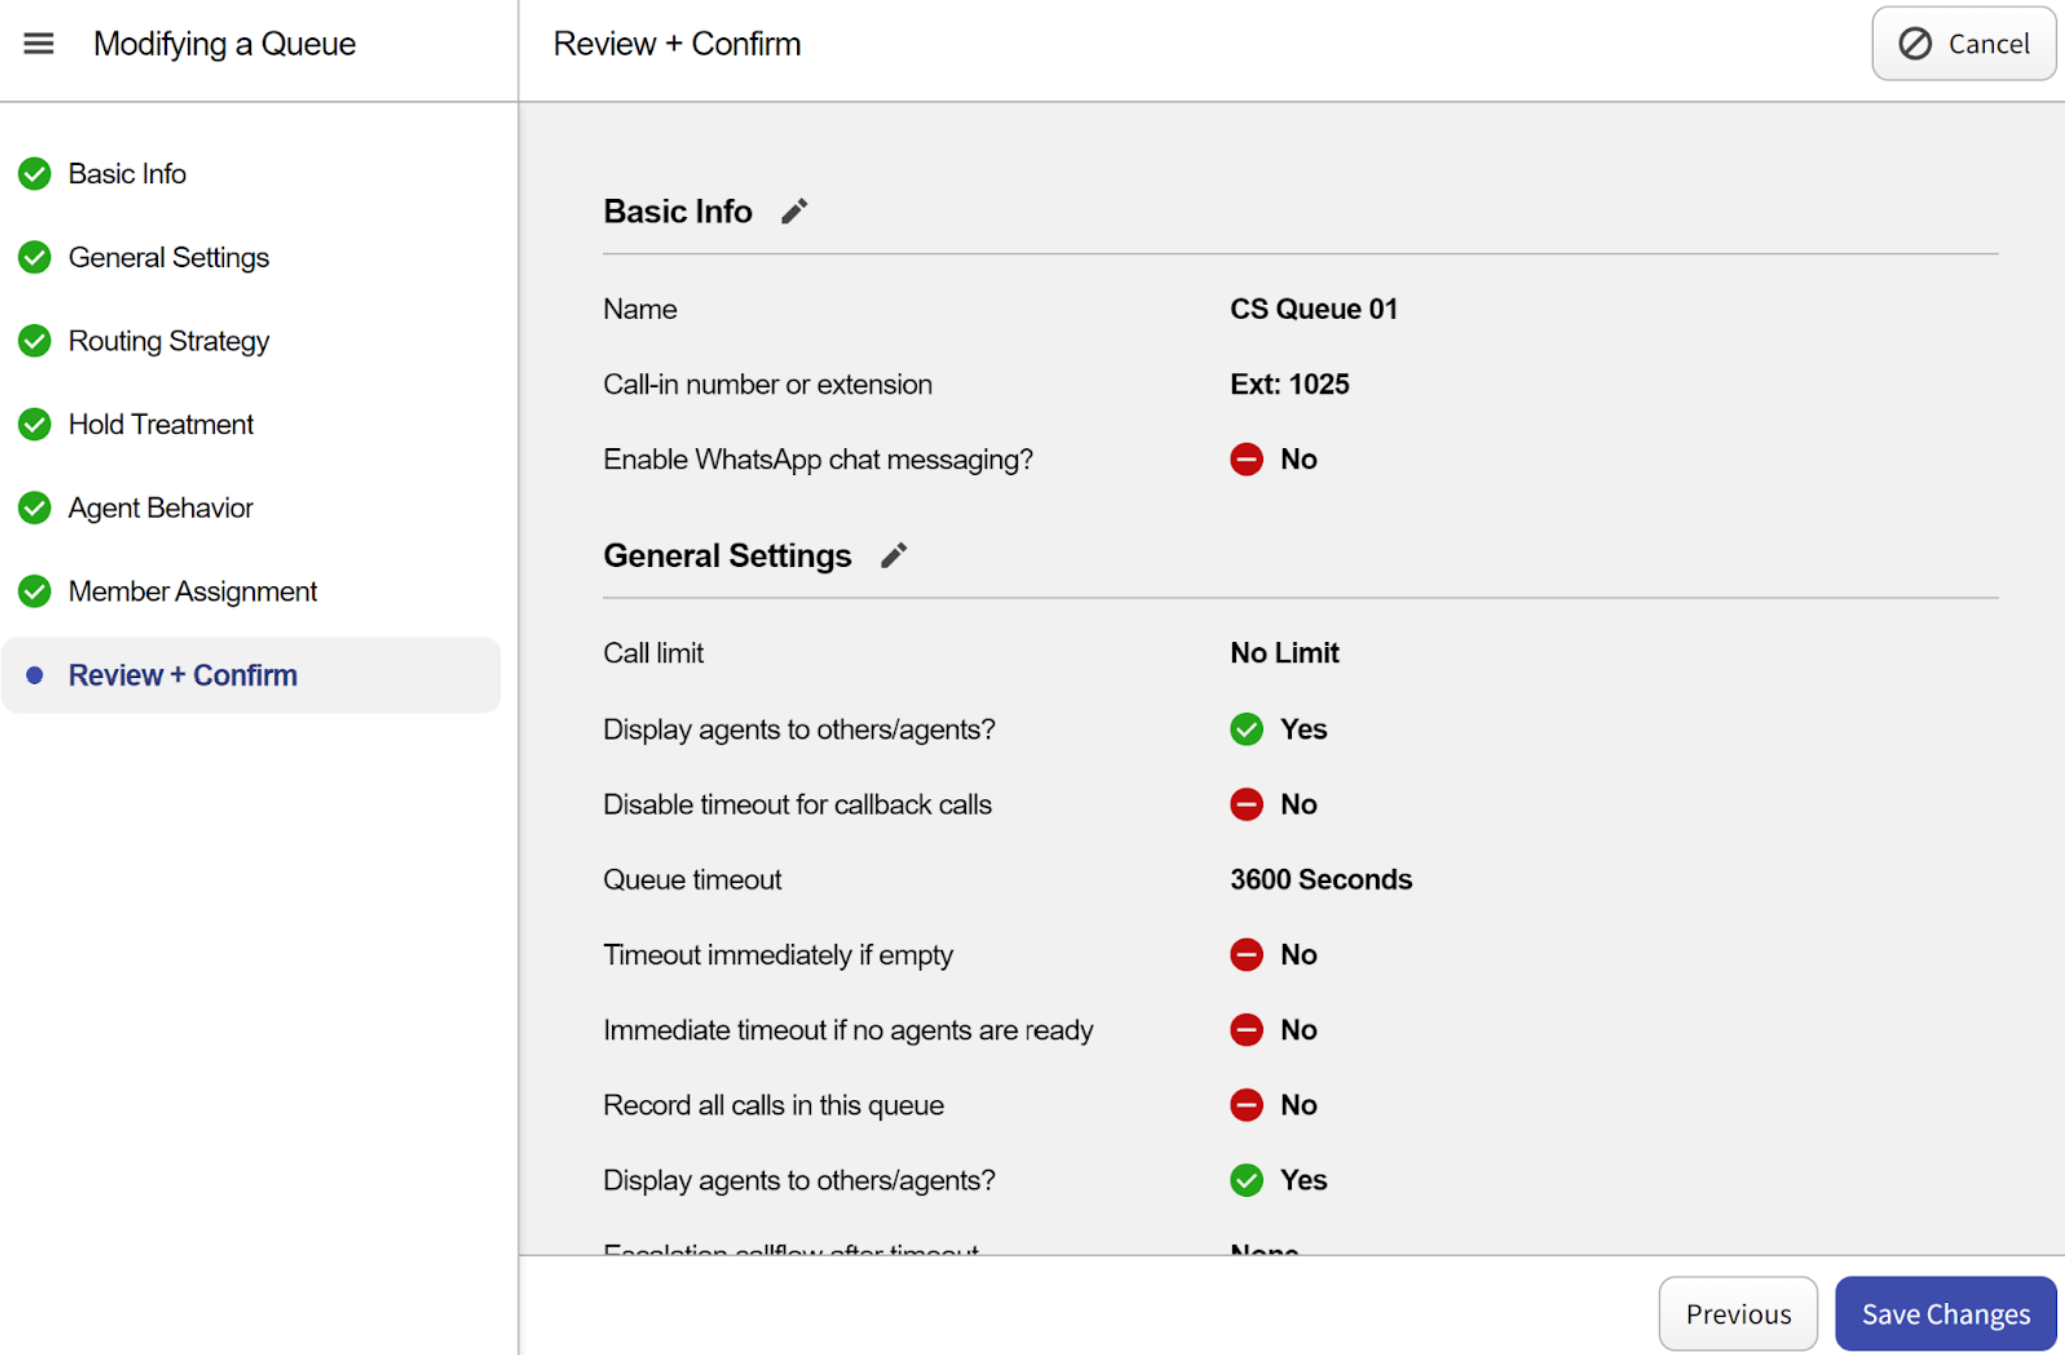
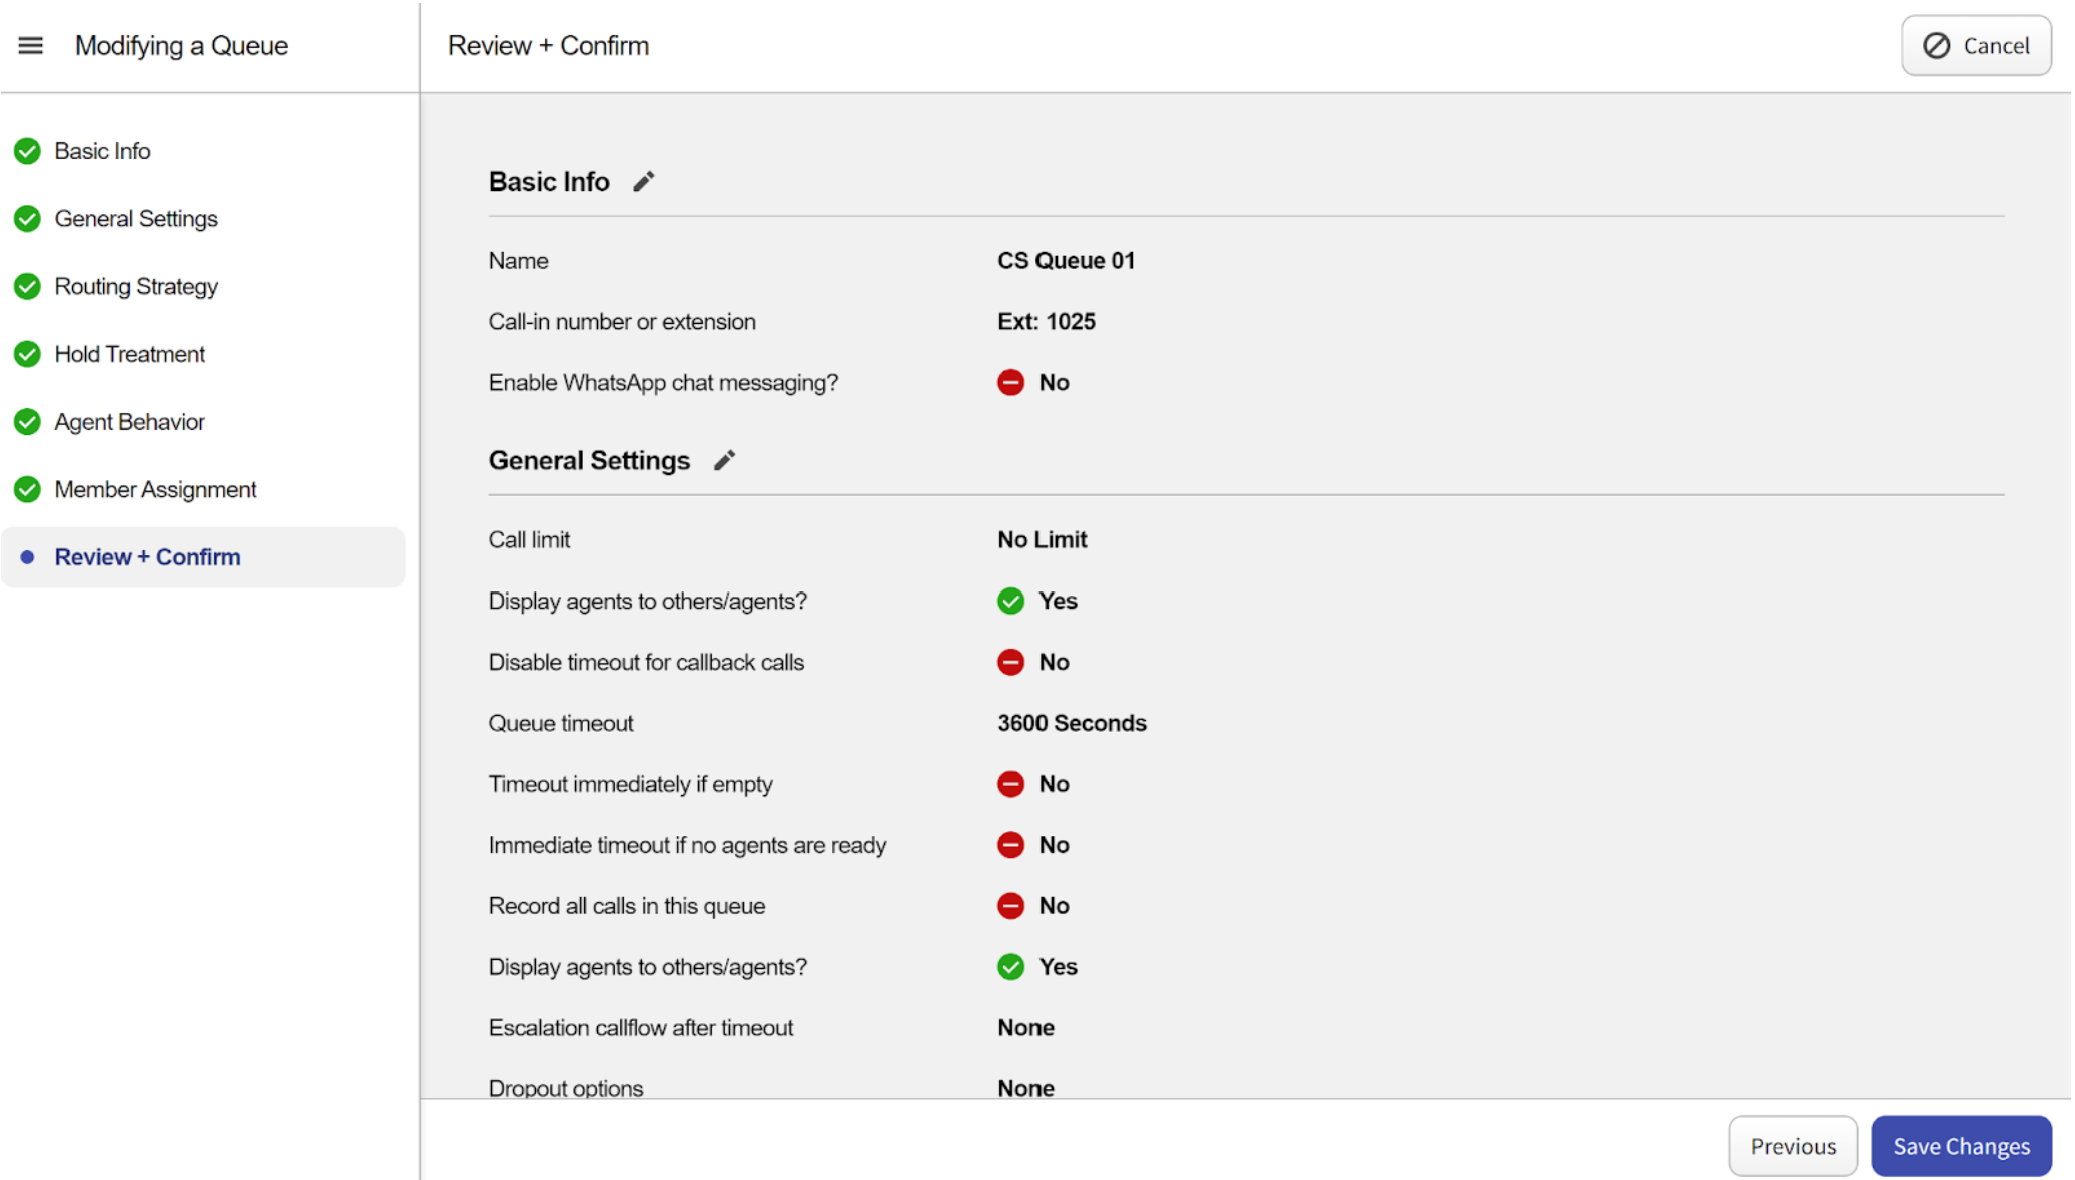
Review + Confirm Tab: this tab provides an overview of all settings configured in the previous tabs. You can review them here and click the “Save Changes” button to apply, “Previous” to go back to an earlier tab, or “Cancel” to discard all changes.