Setting Up Your Accounts
NOTE: This documentation refers to the Monster UI implementation
User Story
- Set up a user account and possible sub-accounts for your clients.
How it works
KAZOO is designed to support a Master account (often the Reseller Master) and a hierarchy of sub-accounts.
The Account Manager Wizard steps you through the basic steps for creating each account.
NOTE: It is recommended the master account is used only to manage the sub accounts and that your personal office account should be created as a sub-account also.
Before you start
Your Account setup process will ask some technical questions that may have long-standing consequences related to how your applications and calling infrastructure is installed. Please take a moment to read through this before you start, and to consider the following:
Do you plan to white-label your account?
If so, complete the branding and DNS mapping process that is available in our branding app before you set up the accounts. This way the account realm and other default pathing structures will be inherited.

For more information and a user guide on setting up white label URLs and branding, check our Branding App documents.
Will you be setting up sub-accounts?
If you want to create sub-accounts, it’s a good idea to map out your naming conventions and strategy ahead of time. One strategy people use is to include the sub-account name as part of the account realm naming string. (see below).
What Service Plan will you be using for this account?
If you are an administrator, you will be asked to identify the service plan you want to use for this account.
While you work in the Wizard
Use the left NEXT button to step through the setup process. If you need to go back to an earlier section, ONLY use the navigation bar to the left to move back and forth between sections. If you try to use your browser’s back button it will not recognize your last window within the application. Your new account will not officially be created and saved until you finish the wizard.
The Accounts Setup Wizard
Opening Page
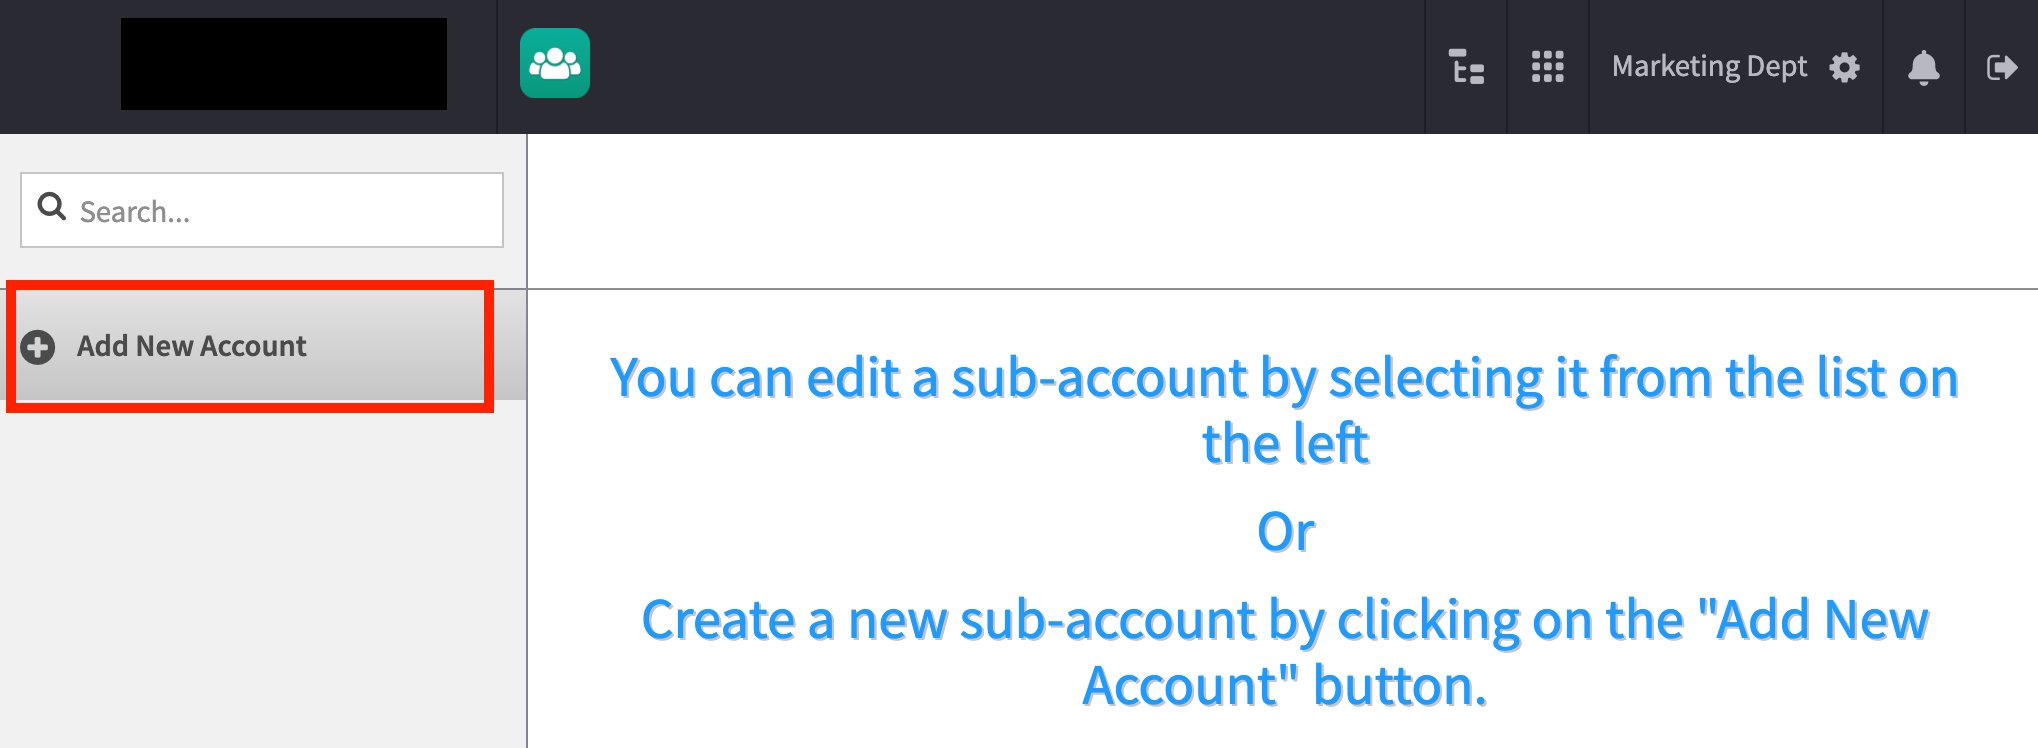
This is the opening page for the Account Wizard. As it states, select the Add New Account button to the left to start a new account.
General Settings
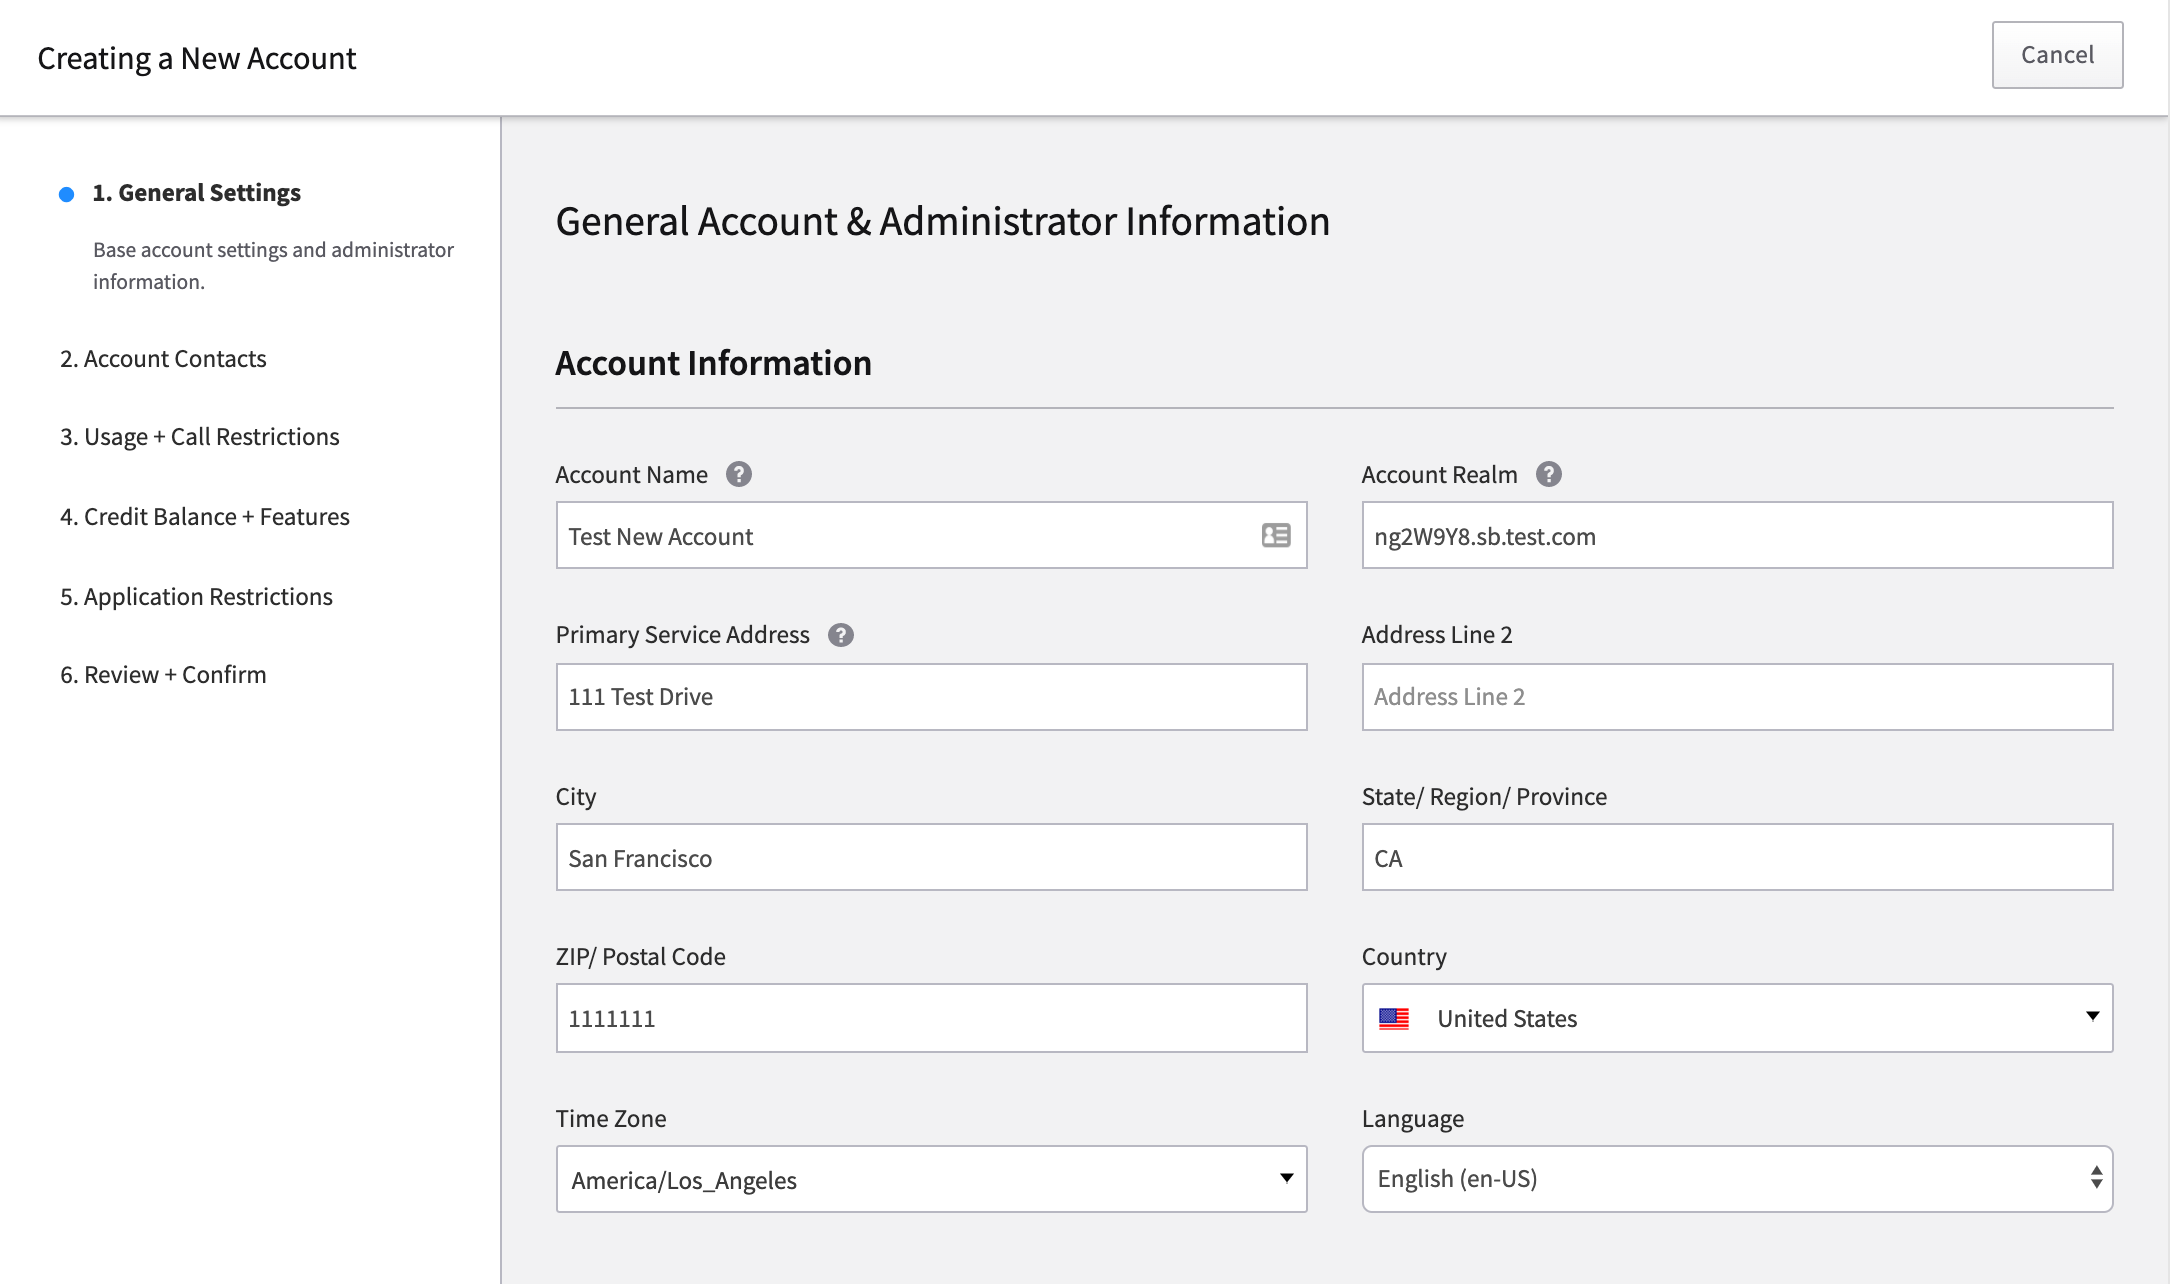
Add Account Information Enter the core information for your account.
Notes:
- Account Name Generally best to use the company’s name, a shortened version of their name or an acronym from their name. A DID does not provide easy recognition of who the account belongs to. It will also be used in reports and will be used on the login page by all users of that account. So simple, short and recognizable are recommended.
- Physical Address Information You MUST include a physical address for each account you create.
- Account Realm Value The Account Realm will be used by all the account’s phones in registrations and potentially for sending faxes. By default, the realm is auto-generated by the Create Account Wizard and is a domain name that will be matched by wildcard A and MX DNS records.The first part of the auto-generated name is a random string, like “8dfjd6”. If you are managing multiple accounts, it may make sense to rename the string so you can identify each account separately. Remember, if you are planning on setting up white label / custom branding DNS values, you will want to do that before you set this value and copy your newly created realm.
Add Administrators Administrators have additional access to applications and some settings, including setting up new users, assigning access rights, adding devices for users, and activating application access for their account members. Choose a user from the company that you are creating the account for that will have access to managing all internal aspects of their account and be able to see everything for all the users.
Note This is an optional step. Users can be designated Admins via the user settings in SmartPBX or the Account App.
Account Contacts
Enter the contact information you want related to this account.
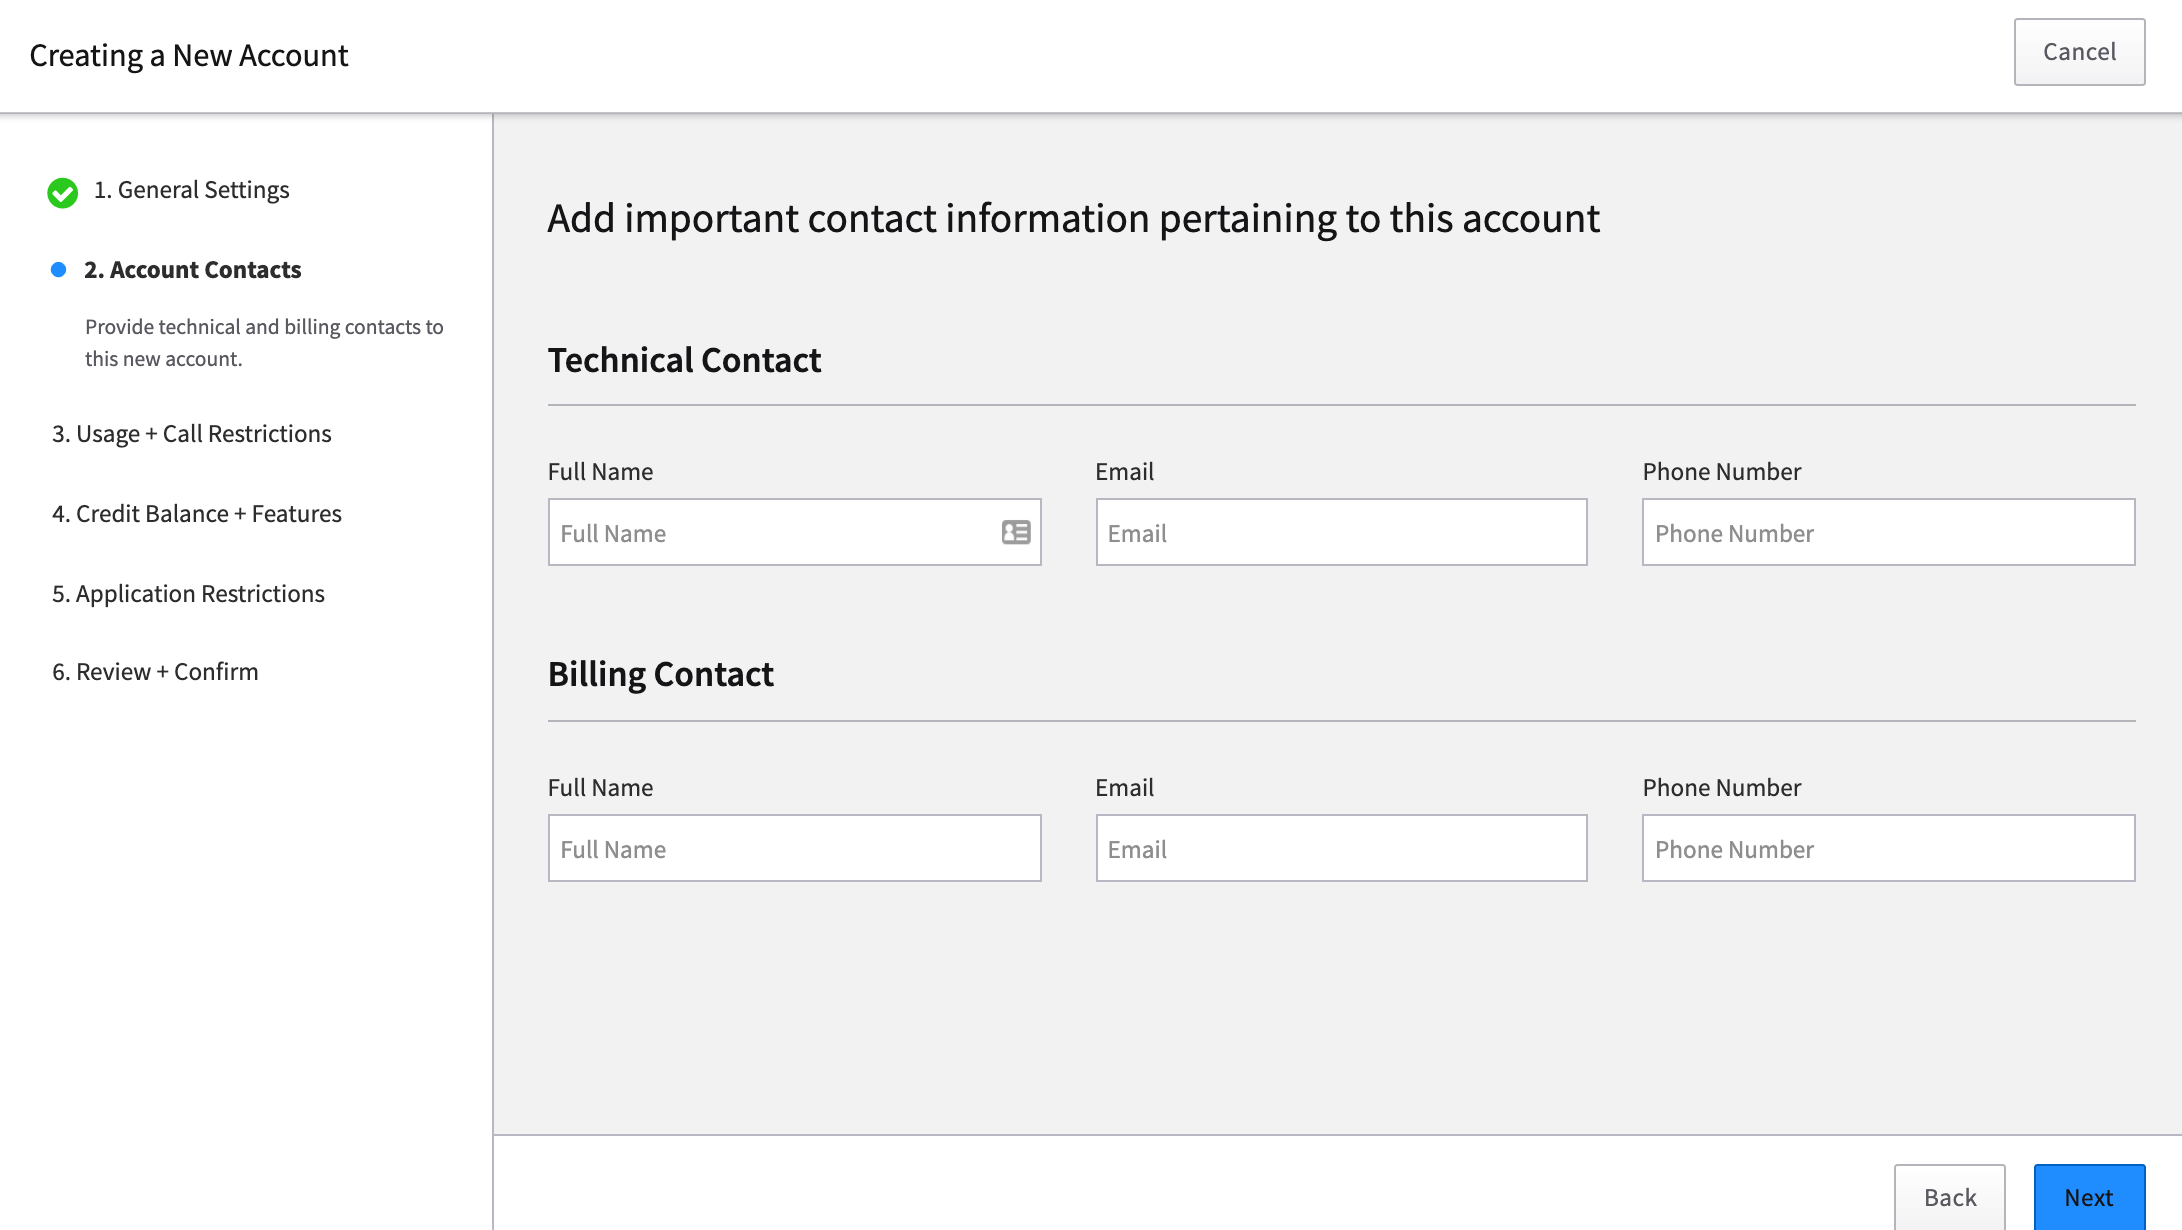
- Technical Contact Assign your first point of support for technical questions here.
- Billing Contact This information will be used to send usage and related billing summaries.
Select Next
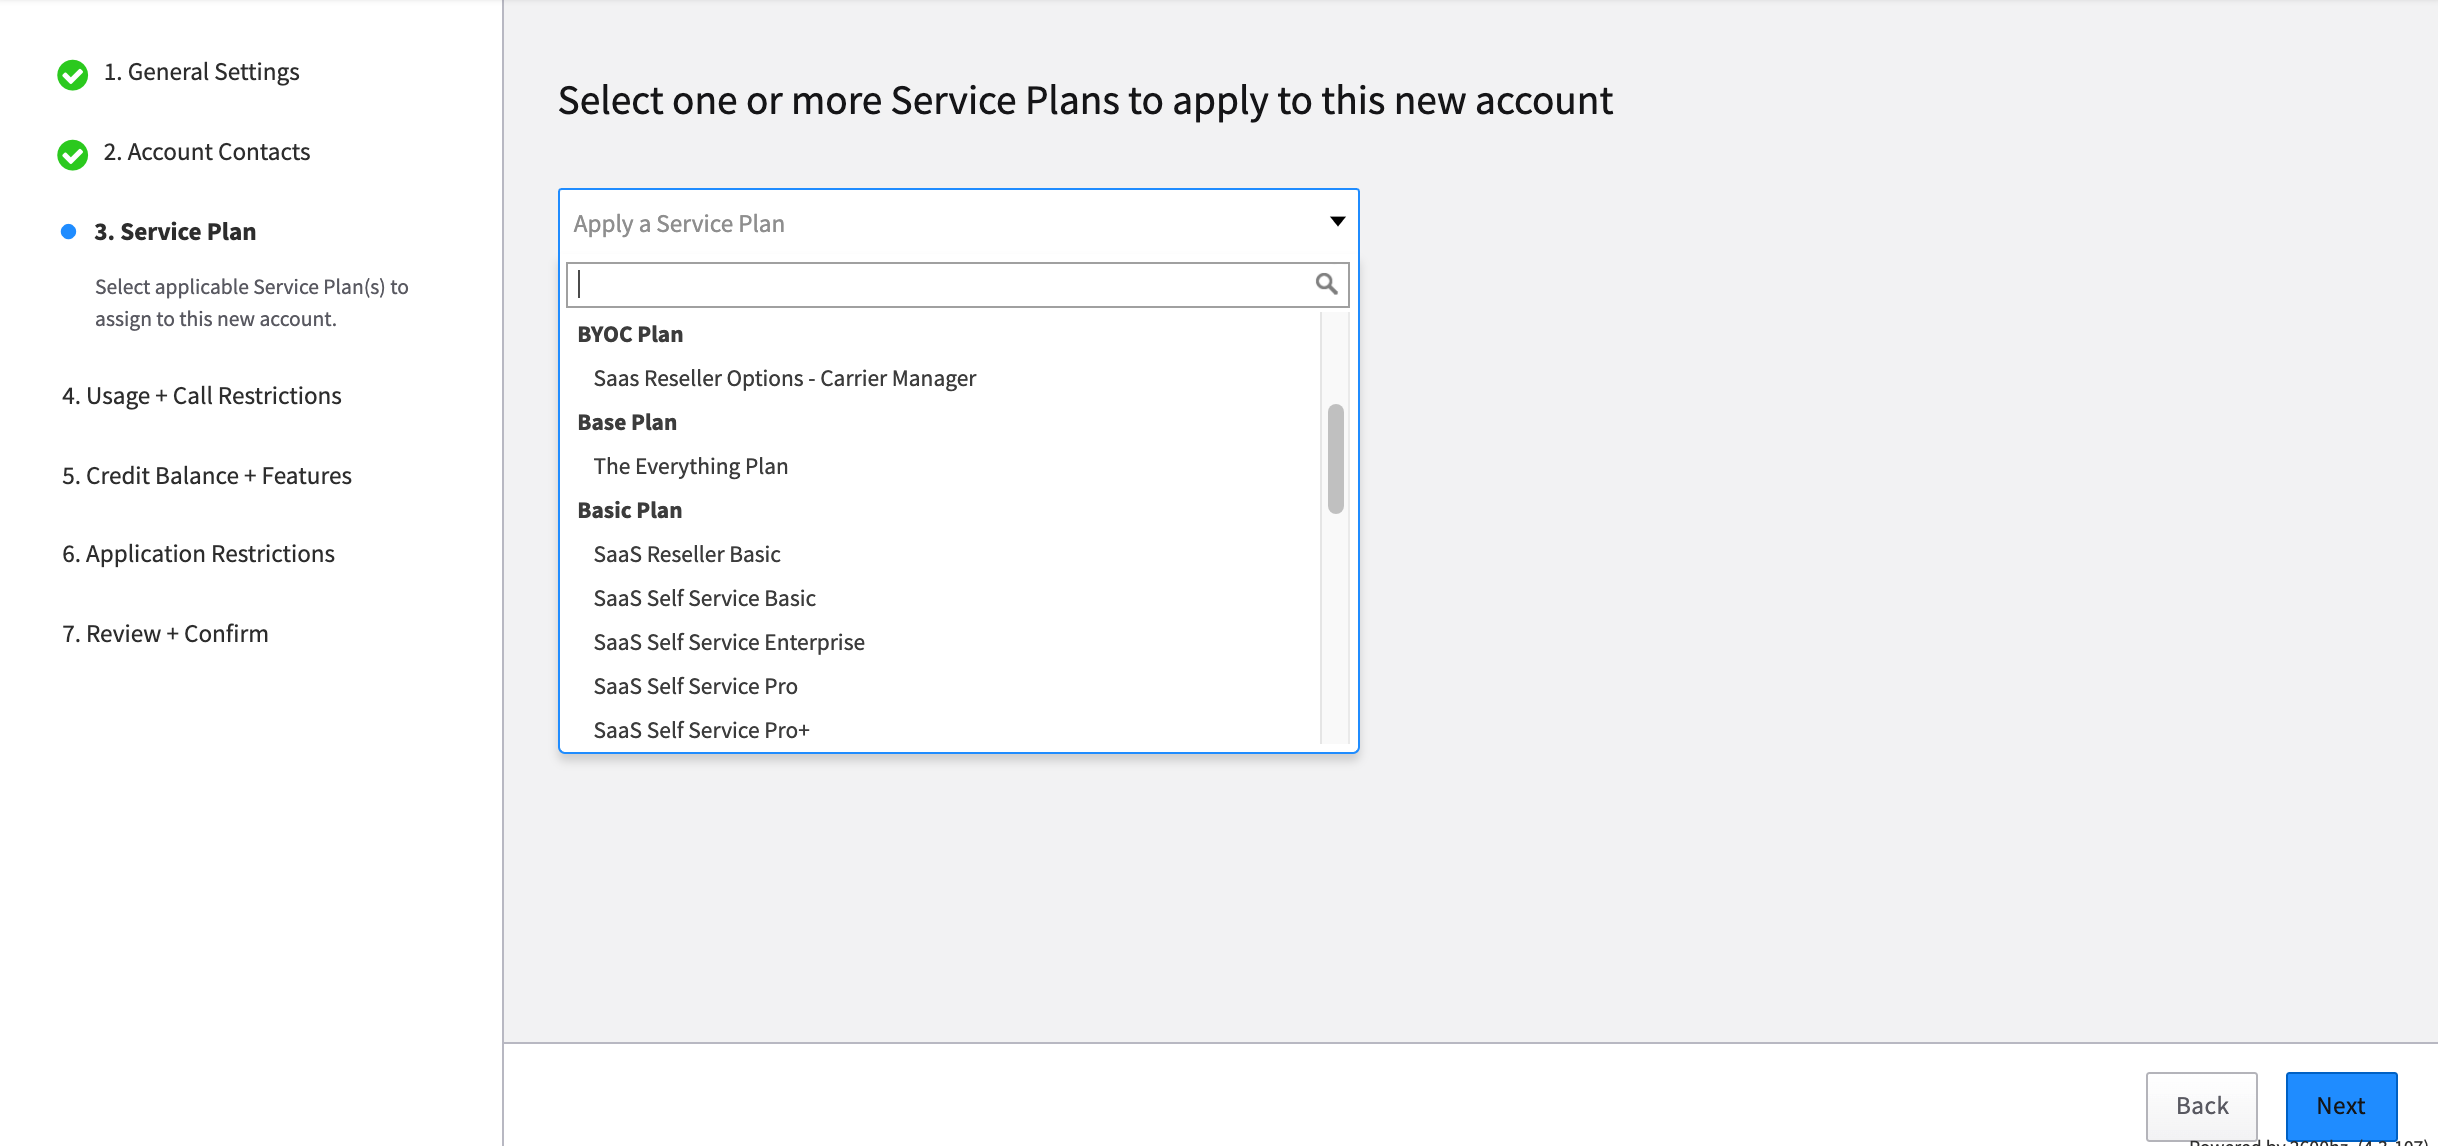
Service Plan This section will be visible only if you are set up as an administrator for the account. Choose a service plan for your account.
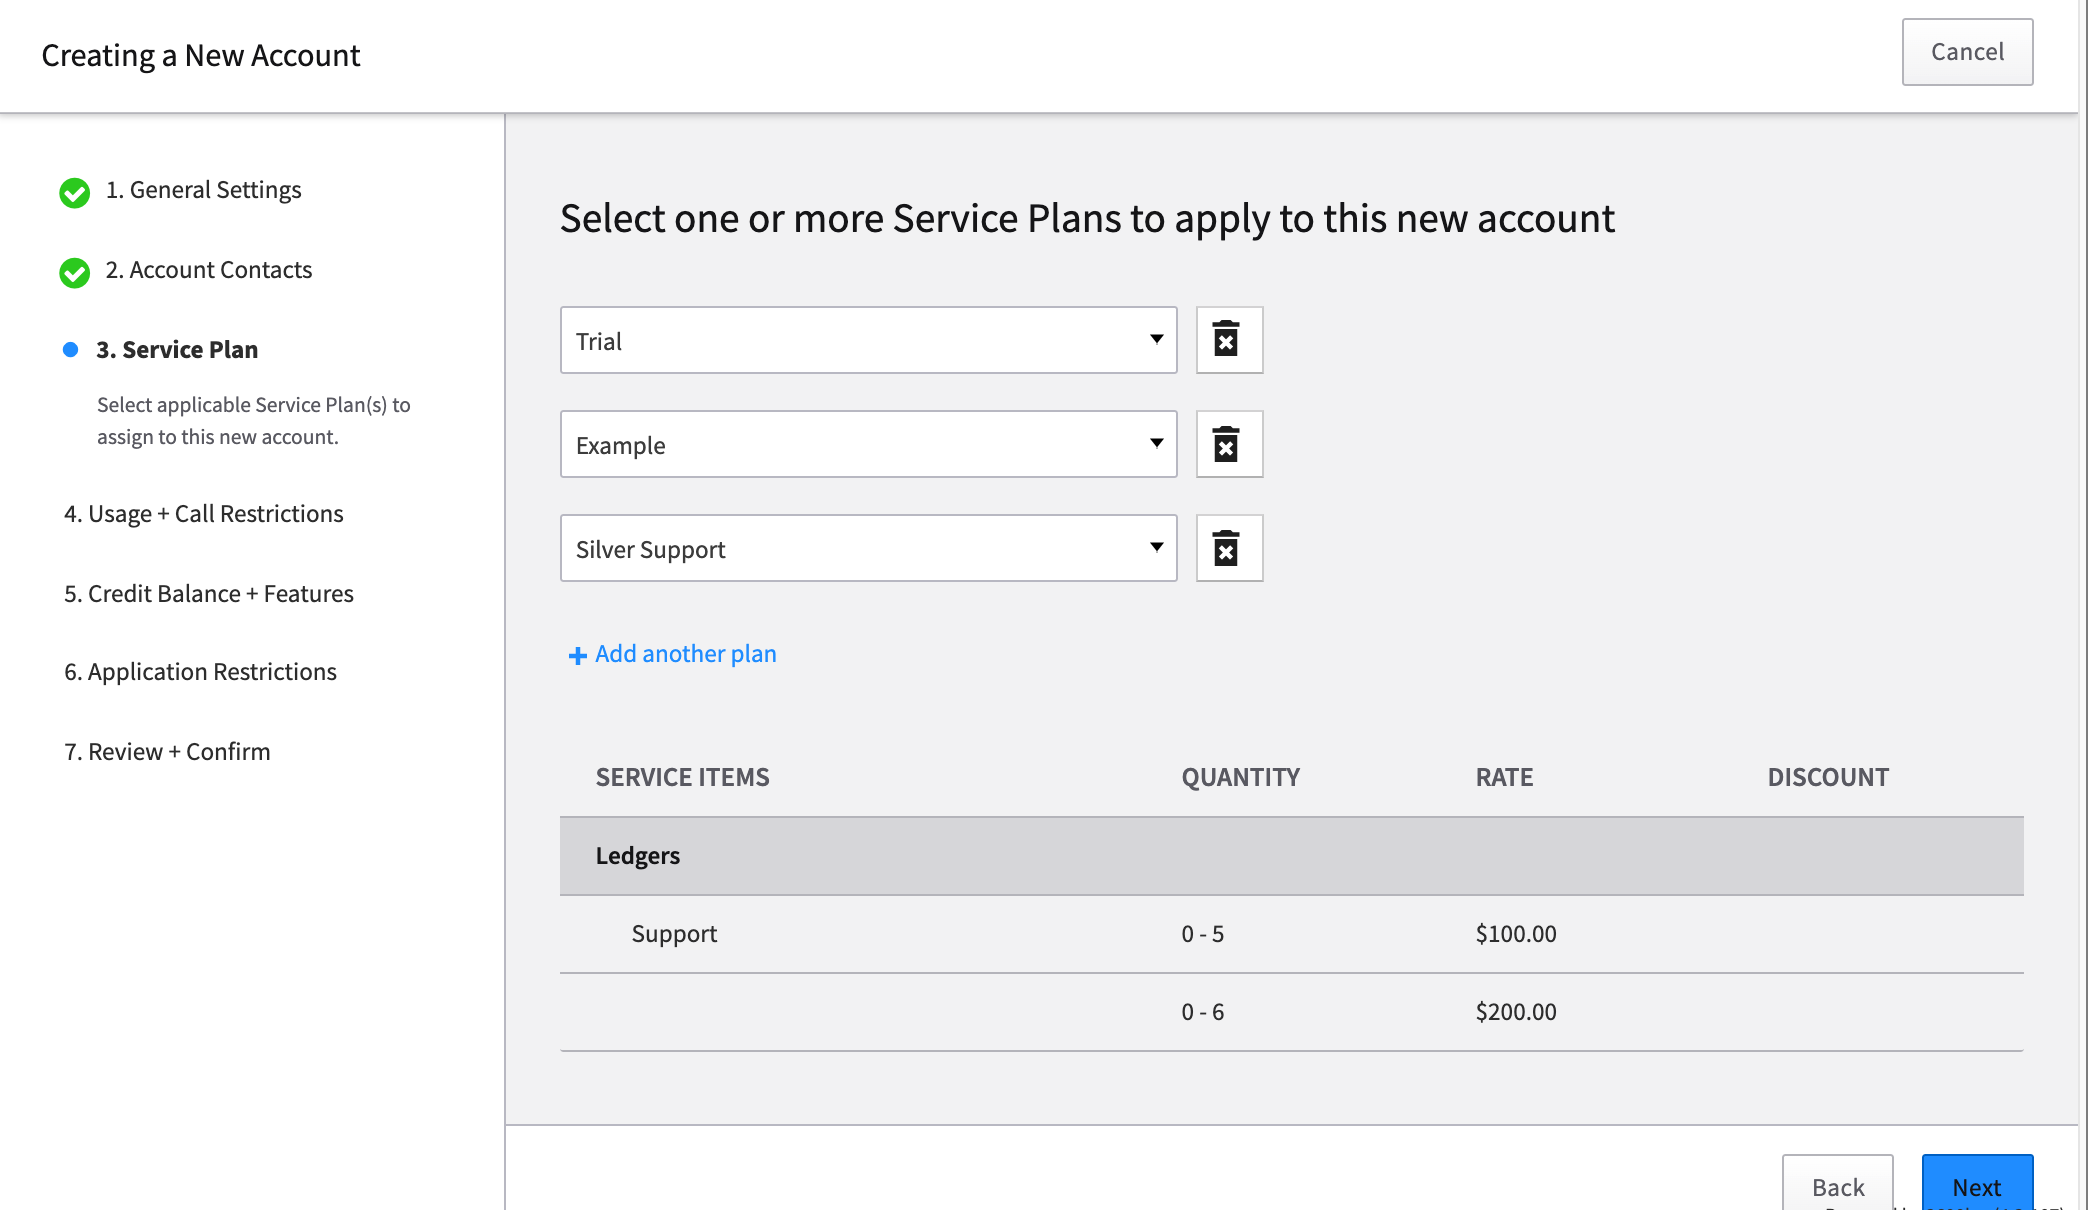
Once you have chosen one or more plans, you will see a summary of the billing rate that will be charged.
Usage + Call RestrictionsTrunk Limits Trunk limits define how many calls can be sent and/or received simultaneously. An incoming Trunk Limit set at 4 for example, means that only 4 incoming calls will be handled at once. Any additional calls will be directed to an automated response.
A Trunk is like a physical phone line. Only one call can be active for each trunk. Inbound Trunks can only handle calls inbound from a carrier, Outbound Trunks can only handle calls outbound to a carrier, and Twoway Trunks can handle calls to or from a carrier just like a physical phone line. Trunks only apply to calls to US and Canada numbers. If a call for an account is not able to use a trunk because it is outside the US or Canada or all the account’s trunks are already in use, the call can be applied per minute charges against their active balance.

- Inbound defines how many simultaneous calls you can receive to your phone system
- Outbound defines how many simultaneous calls you can send (call out) from your phone system
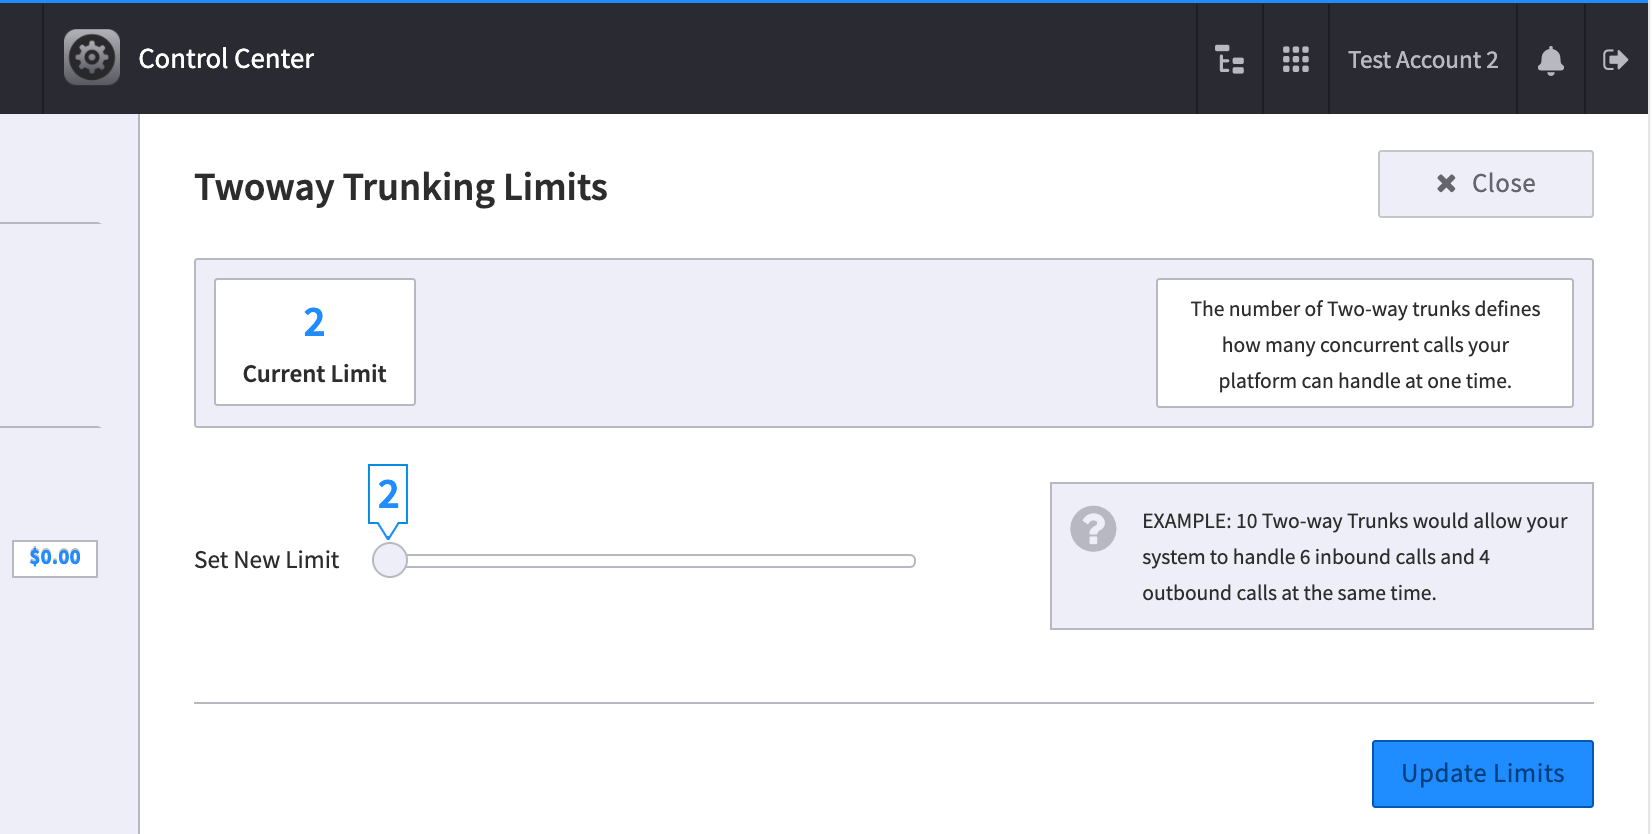
- Two-way Trunks defines how many total concurrent calls your platform can handle at one time.
- Allow customers to make per-minute calls
If selected and the trunk limit is met then a customer can still call in and your account will be charged on a per-minute basis. In addition, some calls require a per-minute charge depending on your service plan. These can include:
- Inbound toll-free calls
- International calls if allowed NOTE: For more information on trunks and pay-per minute please go here: https://forums.2600hz.com/forums/kazoo-platform-guides/get-started/sip-trunks-and-legacy-pbxes/over-subscription-for-trunking-and-per-minute-services-r16/
Call Restrictions
This is where you can define limits on where your agents can make calls. By default, all calling capabilities are enabled for new accounts. If you wish to place call restrictions on this new account, toggle the slider to off.
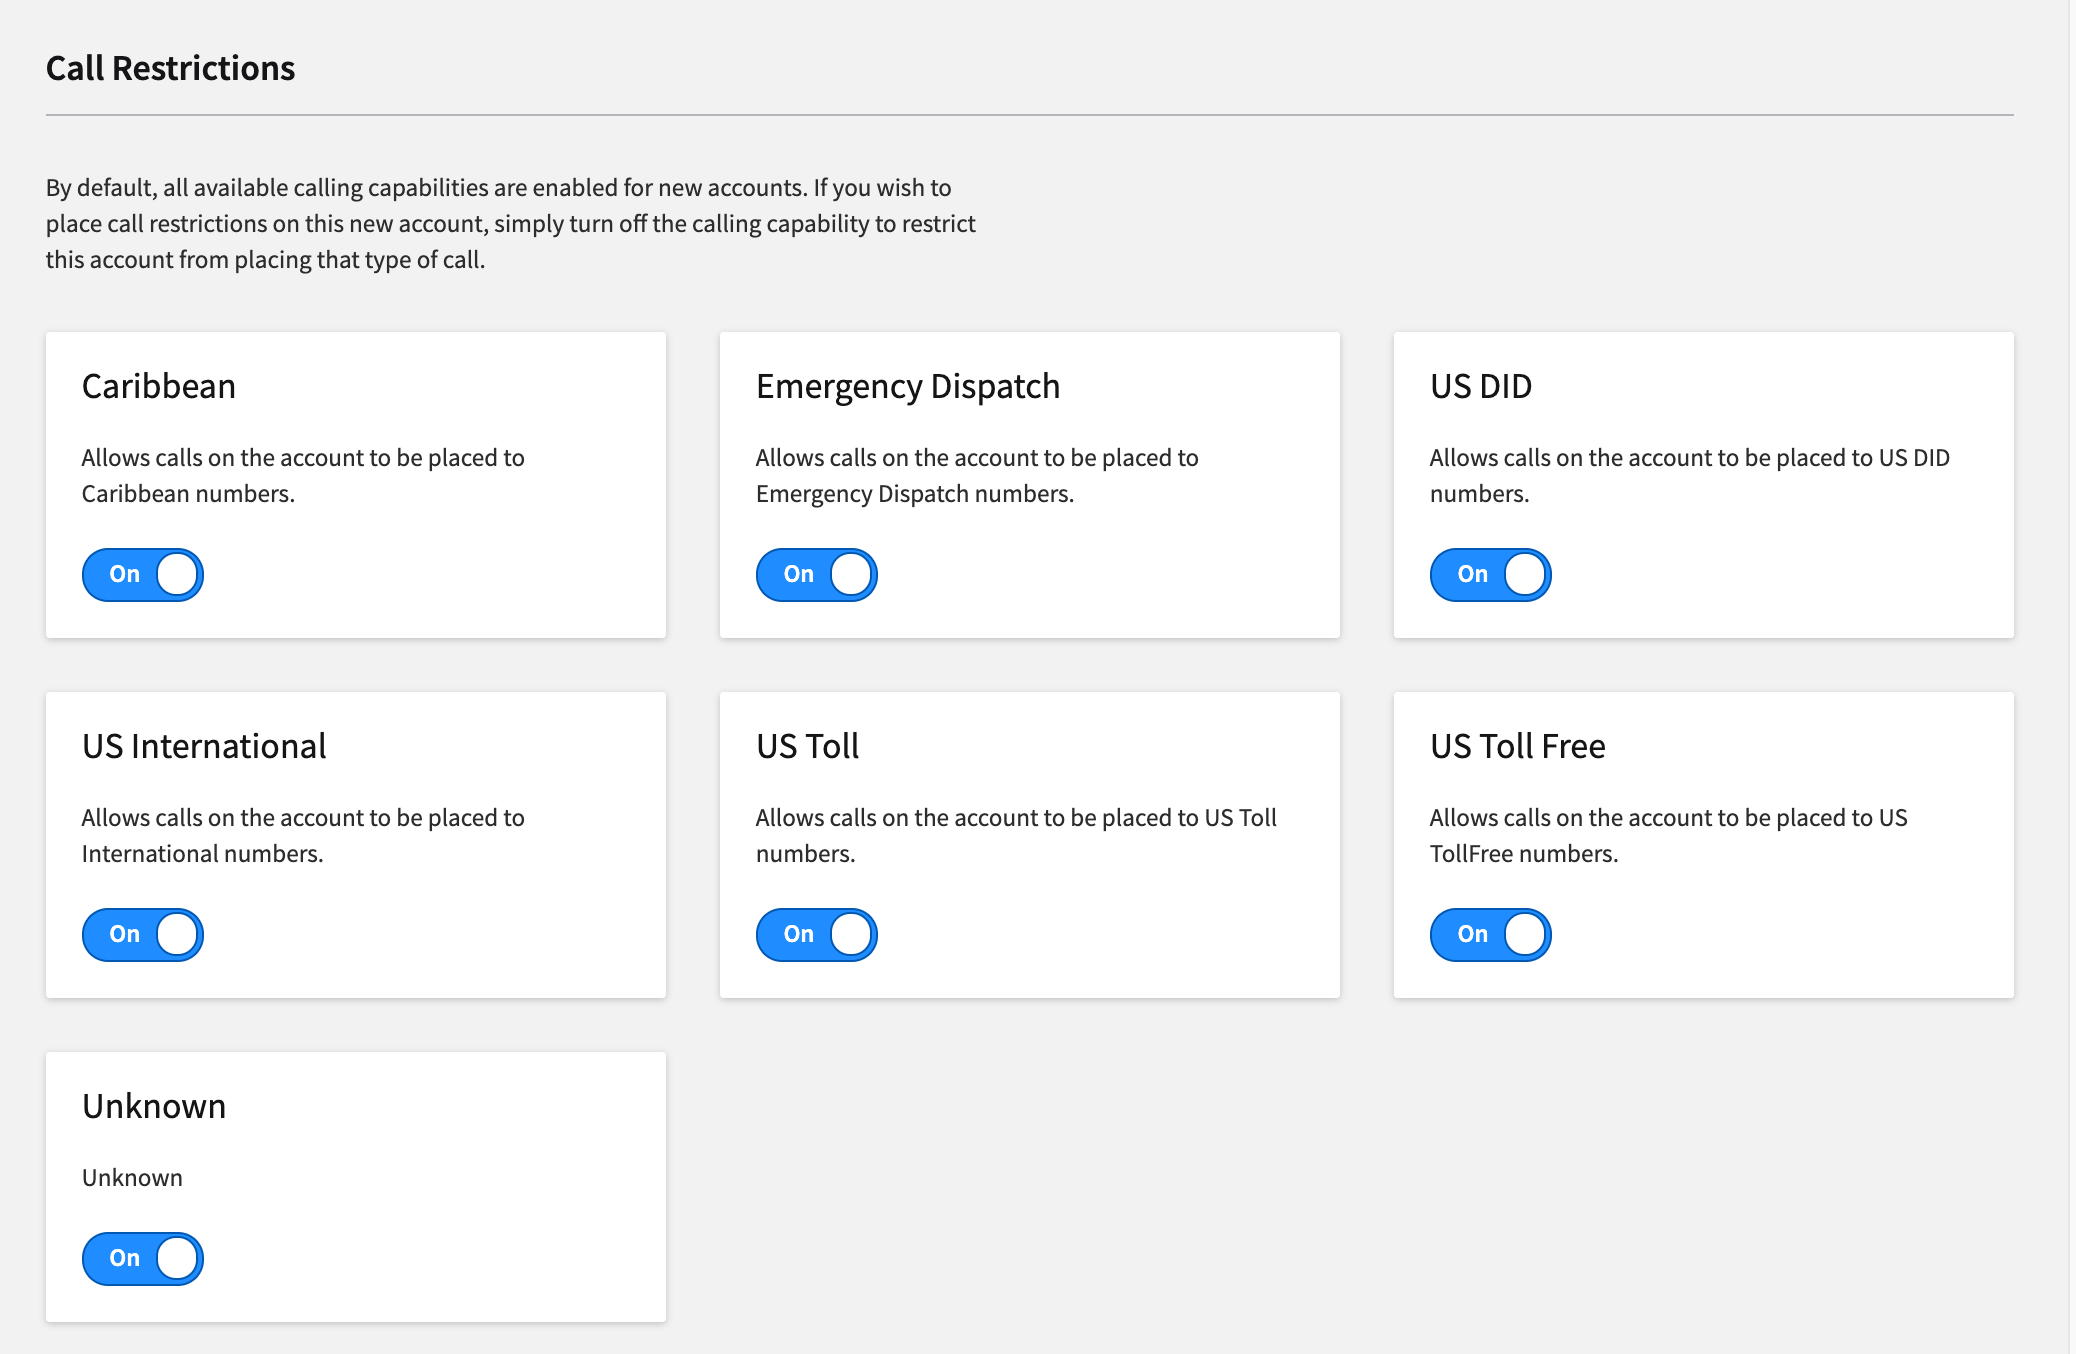
US DID This is your traditional service provided by KAZOO in the US. It refers to the US Direct Inward Dial phone service that is used by PBX systems. The feature allows for multiple telephone numbers over one or more analog or digital physical circuits to the PBX, and transmits the dialed telephone number to the PBX so that a PBX extension is directly accessible for an outside caller, possibly by-passing an auto-attendant.
Unknown This is the default rule that matches any number NOT matched by the other rules. IE: if it’s not a “US DID” or a “US Toll” or “US Tollfree” etc, then its type is “unknown”. For example, the unknown numbers include extensions like “7903” or the feature code “*97” because those numbers don’t match the other rules.
NOTES:
- Emergency dispatch must be kept on according to the new Kari’s Law requirements.
Credit Balance and Features
Account Credit This is where you can set your monthly credit balance. You must maintain a current balance for international, per-minute calls, inbound toll-free, caller ID and other system features that incur an additional charge.
NOTE: Depending on your contract with your customers you may want to use trunks and per minute credit in a way to reduce you and your customer’s exposure to fraud. See for more options on how to use trunks and minutes together HERE.
Control Center Access This is where you can manage general features for the account. You are able to restrict which Control Center features are accessible to this new account. Select the desired features, or leave them all available depending on your business use case and this account’s needs. It is suggested only the USER, ACCOUNT, and MISC. options are selected for subaccounts.
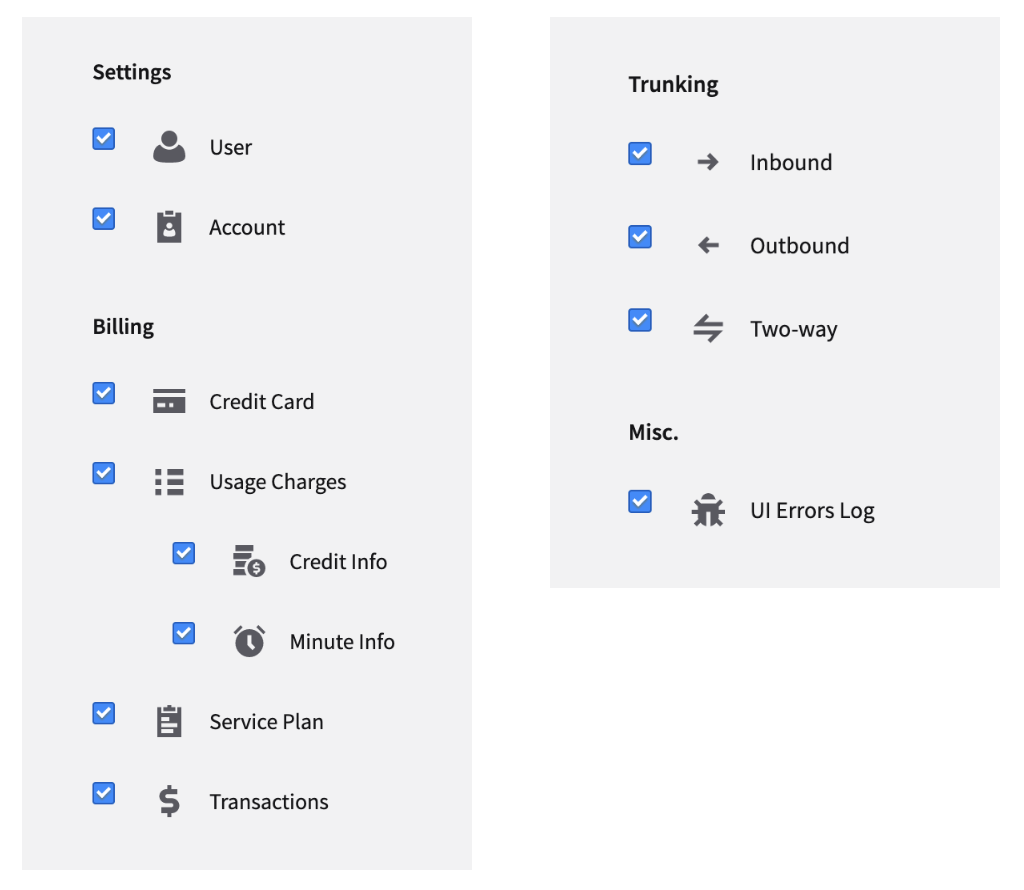
User Allows users to adjust preferences
Account Enables additional controls, including to view/change account name, account realm, technical contact, account timezone/language preferences. NOTE these settings can break a setup so make sure it is available only to trained users._Credit Card_Allows users to view and change billing contact and credit card information.
Usage Charges Exposes the “per minute” tab of Usage Charges to users for credit and minutes
Service Plan Allows users to view/download a copy of the Service Plan associated with the account.
_Transactions_Allows users to view the Transactions log
Trunking
- Inbound Enables inbound trunking
- Outbound Enables outbound trunking
- Two Way Enables two-way trunking
Misc
- UI Errors Log Exposes errortracker log. If enabled, the error log will display as a menu option in the Account Control Center.
Applications Restrictions
Define Access to applicationsThis is where you enable access to the applications.
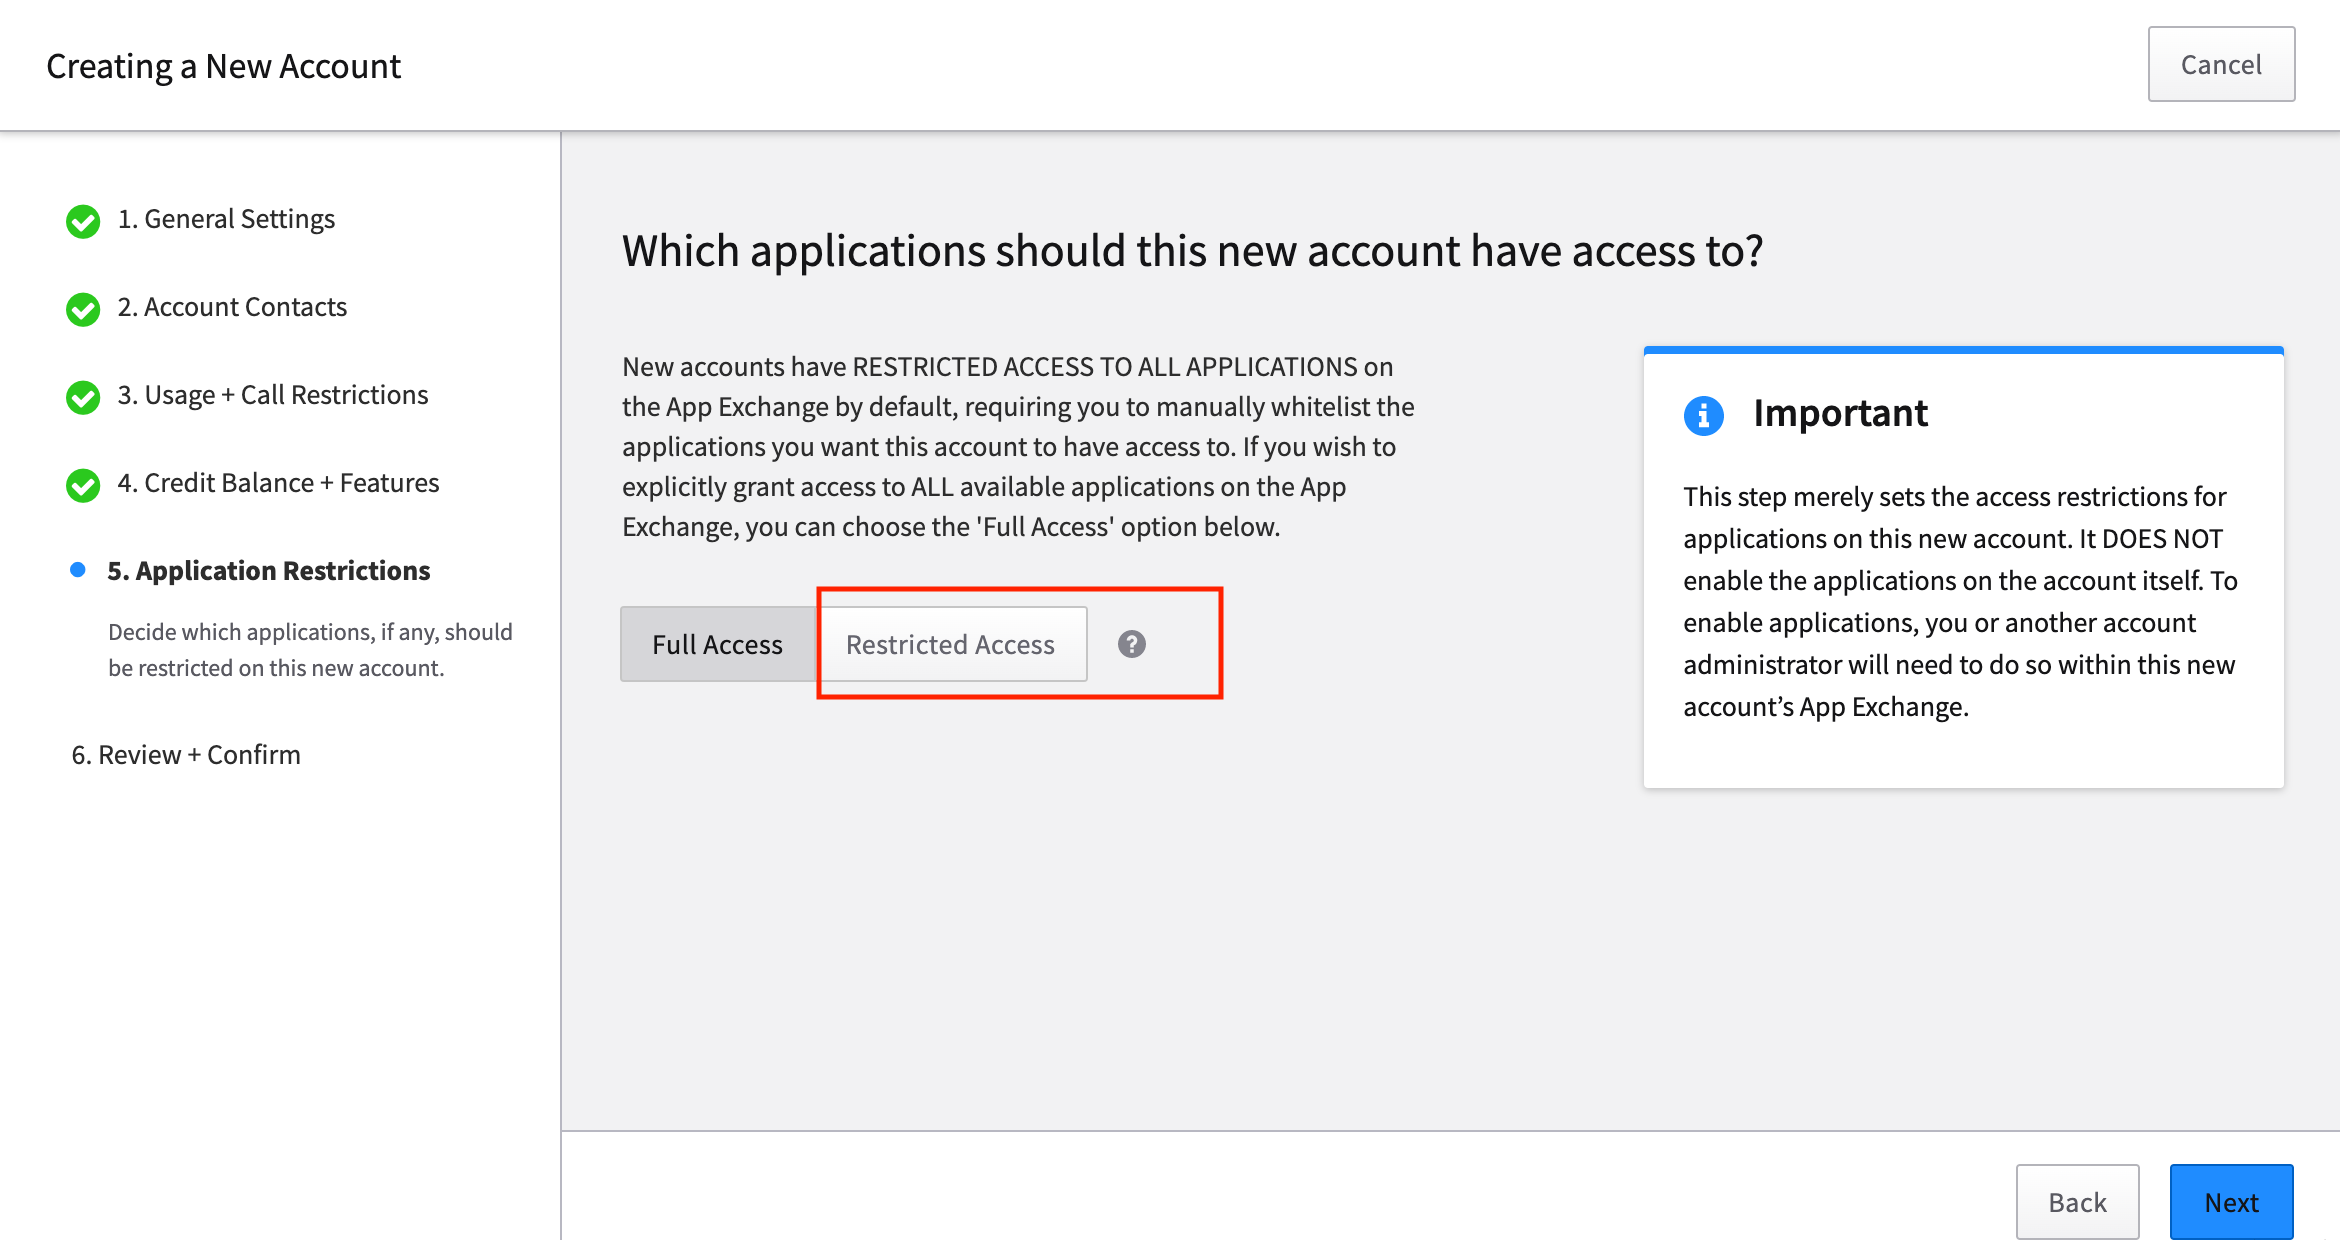
NOTES
- You must also enable the application within the Application Exchange process once you start up the account.
- There may be additional fees for some of these applications. Make sure you understand how this will affect your client billing structure.
- If you select Restricted Access, you will need to manually add the applications you want to enable for this account.
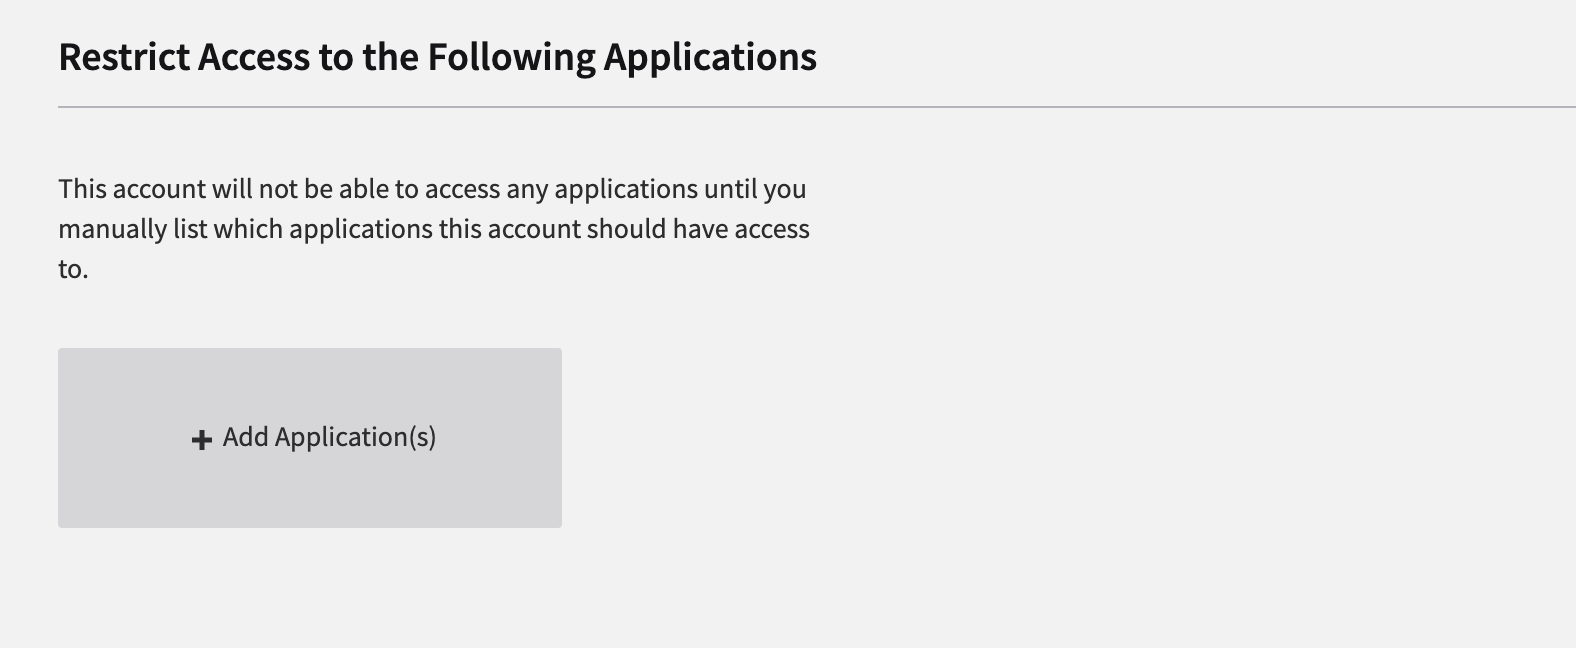
Manually adding access to applications (not recommended)
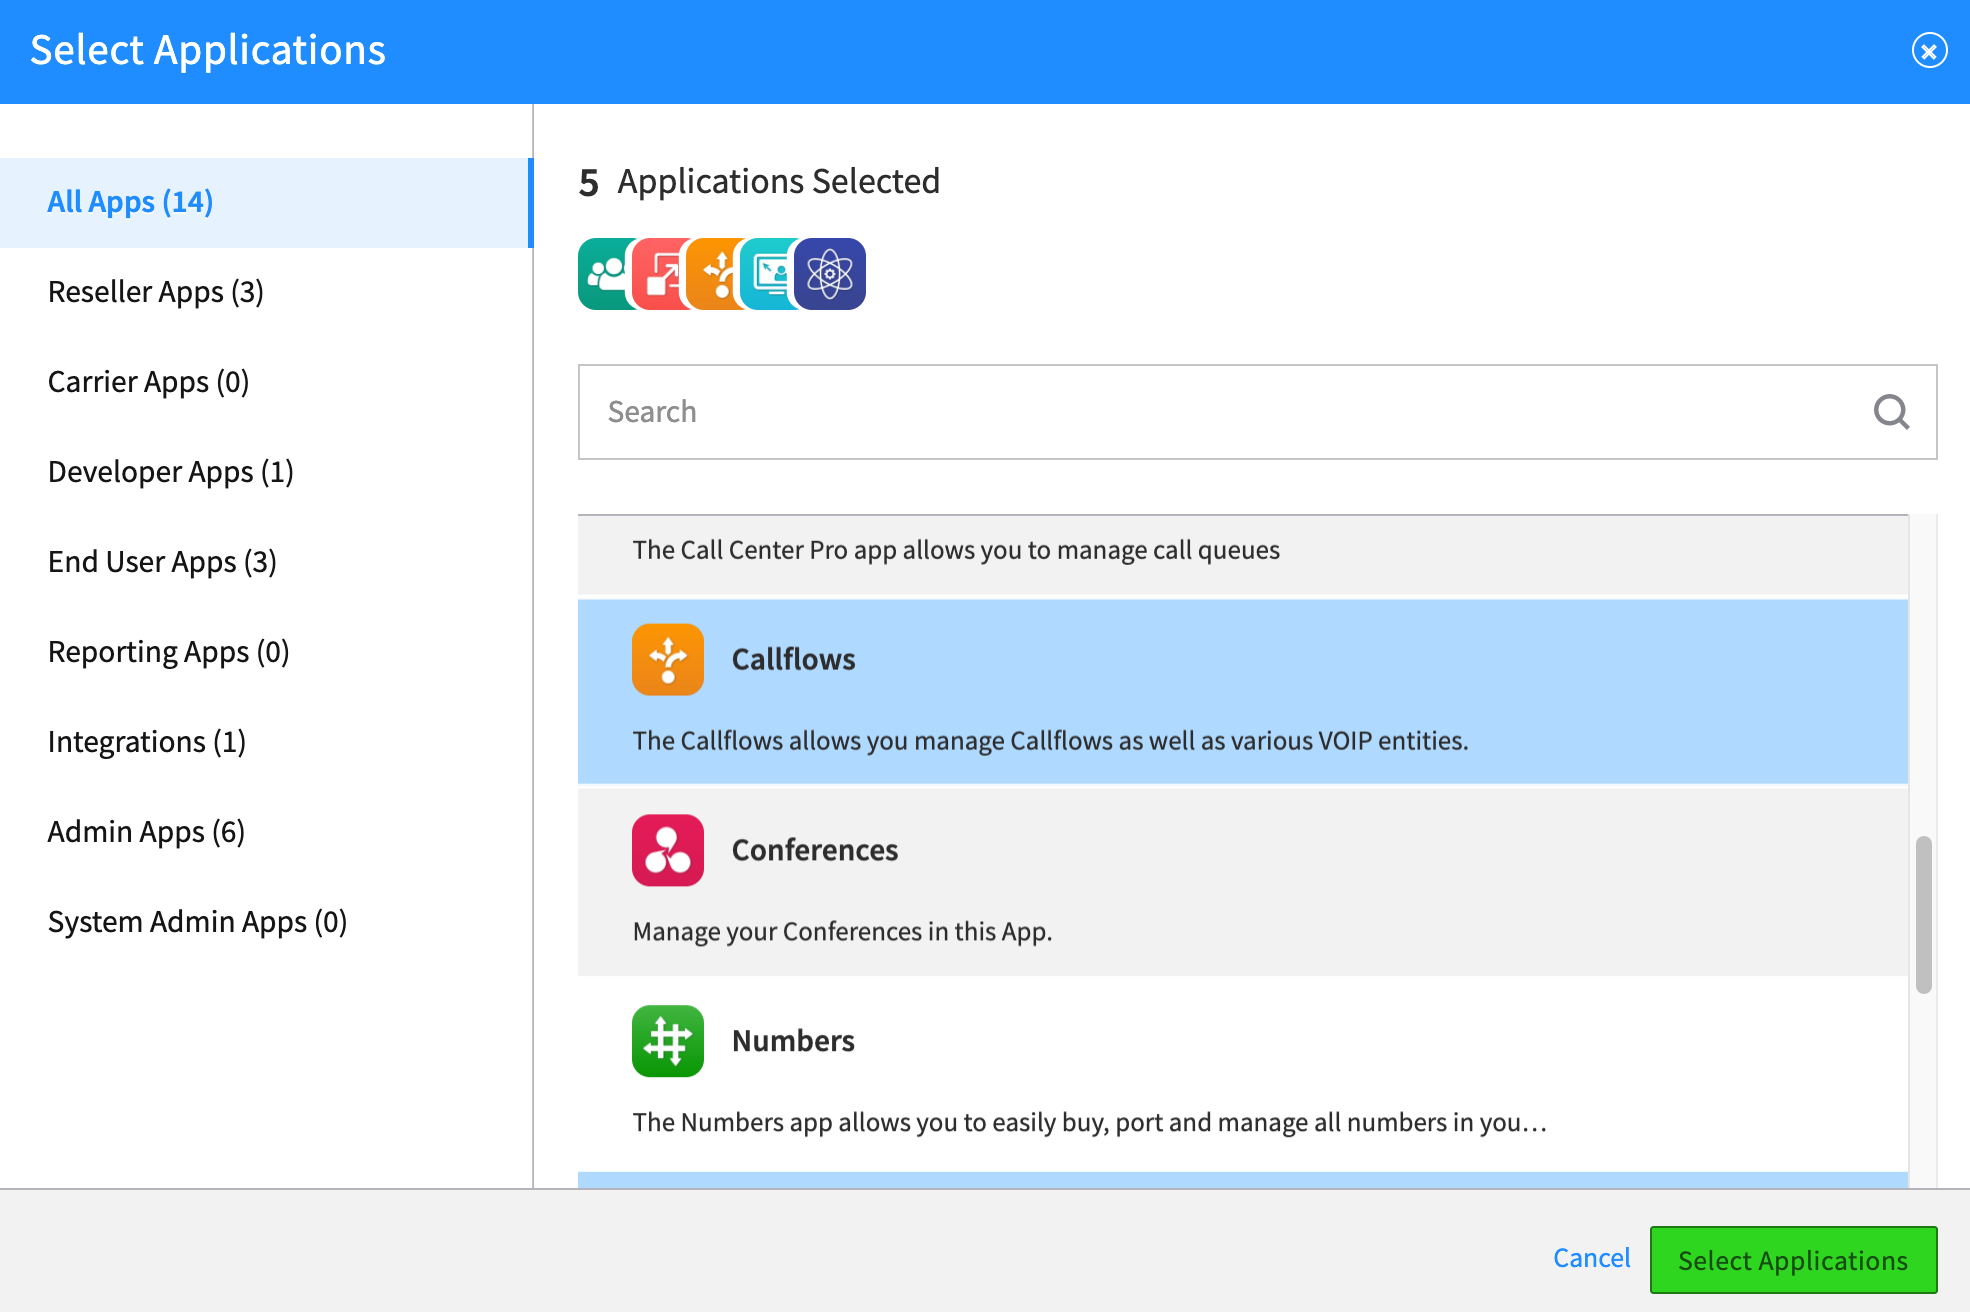
If you select Restricted Access above, you will see the added screen below. This is where you enable access to the applications.
Review your selections
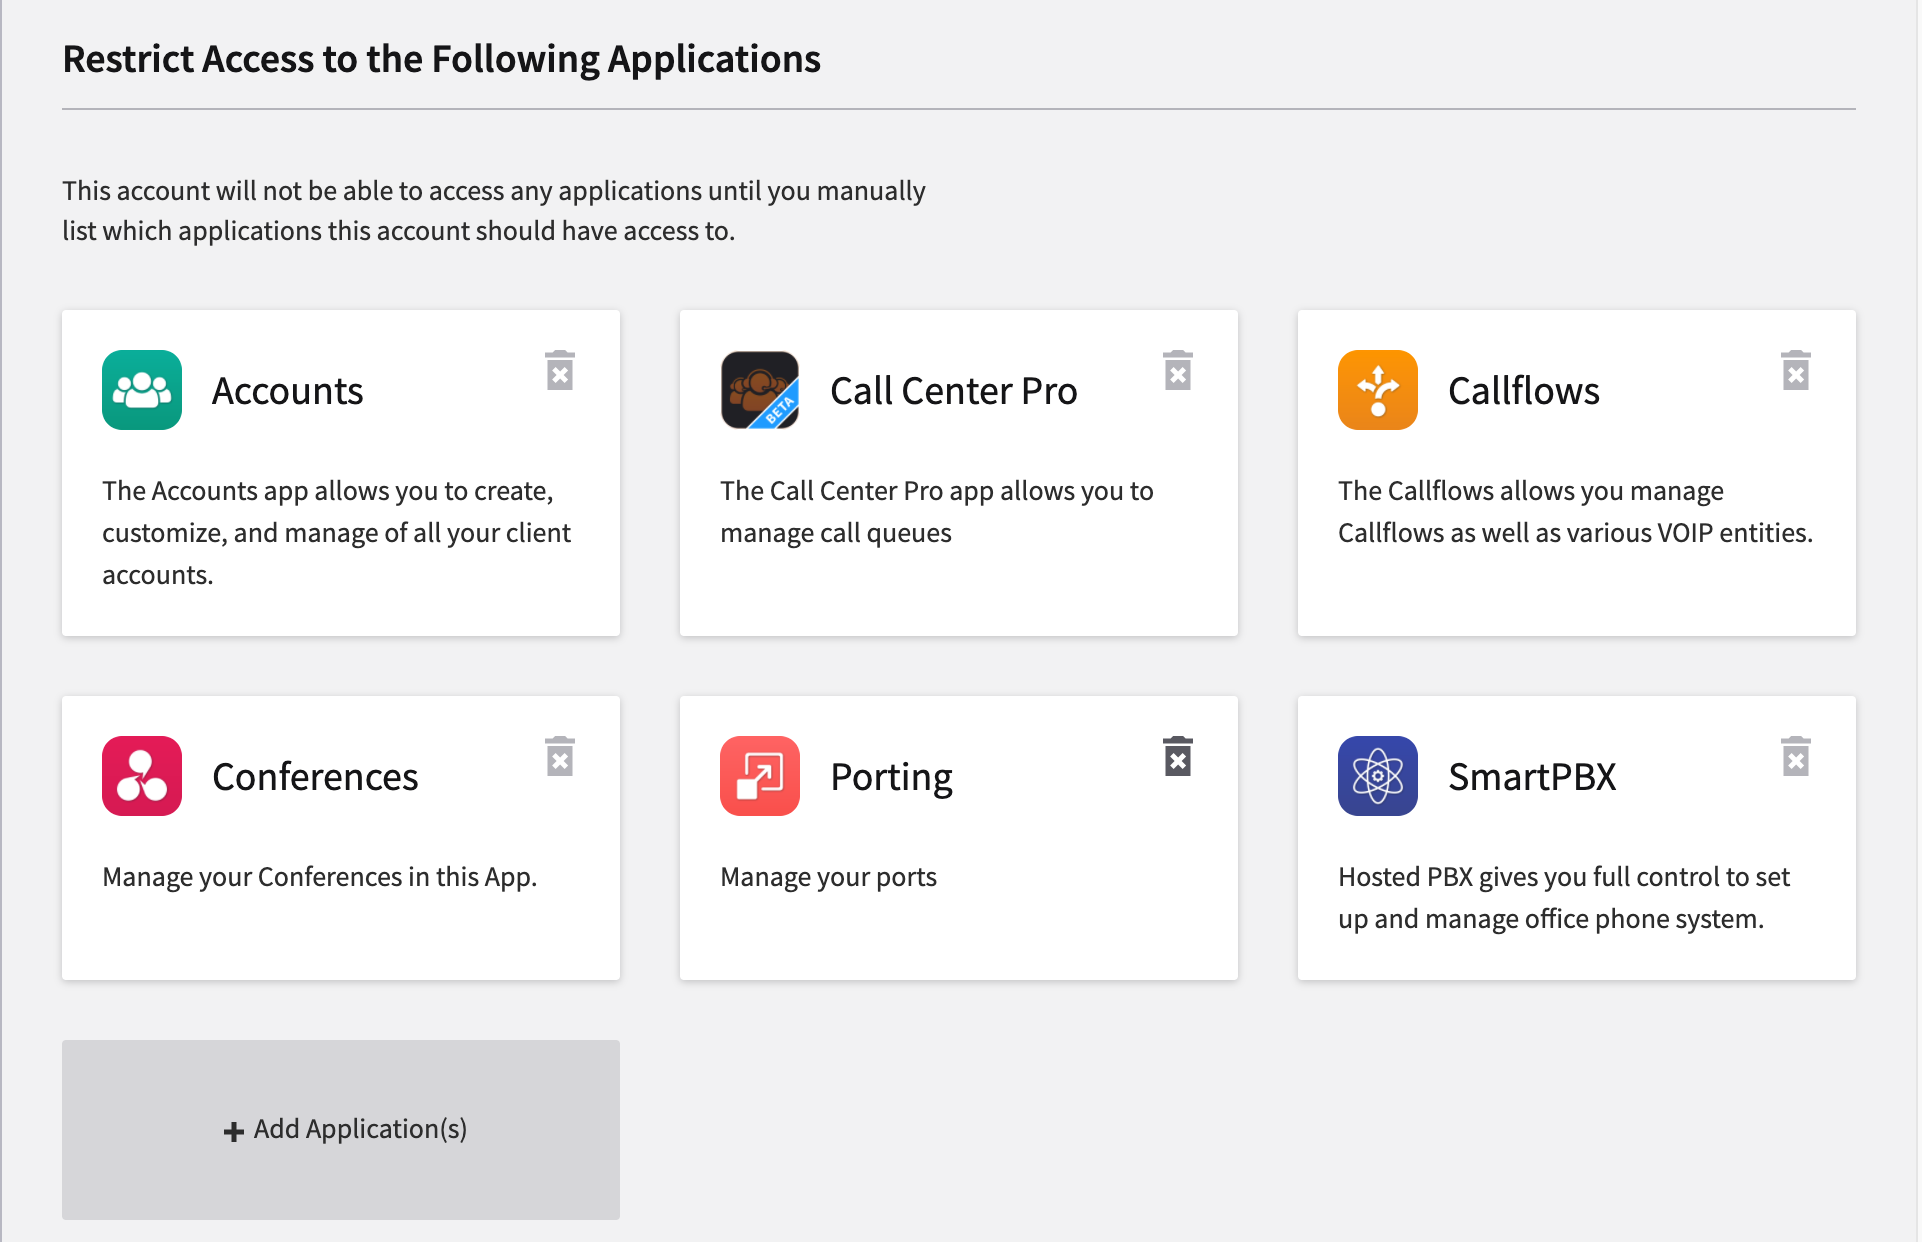
Once you’ve selected your applications, you well see them displayed on your Restrictions page, as shown below.
- You can remove an application by selecting the trash icon shown in the upper right.
- You can add more applications by selecting the add application button at the bottom.
NOTES:
- At a minimum, you will need to select SmartPBX
- Once you select an app, it will display at the top
- You can search for specific applications using the search button, or filter your listing by using the menu to the left.
- To “unselect” an app, click on it again.
Review, Print and Confirm
The last step in this process is to review and confirm your settings.
NOTES:
- To edit a section, select the pencil editor next to each heading. That section will open and be available for editing.
- We strongly recommend you PRINT your summary by using the printer icon at the top right of the page. This will be a useful reference when you are working on the account in the future.
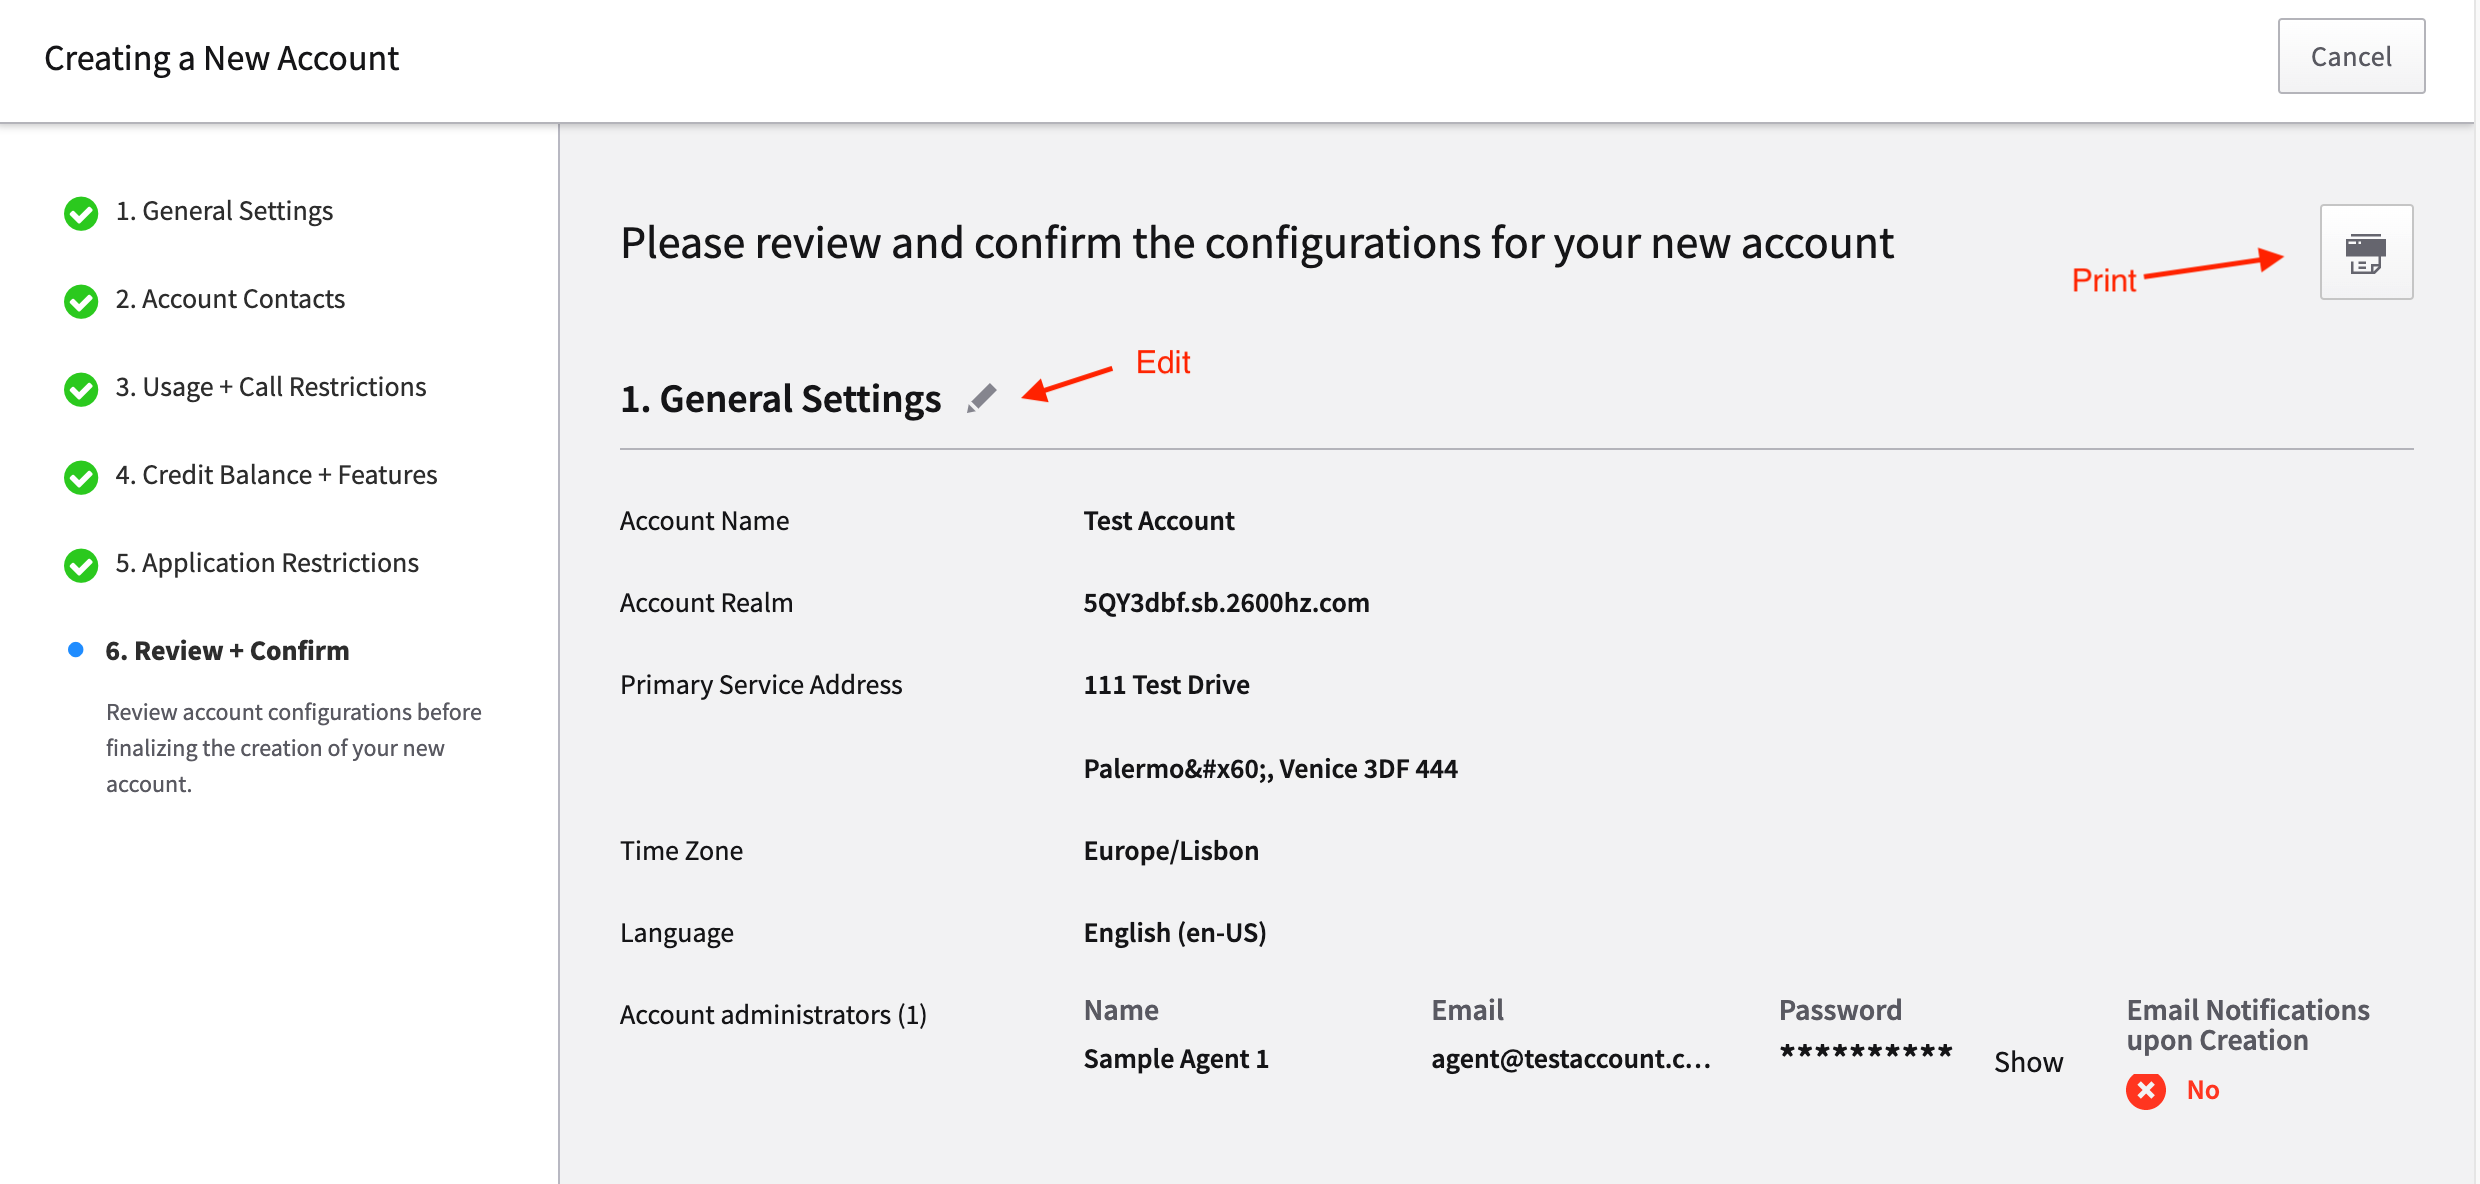
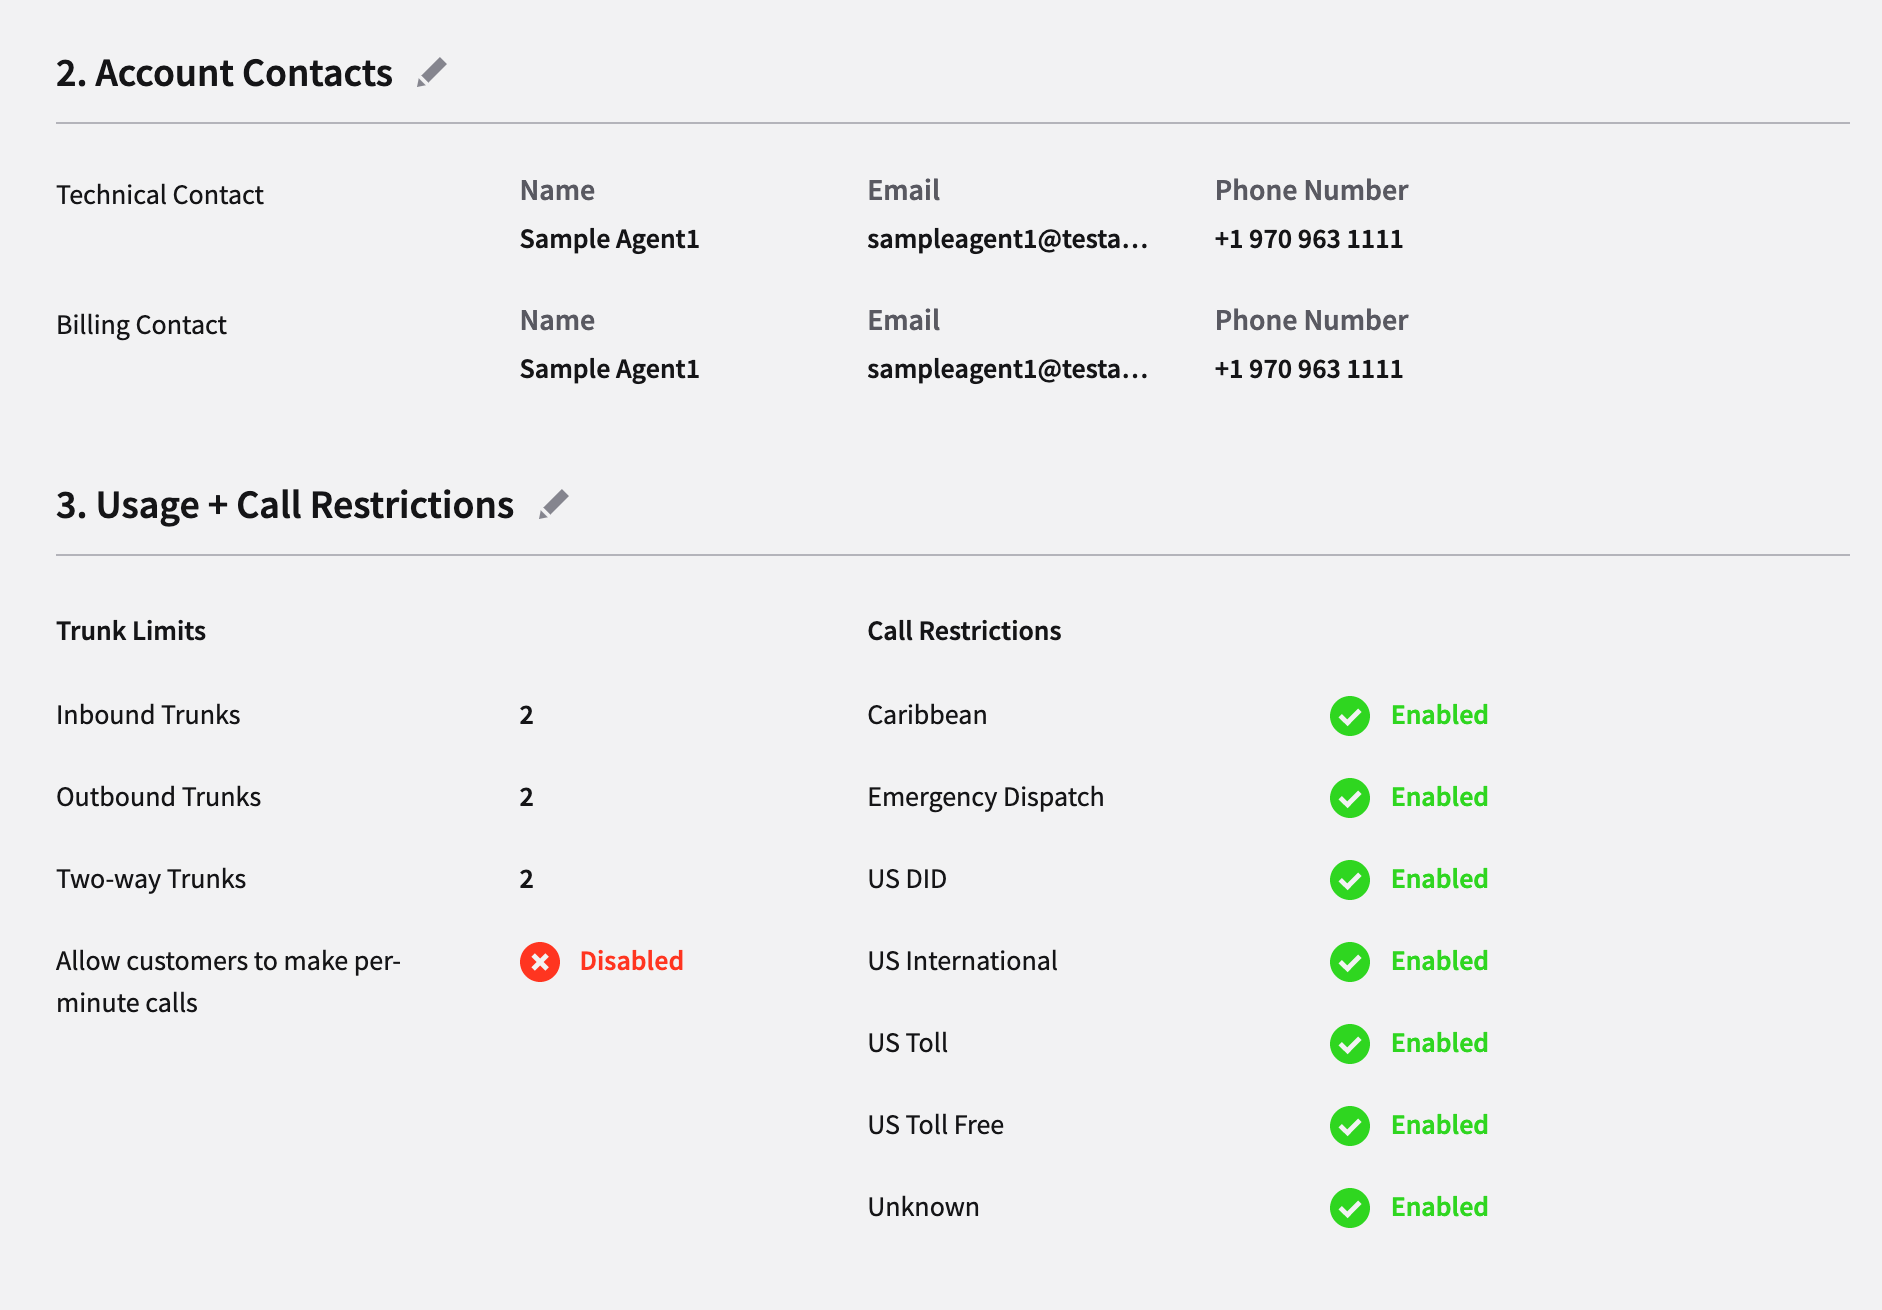
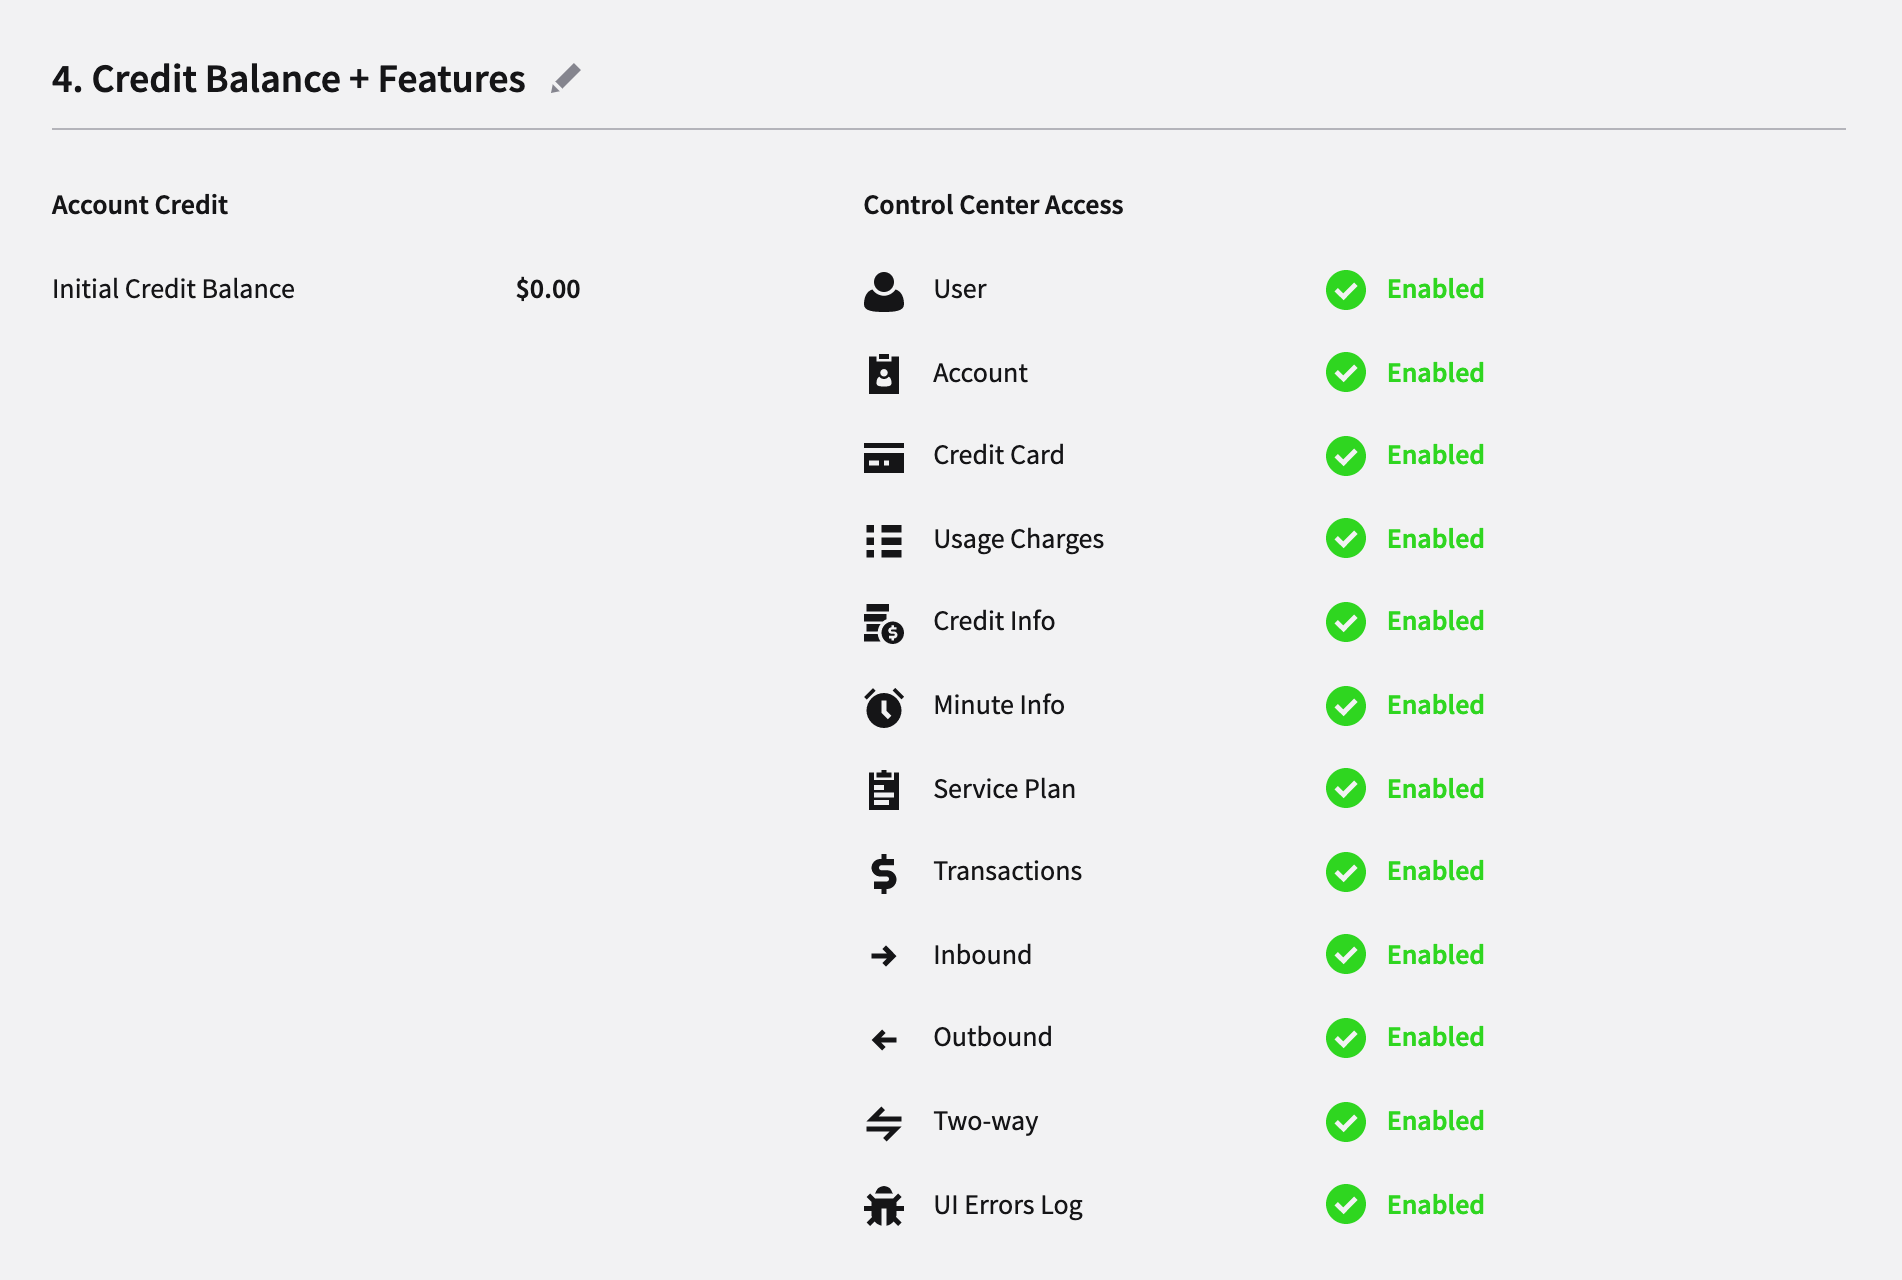
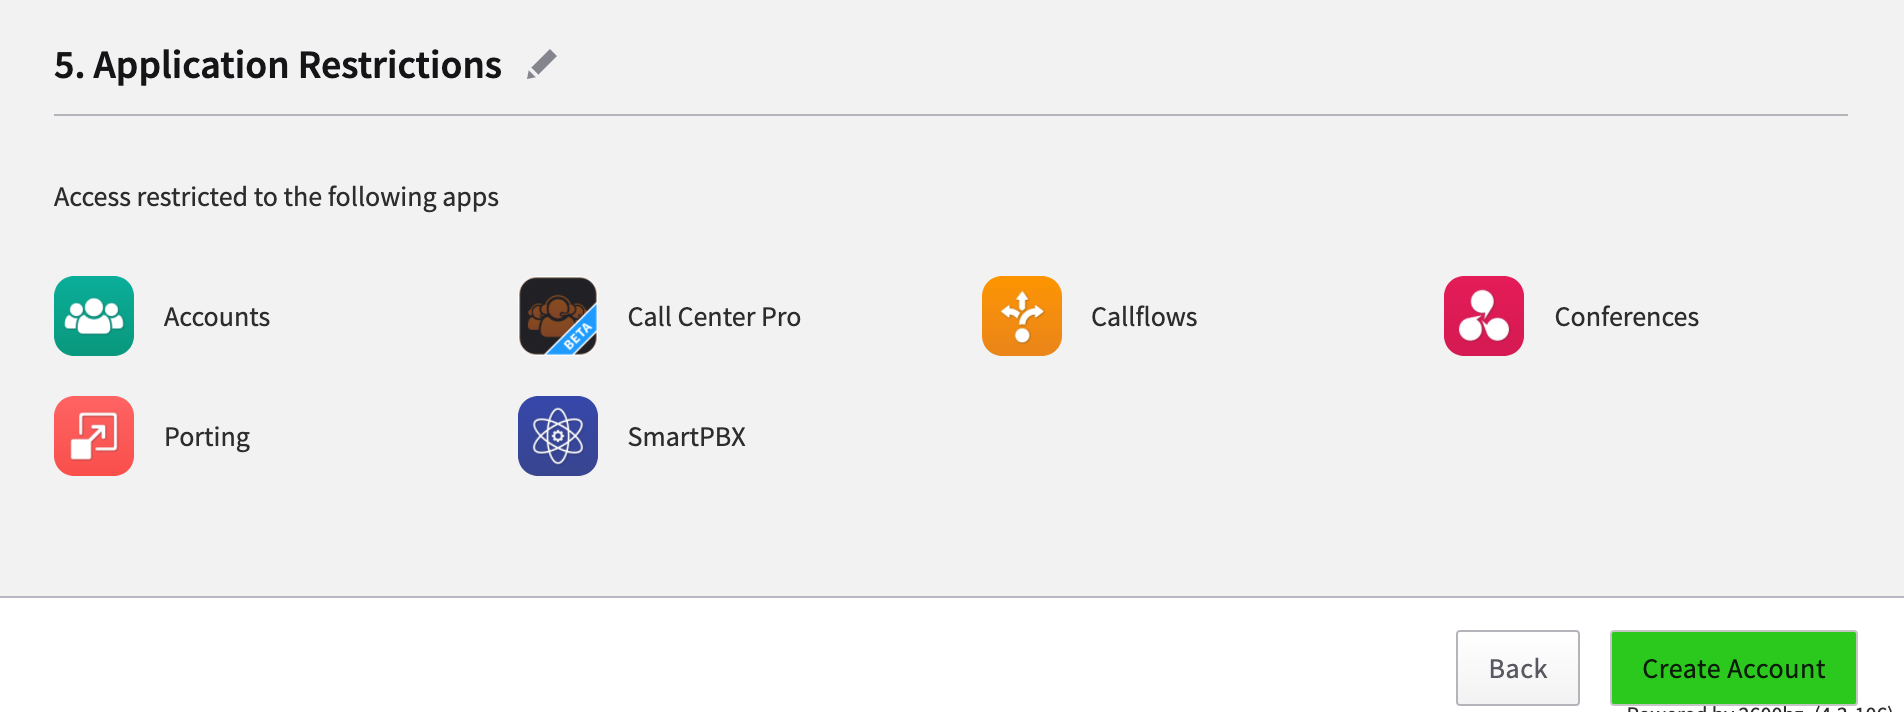
CREATE YOUR ACCOUNT!
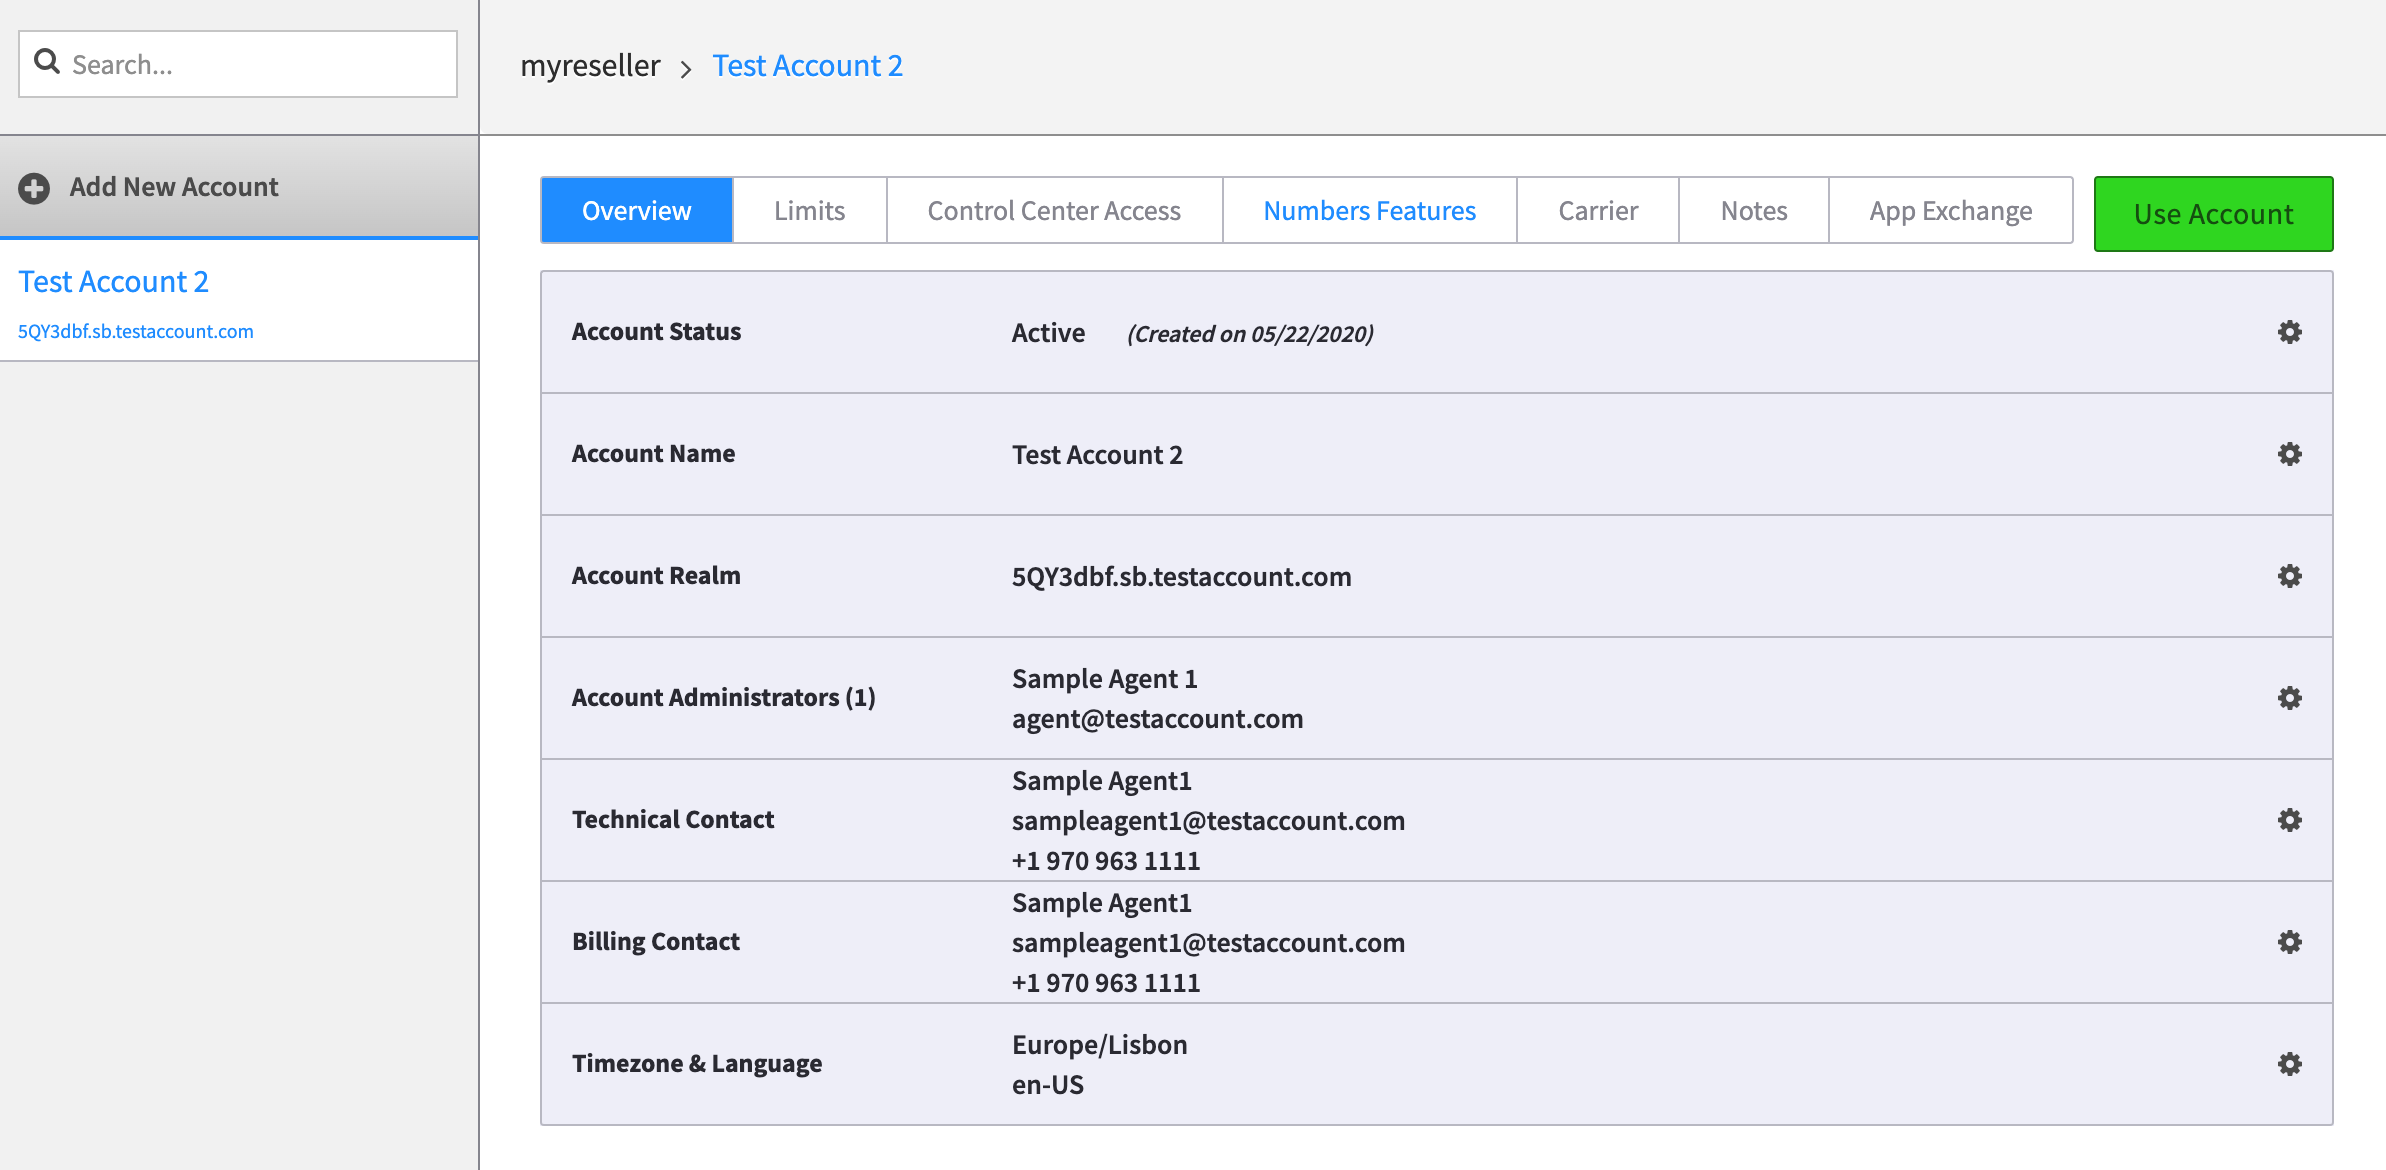
Once you have reviewed and edited your settings, select Create Account! This can take a while as the application is generating several files. Once it’s created, you will see your new Account Home Page.

- You can navigate to and update each section for editing using the top tabs
- You can select the gear to the right of each section to edit the specific field shown.
Editing Account Settings
The page above summarizes. your account settings. Each gear to the right allows administrators to edit global settings for the account.
In addition, there are the following tabs above to make edits:

- LimitsAllows you to view/change. your trunk limits and call restrictions.
- Control Center AccessAllows you to select what settings your customers can view.
- Numbers Features Toggles to Enable/Disable numbers’ features.
- CarrierView/Update your carrier preference.
- NotesThis provides you with a WYSIWYG editor for creating an pop-up announcement page that appears when users log in.
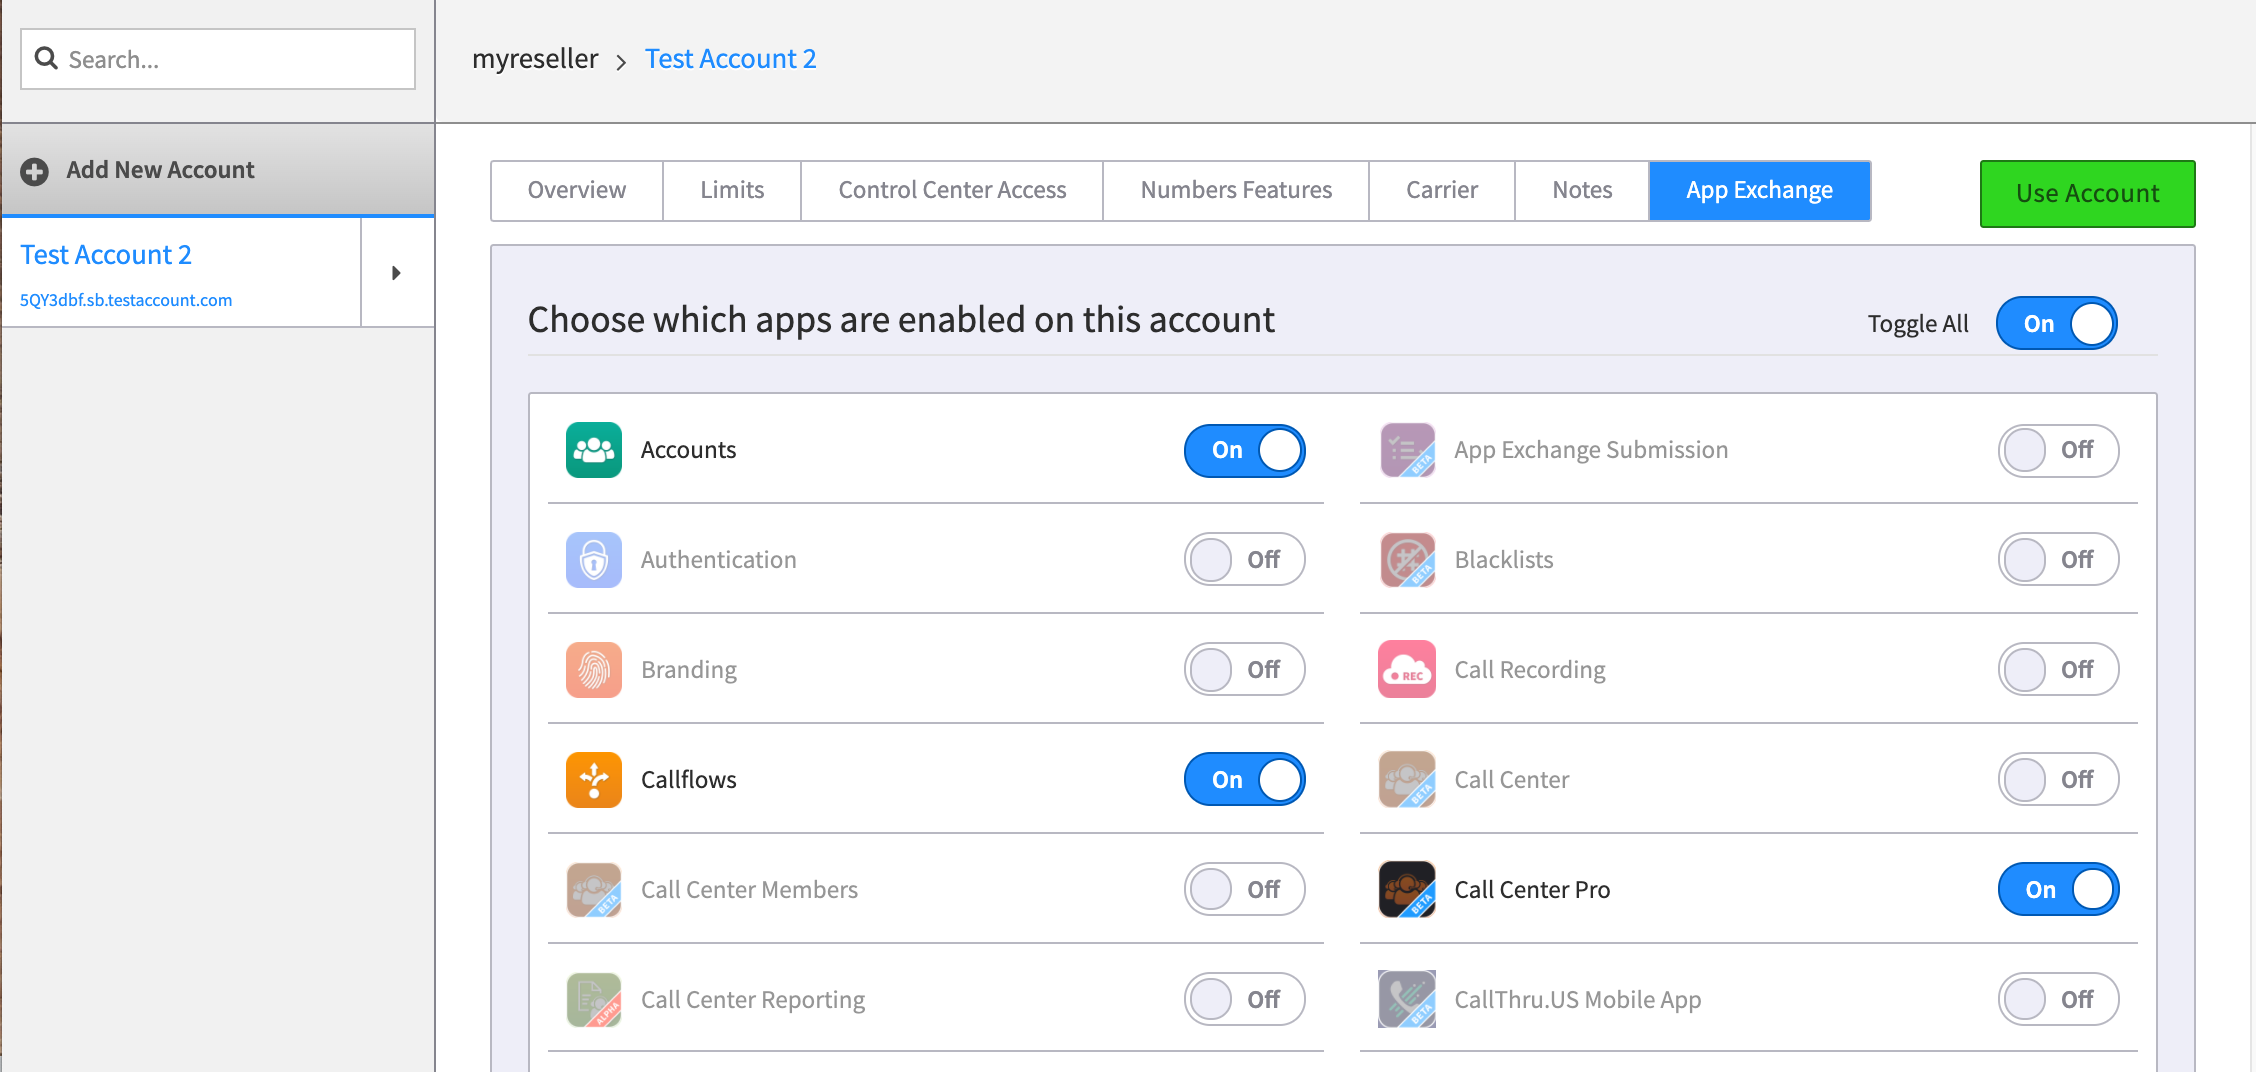
- App ExchangeView/Enable specific apps for this account.
Frequently Asked Questions
How many accounts can I set up?
There is no limit.
How do I create a sub-account?
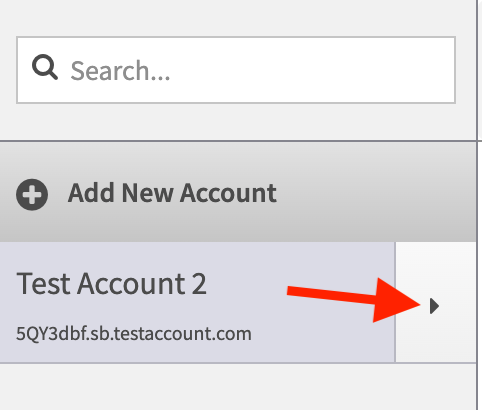
If you want to create a sub-account, for different field offices for example, first highlight the main account from the home page listing and then select “Add Account”.
Can I change the Trunk Limits value any time if I discover what I enter is not appropriate?
Yes, once your account is created, you can manage your trunking settings from the account’s Control Center page.
If I manually enable applications during this setup can I return to this and add more later?
Yes. Once your account is generated, you can select the App Exchange tab at the top of the main page and enable additional applications from there.
