CSV Onboarding
CSV Onboarding is a tool that allows you to enter an exported list (.csv file) of users and (optionally) phone data into the KAZOO environment. This replaces the process of entering the most common data manually when you are first setting up your users.
NOTE: This documentation refers to the Monster UI implementation
Before you Start
-
Create a .CSV (Comma-Separated Values) export file from your existing phone list. The following fields are used by KAZOO; you can create the same fields or if there are existing field names, map what is imported to the KAZOO names.
first_name, last_name, password, email, extension, notification_email, mac_address, brand, family, model -
NOTES
- If you want to upload User names only, the fields after extension are not required.
- Notification_email field is optional for either onboarding option.
- Double-check the field name and spelling of your phone model. It must match the syntax and capitalization exactly for the import to be successful.
Quick Steps
- Open the CSV Onboarding app.
- Choose if you want to Add Users only, or Add Users & Devices
- Drag the .csv file you created into the box and pick Proceed.
- You will see your imported file. The top row above the drop down fields displays the fields in your .csv file.
- Using the drop-down fields, select the KAZOO field you want the .csv field to map to.
- If you have advanced programming knowledge, enter your json payload information for
- Pick Proceed. The screen will follow your progress.
- If you want to cancel, close the window.
Detailed Steps
Activate and open the CSV Onboarding app
Choose whether to onboard Users Only or Users and Devices

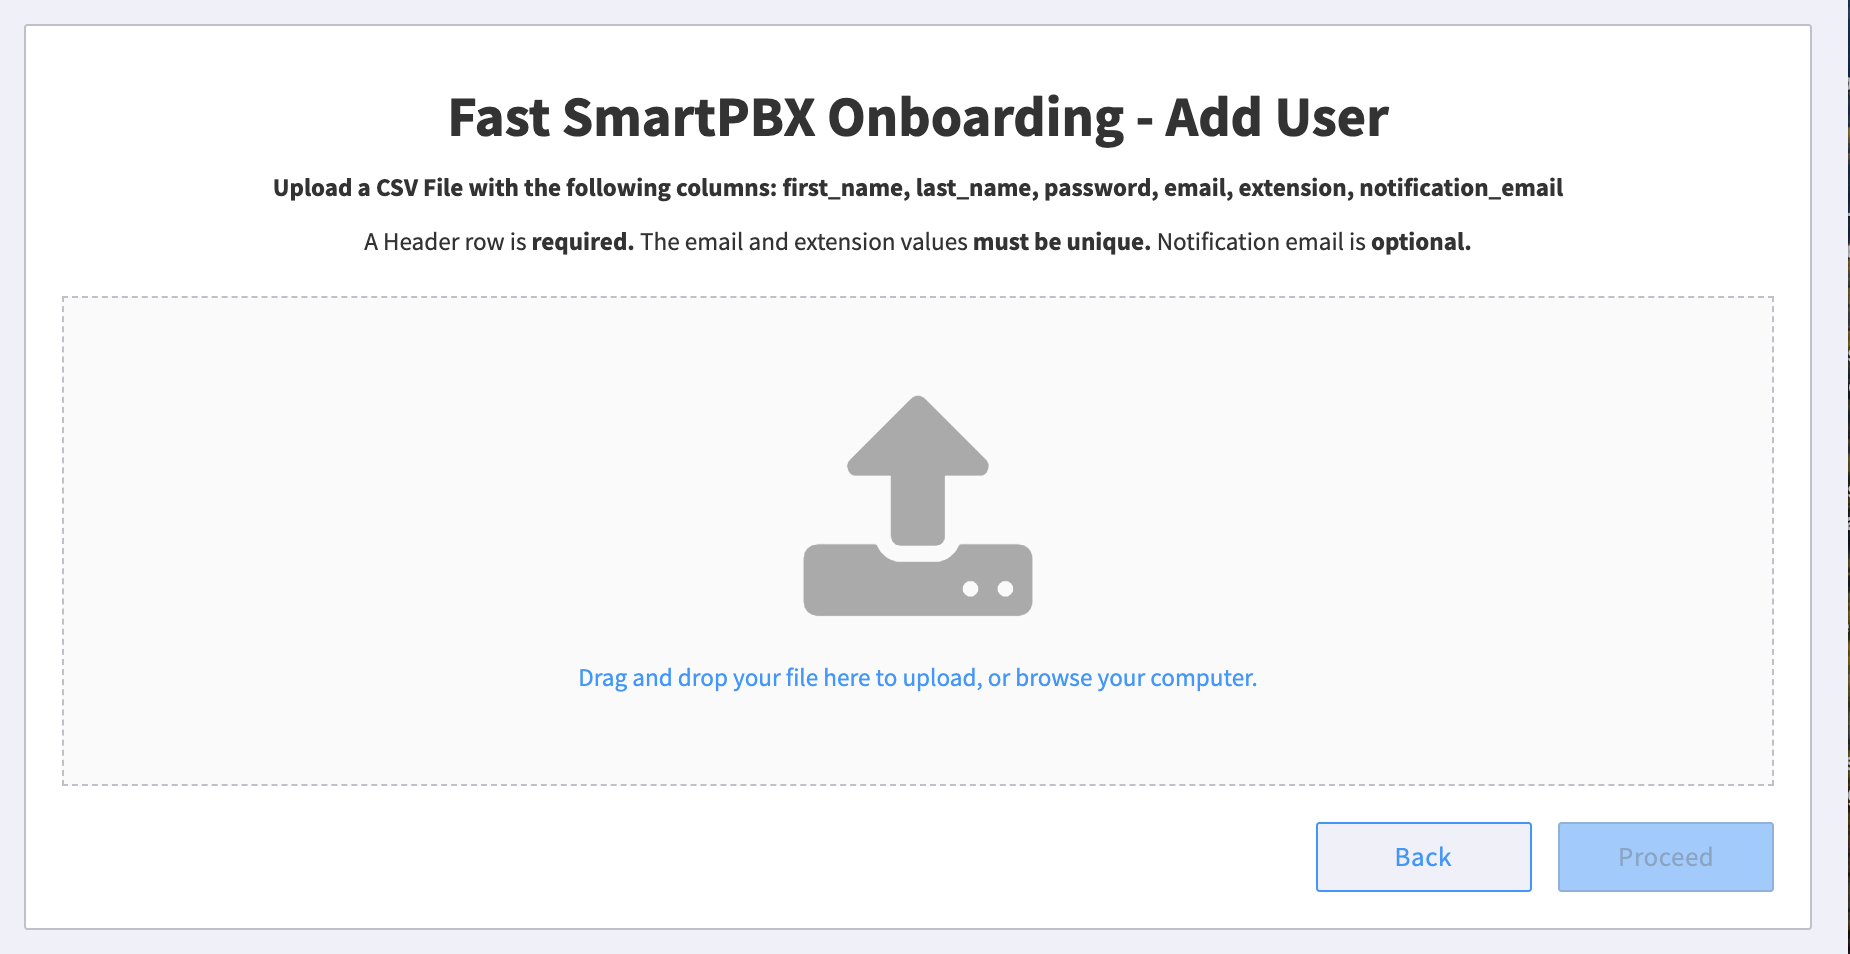
Adding Users Only You will see the screen below. Check your .csv file to make sure it includes a header row with the fields mentioned.
NOTE: If the header is different, you will be able to match/change that in the next step, but the values for the columns must match.

Preview your imported fields and its data
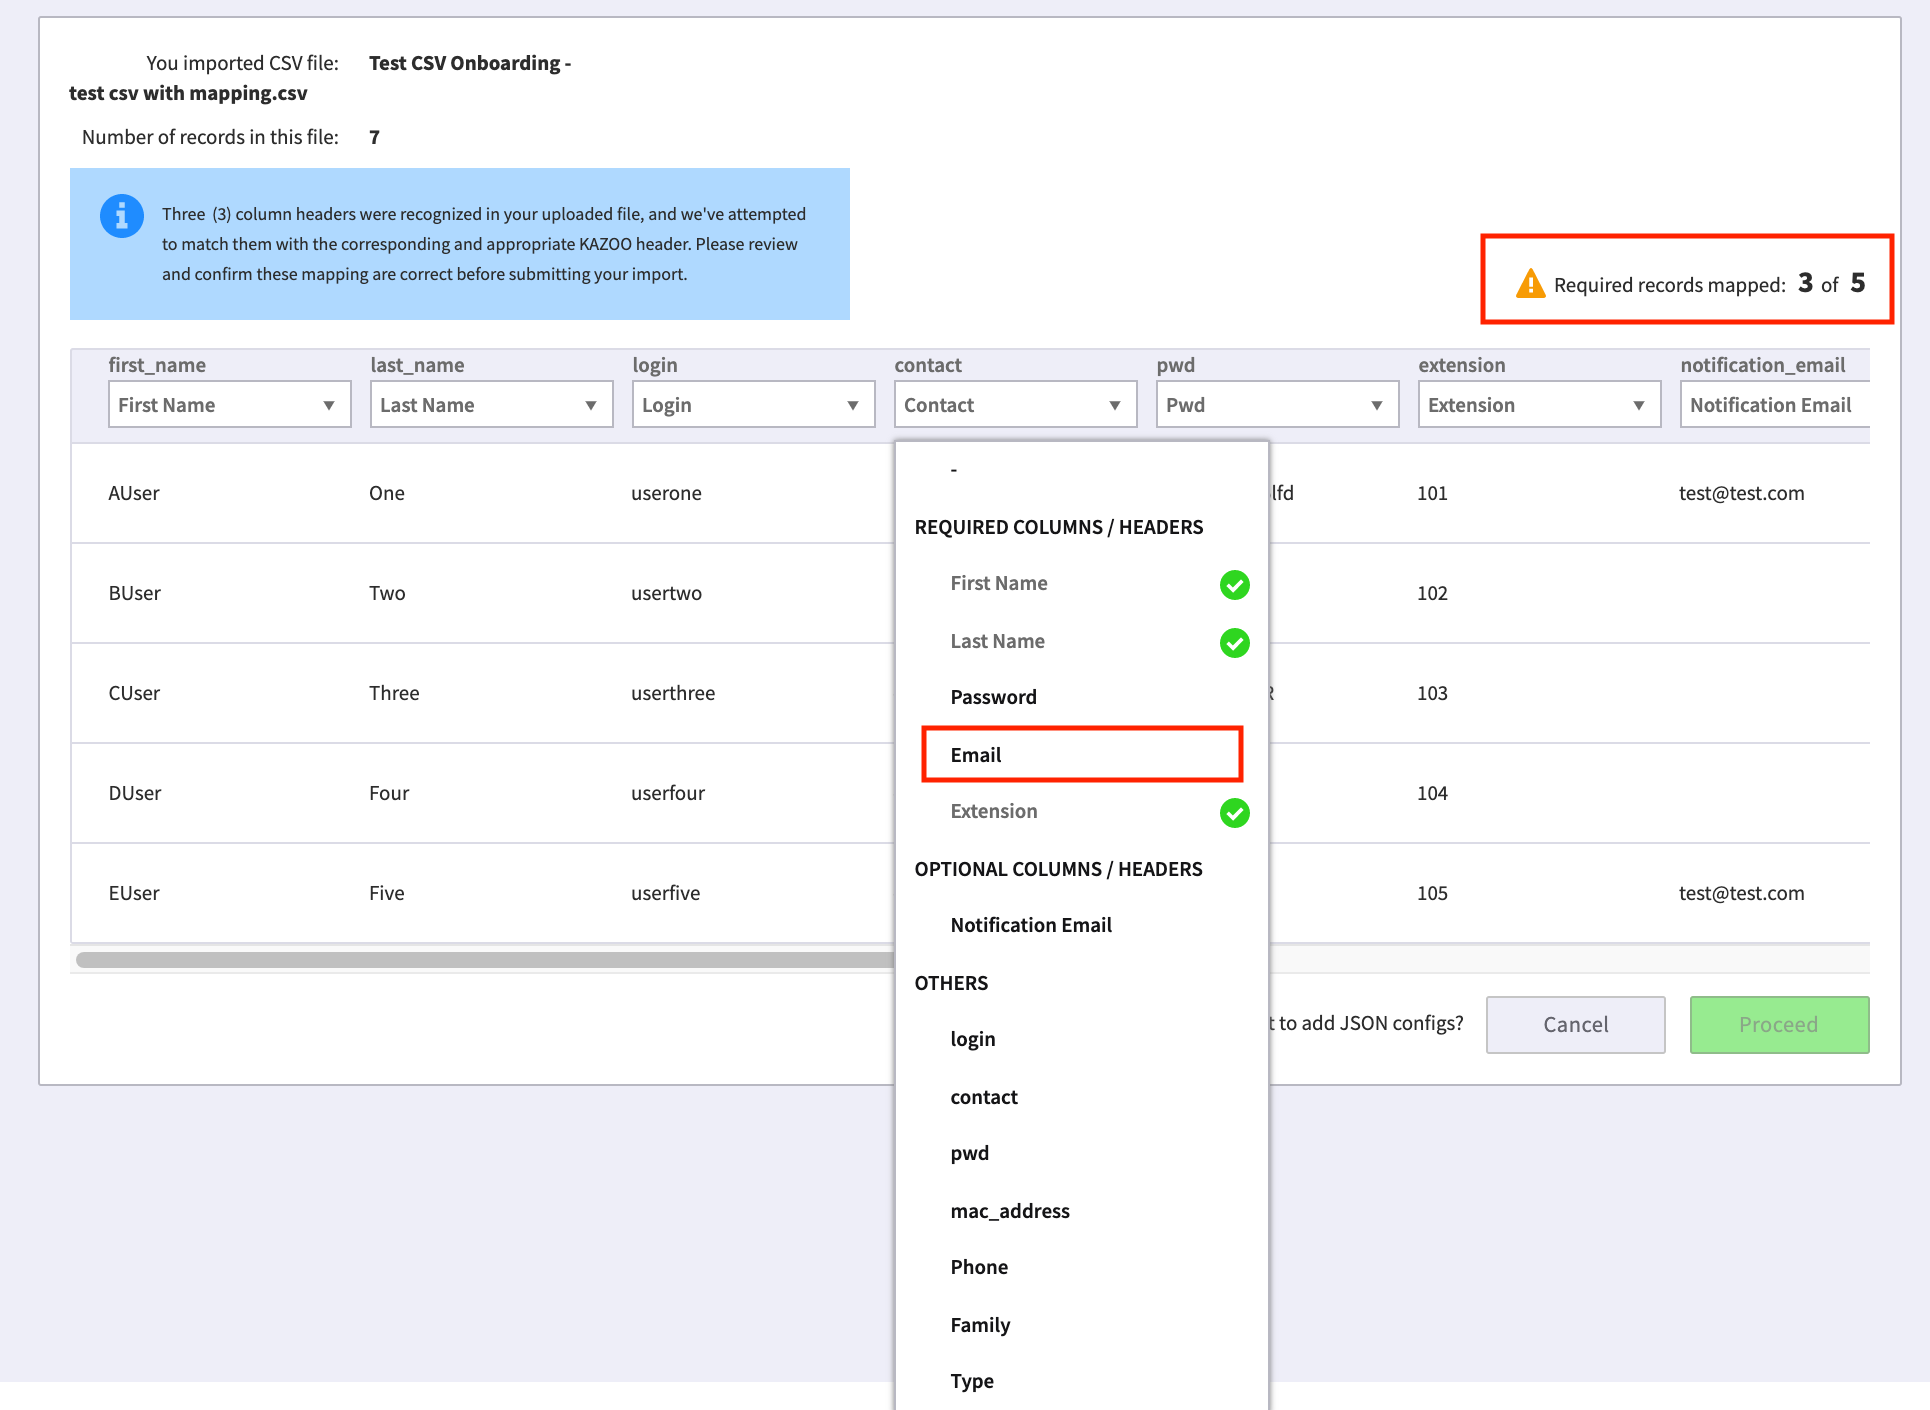
Once you upload the file, the CSV app will map the fields it recognizes to the account fields and provide you with an account of what is still missing. You will see a preview of the result.

What to look for as you review this page:
- The information box will let you know how many fields are recognized,
- The “required records mapped” counter to the right will indicate if you have additional records to map before a successful import.
- The fields displayed above the drop down field options are the fields that were imported from your .csv file.
- The field names in the drop down are the proposed match to your import file. You will need to verify this is correct.
- If the field is empty and should map to a required field in the drop down options, you must assign it a value.
- All required fields must be mapped to one of the columns you have imported so the system will be able to place them in the correct instance.
- If some fields are empty they will transfer as empty.
- Make sure to scroll to the right to see all the fields.
Map any remaining “missing” fields
Your next step is to map the fields you’ve imported with the fields required by the Account. In this case,
- the “Contact” field can be mapped to the required “email” field, and
- the “pwd” field can be mapped to Password.
Click on the field to remap, and then click on the account field to match it with in the drop down. Once these are defined, you should see the “Required records mapped” indicator turn to green and all the Required Columns/Headers in the drop down display a green checkmark.
_The JSON Checkbox_At the bottom of the screen near the Proceed button, you will see a checkbox asking if you want to add a JSON config.

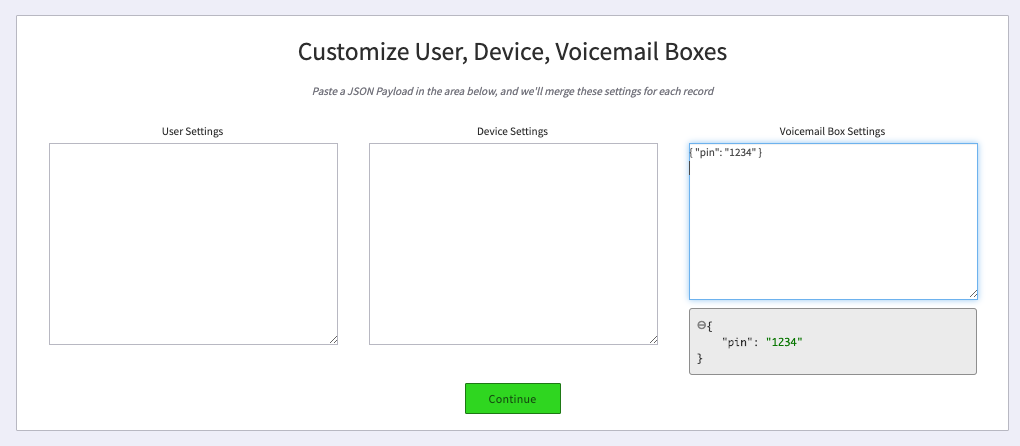
This is available for advanced programmers who may want to add some custom settings for voicemail boxes, call parking and other feature codes using JSON. If you check the box at the bottom of the screen you will be prompted to add your code into one of 3 different fields: User Settings, Device Settings, or Voicemail Box Settings. Some reference information about these settings is included at the end of this document.
You’re ready for the Import! Click Proceed
You will see a screen like this:

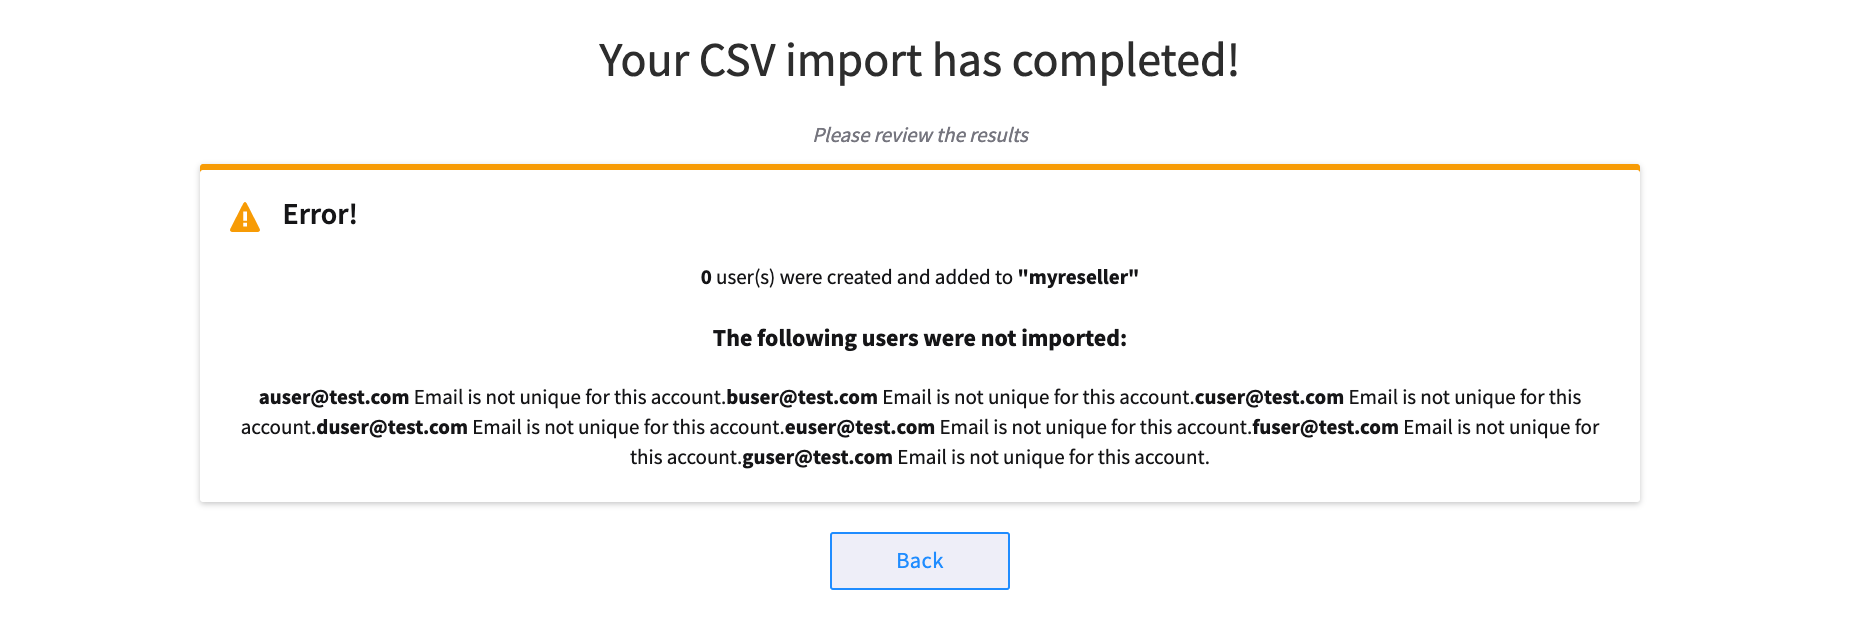
If the import process finds an error and cannot import some of your records, you will see a screen similar to below:

In this case the error, “email is not unique for this account likely means you already have a user imported that has the same email. If you want to add devices to the already existing user, you will need to go to SmartPBX and add them there.
If the import is complete without errors, your screen will look more like this:

Importing both Users and Devices
If you have a more robust .csv file that includes device details, you can also include them in your import. At the first step, select “Add Users and Devices.” At a minimum, you will need the following fields:
first_name, last_name, password, email, extension, notification_email, mac_address, brand, family, model
The email, extension and mac_address values must be unique, and not already added in the database. The notification field is optional. NOTE: Once imported, you are not able to adjust a device’s brand, family, or model information without deleting and recreating a device, so please ensure your information is accurate.
From here the process is the same as importing just users. Note you may have to use the scroll button an the bottom of your screen to view all the fields you’ve submitted for import.
Sample .csv file
Sample CSV File with Device list added
Spreadsheet First

Then saved as a .csv file, will look like something like this, commas separating the fields.MAKE SURE THERE ARE NO SPACES! This will block the import.
first_name,last_name,login,email,extension,notification_email,mac_address,Phone,Family,TypeAUser,One,userone,auser@test.com,101,test@test.com,00-15-E9-2B-99-3C,111-22-1231,aaa,111BUser,Two,usertwo,buser@test.com,102,,00-15-E9-2B-99-3D,111-22-1232,bbb,222CUser,Three,userthree,cuser@test.com,103,,00-15-E9-2B-99-3E,111-22-1233,aaa,111DUser,Four,userfour,duser@test.com,104,,00-15-E9-2B-99-3F,111-22-1234,bbb,222EUser,Five,userfive,euser@test.com,105,test@test.com,00-15-E9-2B-99-3G,111-22-1235,aaa,111FUser,Six,usersix,fuser@test.com,106,,00-15-E9-2B-99-3H,111-22-1236,bbb,222GUser,Seven,userseven,guser@test.com,107,test@test.com,00-15-E9-2B-99-3I,111-22-1237,aaa,111
Starter Template .csv file
For starters, you can use this file as a template:
Frequently Asked Questions
Check out our CSV Onboarding FAQ document below
JSON Reference links
To add your custom JSON payloads, check the box that says “add JSON”, and you will see this screen. It shows an added script to assign a voicemail box. For additional reference to the syntax for JSON scripts, check the links below.

