Language Editor
The Language Pack Editor allows you to view, edit, and create language packs of your own in order to support your language of choice. This guide contains step-by-step instructions for using the Language Pack Editor.
NOTE: This documentation refers to the Monster UI implementation
What is this?
Language packs provide localization for Kazoo apps. The Language Pack Editor allows you to view, edit, and create language packs of your own in order to support your language of choice. This guide contains step-by-step instructions for using the Language Pack Editor.
English to German Translation, Underway!
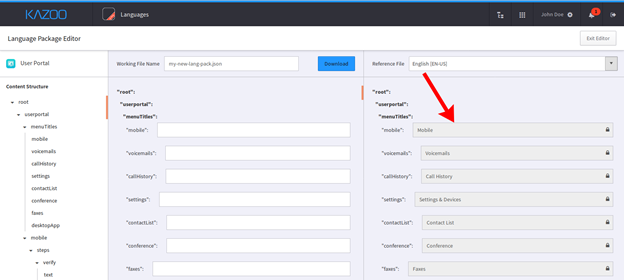
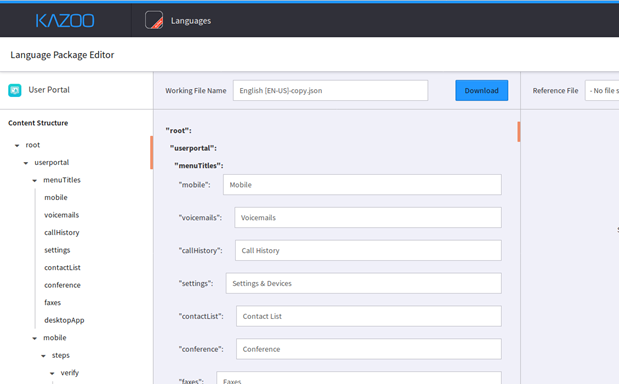
The Language Pack Editor provides you with the terms to translate on the left and a field to enter your translation on the right:
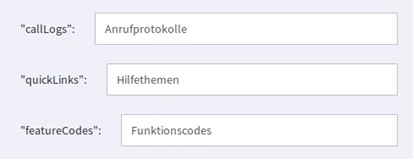
For simple menu items and titles, this is relatively straightforward. But for other items, such as the following error messages, things get tricky:
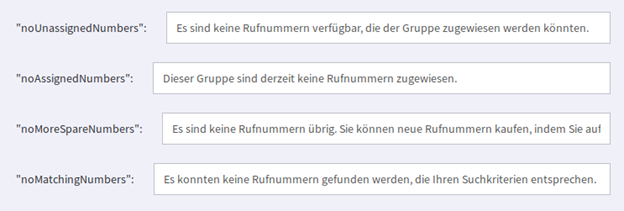
How would you know what to enter for “noMatchingNumbers”? We’ll dive into this more deeply later, but the short answer is that you can use the existing English translations as your guide. In fact, the Language Pack Editor supplies “reference files” just for this purpose. Here’s a sample from an English reference file:

Quick Steps
We’ll be covering the following topics:
- Accessing the Language Pack Editor
- Creating a new language pack
- Modifying your new language pack
- Cloning an existing language pack
- Submitting your completed language pack
- Reference File shortcuts
- Downloading all language packs
Access the Language Pack Editor
From your Kazoo home page, select the Apps icon in the application bar.

Search for “Languages” using the search tool. Open the app by clicking on the Languages icon.
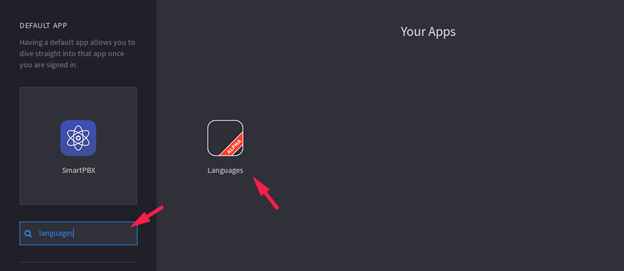
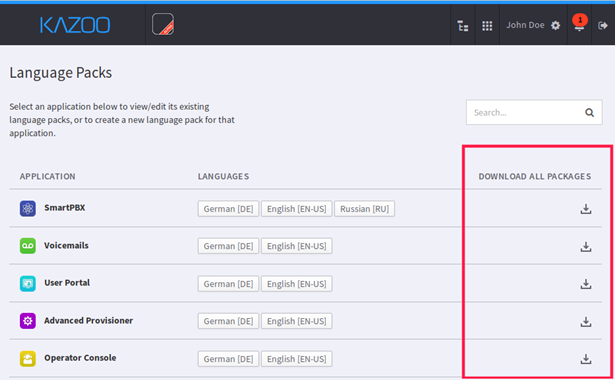
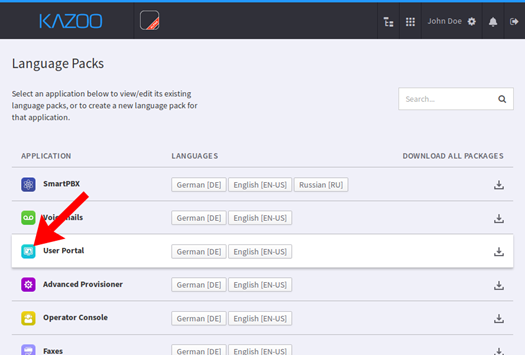
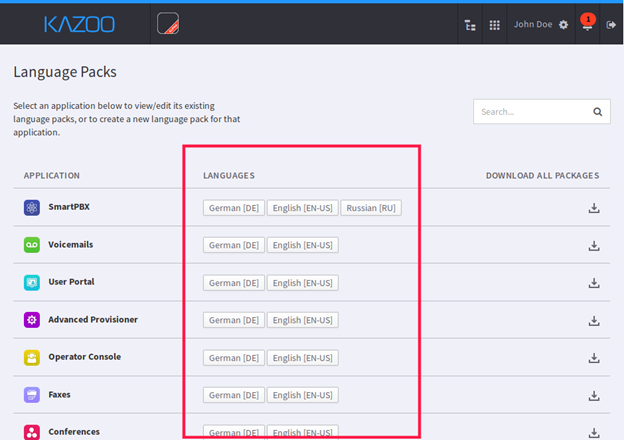
You should see the following screen:
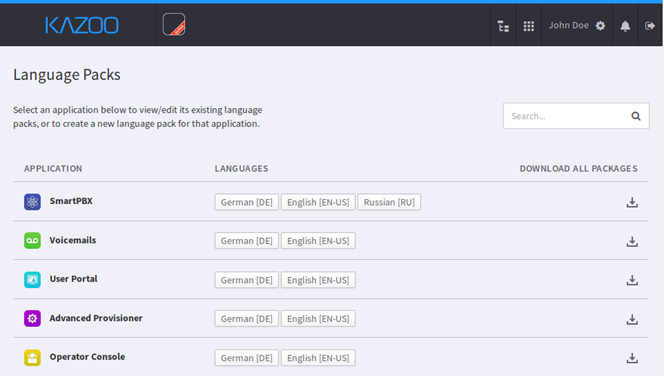
Each application can have one or more language packs. You may use the search tool on this page to filter the applications based on your search criteria.
Create a new language pack
There are a few ways of creating a new language pack. We’re going to start with the simplest way; starting from scratch.
Click on the app icon that you wish to localize:

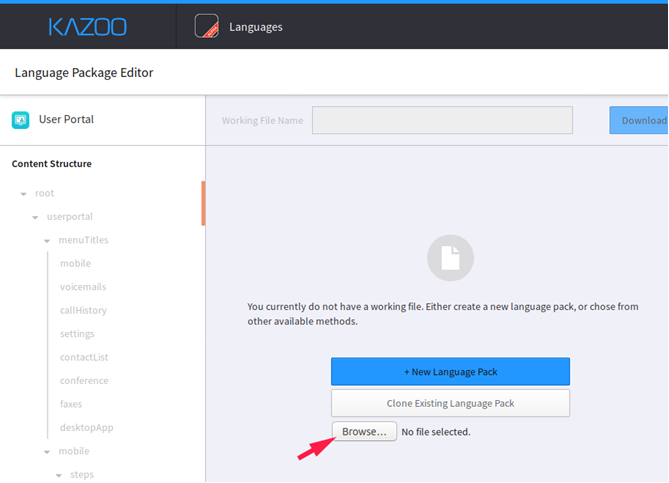
On the next page, select [ + New Language Pack ]:
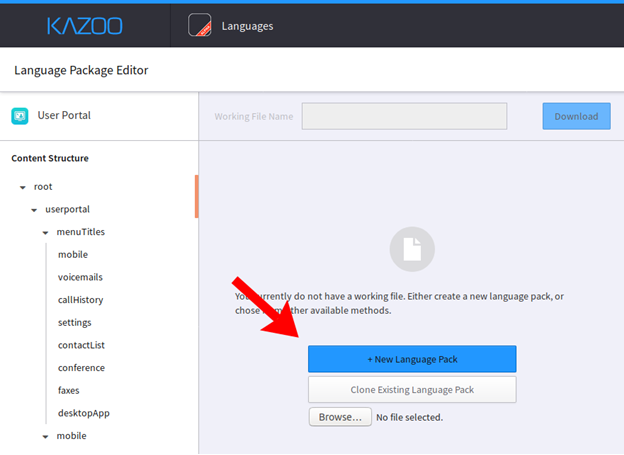
This will bring you to the main language pack editing screen:
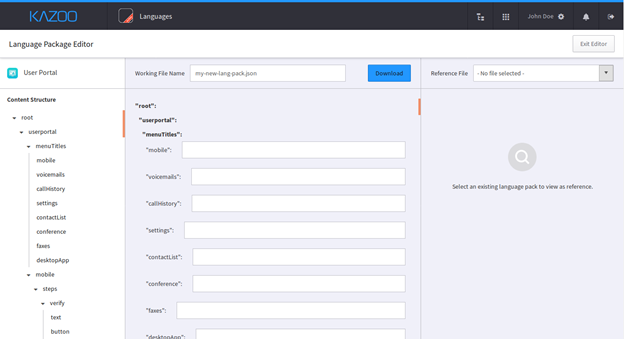
The language pack editor consists of three columns.
- The left-most column contains the Content Structure, which is useful for locating the page elements that you wish to add or edit. You can click on any element in the Content Structure to jump to the corresponding value in the editor.
- The middle column contains the main editor. Here’s where you’ll be entering your translations.
- The top of the middle column contains default working filename and a download button. Ignore the filename and download button for now. We’ll cover those in just a moment.

Select a Reference File
The right-most column is reserved for displaying reference files. Reference files provide existing translations which can be helpful when adding new translations in the main editor.
Reference Files might sound fancy, but they’re really just exciting language packs that are displayed side-by-side with the language packs that you’re creating or editing.
It’s likely that you’ll want to use a reference file while creating your first language pack. At the top of the right-most column, select a reference file from the drop-down menu:
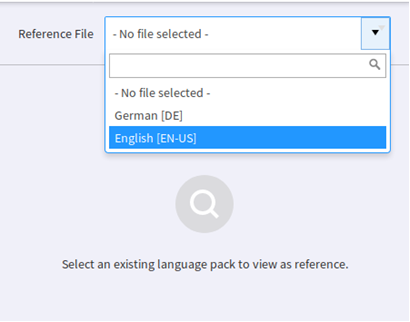
Once selected, the reference file will appear to the right of the main language pack editor:
Add Translations
At this point, you’re ready to start adding your own translations to the form fields displayed in the middle column. Go for it! Any fields left blank will default to English in the application.
It’s a good idea to frequently download your language pack while you work to avoid any loss of work due to power outages, authentication timeous, etc. See “Downloading Your Work” in the next section.
Download Your Work
At the top of the middle column in the Language Pack Editor, you’ll see the default working filename and a download button. We ignored these up until now.

In order to save your work, you must download the active language pack to your computer. Rename the working file name to something like “japanese-user-portal.json”, ensuring that the filename ends in .json , then click the Download button. You’ll be able to upload this file later if you need to make updates.
Now that you’ve completed entering all of your translations and have downloaded a local copy of the language file to your computer, you’re ready to deliver that file to our staff for installation. Continue to the section below titled “Submitting your completed language pack” for further instructions.
Modify your new language pack
If you haven’t already, please complete the tutorial above titled “Creating a new language pack”. That tutorial covers essential information about using the language pack editor and saving your work.
Open the Languages app and select the app associated with the language pack that you’d like to edit:
On the next page, click on the browse button to locate your previously downloaded language pack:
Select your previously saved language definition file. The file selection dialog box may look different depending on your operating system:
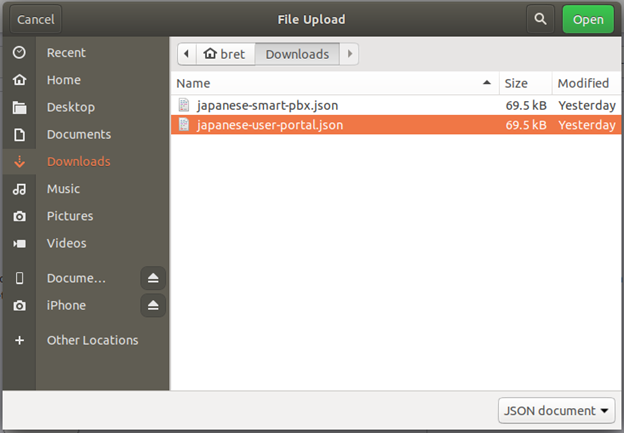
Click on Open to continue.
The previously saved language pack should now open and be editable in the language pack editor.
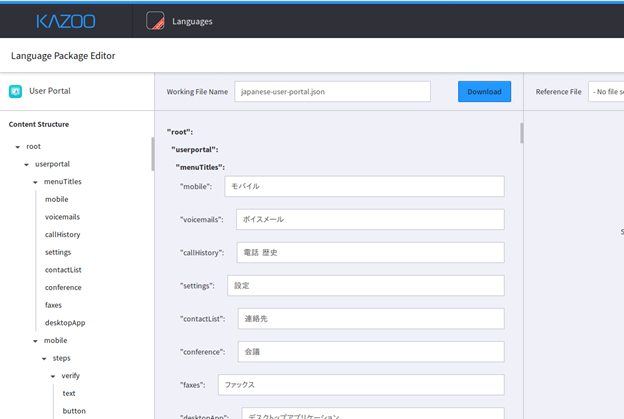
_(Please be aware that we do not currently provide a Japanese language pack._The Japanese shown is for illustration purposes only.)
It may be helpful to open a reference file while editing your language pack.
For more information about reference files, please refer to the instructions under the section titled “Creating a new language pack” above where reference files are introduced.
Once you have completed making updates to your language pack, download your language pack.
Clone an existing language pack
This section assumes that you’ve completed the “Creating a new language pack” tutorial above. If you haven’t already, please complete that tutorial before proceeding.
This tutorial teaches you how to clone an existing language pack. This may be useful if you wish to implement British English as opposed to American English, or customize an existing language pack to your own liking.
Open the Languages app and select the app associated with the language pack that you’d like to clone:

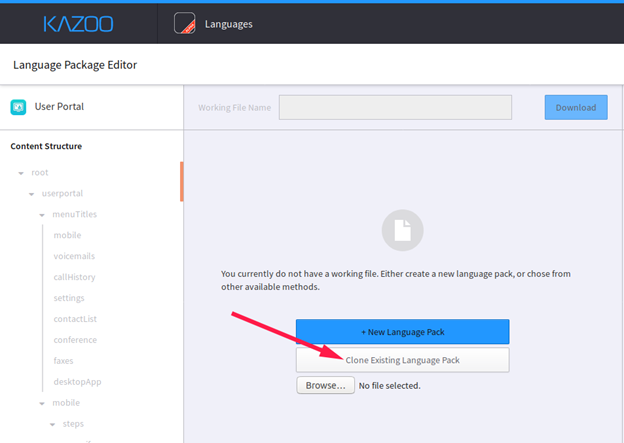
On the next page, select [ + Clone Exiting Language Pack ]:
You will be prompted to select an existing language pack to clone.
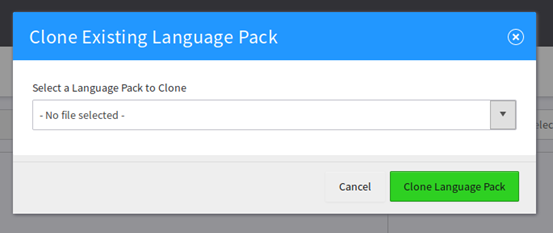
Select a language pack and click on Clone Language Pack. The language pack will load in the language pack editor to allow you to make changes:
It may be helpful to open a reference file while editing your language pack.
F__or more information about reference files, please refer to the instructions under the section titled “Creating a new language pack” above where reference files are introduced.
Once you have completed making updates to your language pack, download the modified language pack.
Submit your completed language pack
Once you’ve completed editing your language pack, the next step is simple. Contact us! Our staff will be happy to review your language pack and add it to Kazoo.
Reference File shortcuts
On the Language Packs APP home page, you may have noticed a column called “Languages”. These buttons are shortcuts that:
- Create a new language pack
- Automatically open a reference file based on the button you select
Download all language packs
Each app displayed on the Language Packs APP home page has a corresponding download button. These buttons can be used to download all language packs associated with an app at once: