Managing Service Plans and Usage Fees
This doc provides information for account managers. It outlines how to:
- Review Account Balances for each account and sub account
- Review Service Plan charges
- Track transactions during a specific time window
NOTE: This documentation refers to the Monster UI implementation
Overview
Account information is stored within the Control Center, which is accessible by clicking on your login name and account in the header of your window.
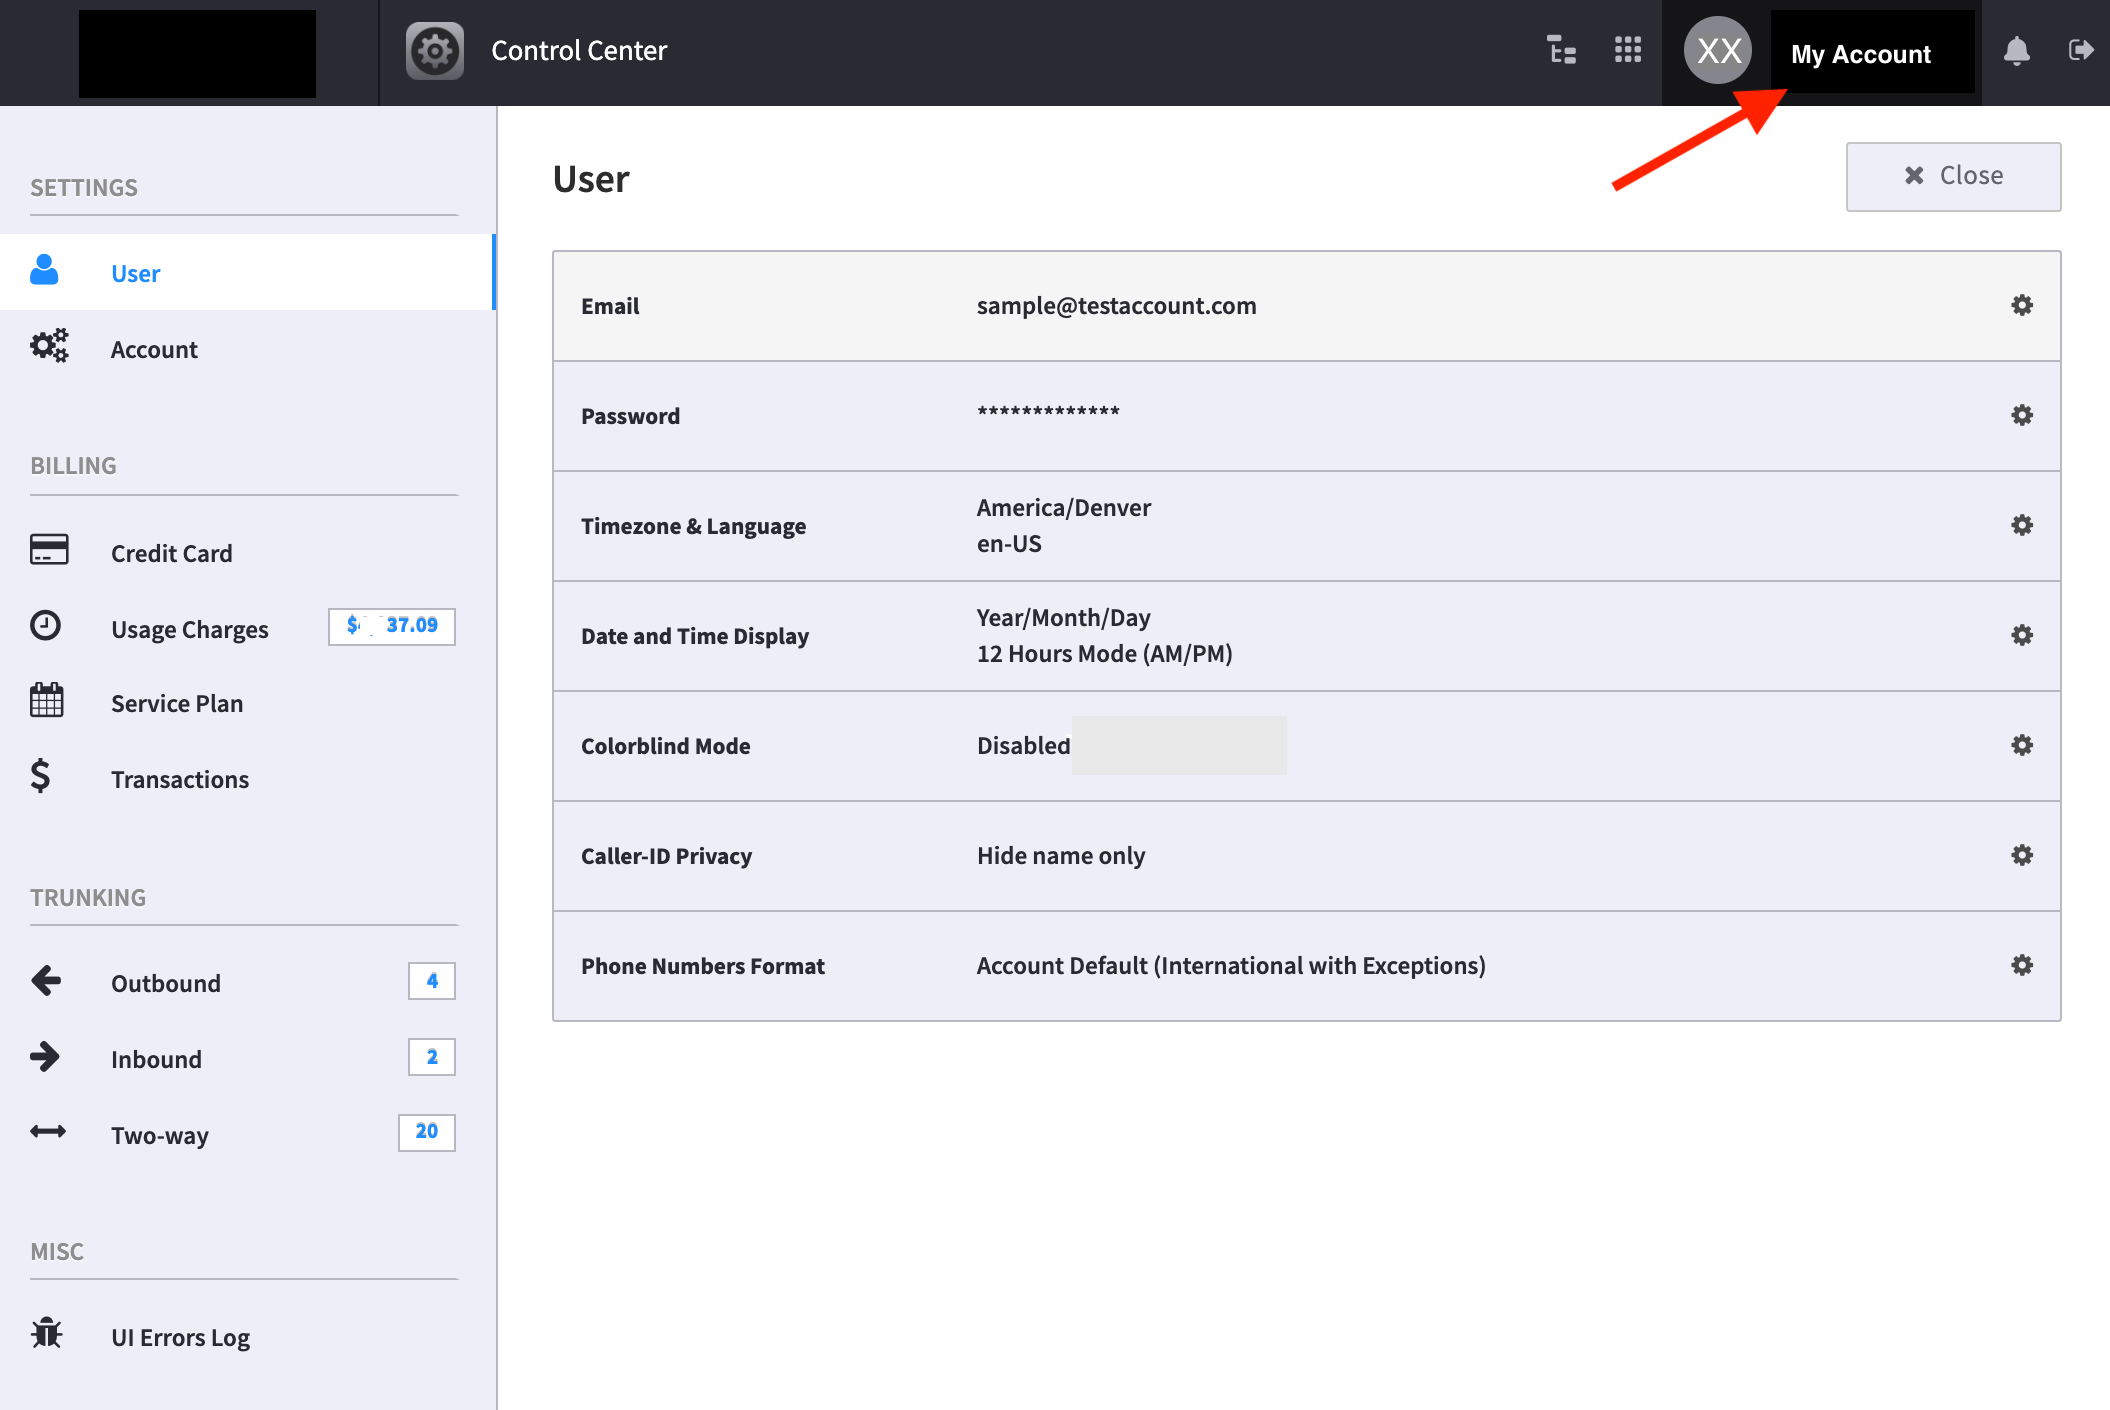
To the left, you will see the following options under the Billing section:
- Payment Details
- Usage Charges
- Service Plan
- Transactions
These tabs display information for both the Master account and any sub-accounts you may have created.
Details
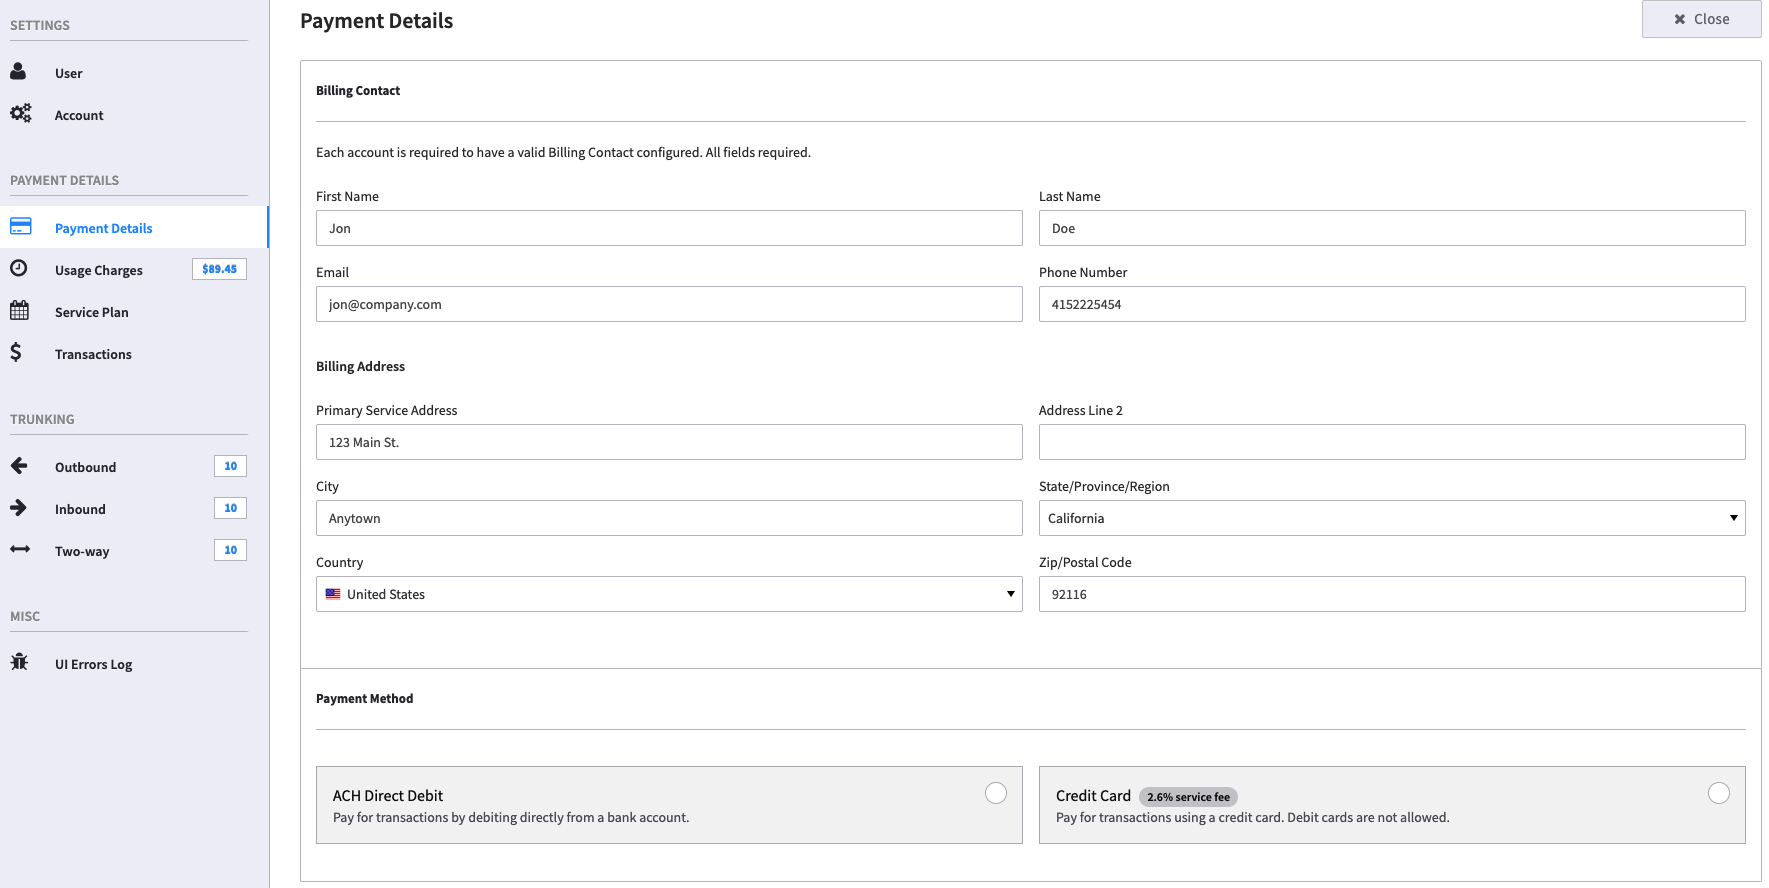
Billing Contact:
Enter contact information for billing questions. This is used if there is someone specific that we need to speak with regarding billing. This also determines payment methods available. ACH is only available in U.S. as a method of payment.
Payment method MUST be on file.
Once this is entered, it will be used to:
- Purchase new numbers
- Add credit under the Usage Charges screen for discrete charges including
- Monthly charges
- Added billing for some applications
- Added billing for SMS texts, depending on your service plan
- Manual override charges for call restrictions as defined in the Accounts setup.
NOTES:
- Only the top level account needs to have payment information associated to it.
- When an account is first created and set up. A service plan will be added. Billing starts at that date (proration). When the customer enters their card, there will be a charge then. They will also then be at the beginning of each month.
- The payment method is charged at billing cycles. When an account is first set up, after the service plan has been added, the account will be charged for the remainder of the month (proration).
- Under the Usage Charges / Subscriptions tab you can set when and how you want to set up payments for your monthly bill — as an automatic billing via this charge card, charged against your account credit, or by manually going to check your balances. The latter, called “Self Manage” is set as the default.
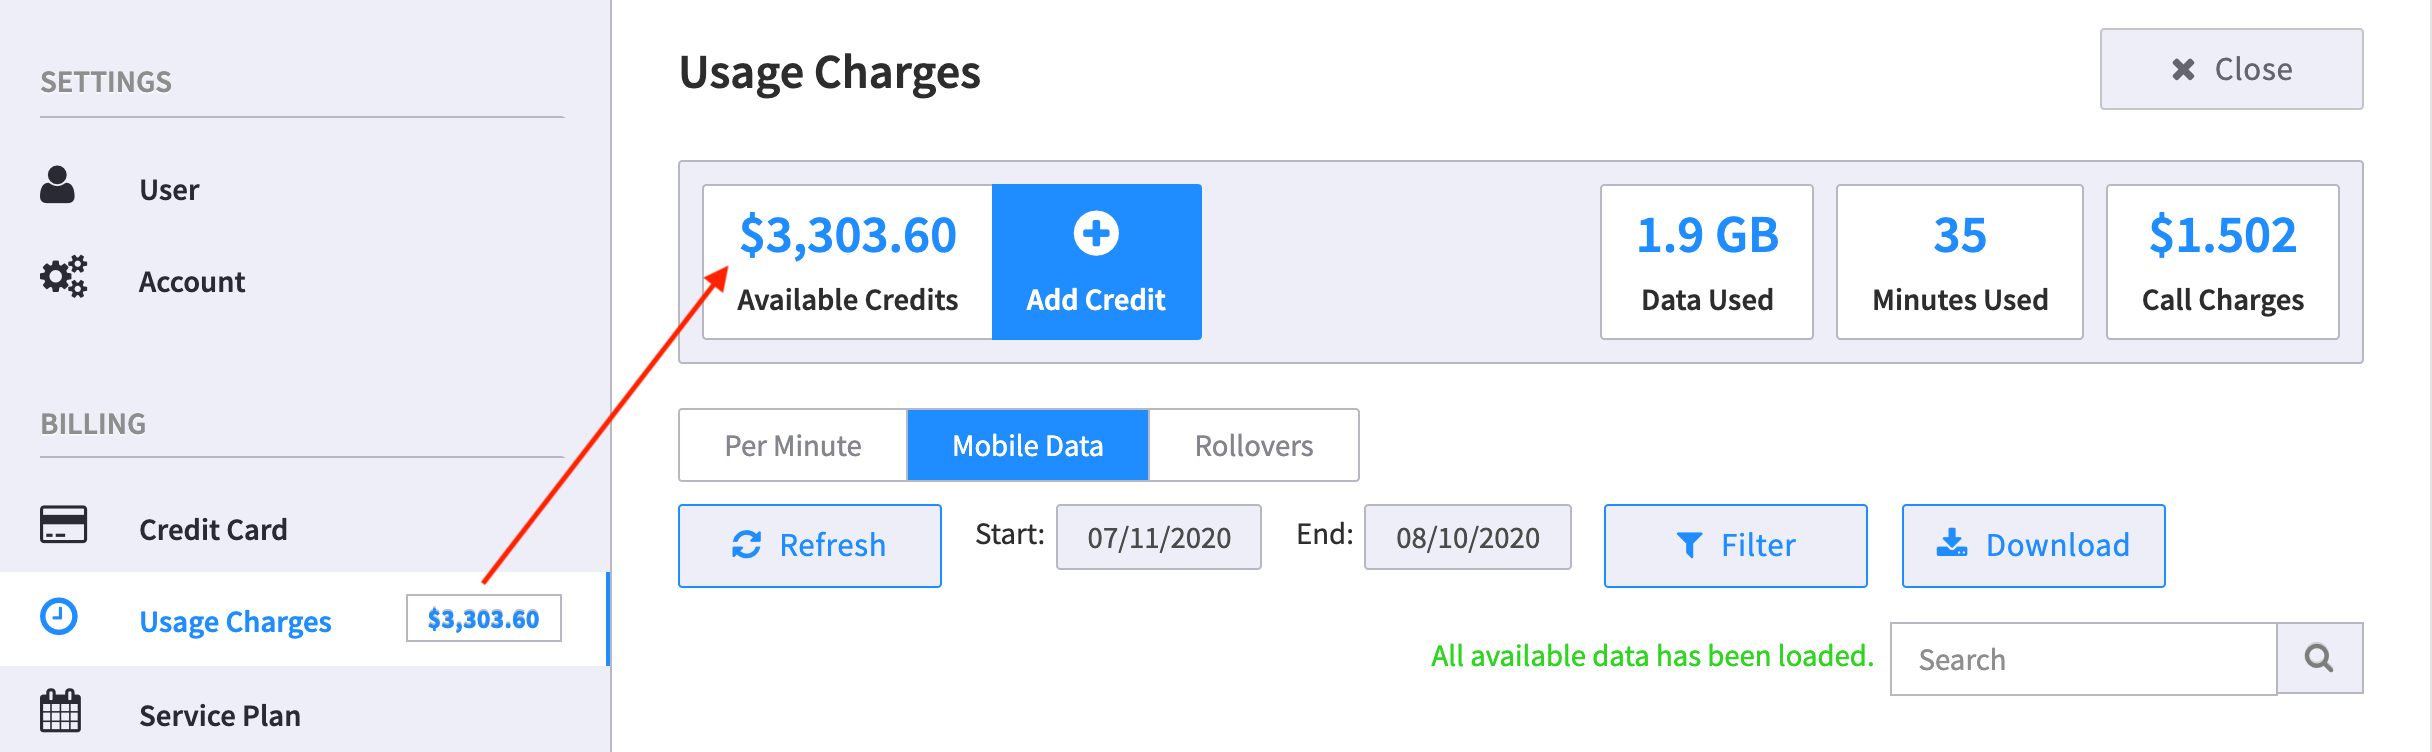
Usage Charges This is where you can monitor your account usage, manage credits, enable threshold alerts, enable Auto Recharge, and if a Reseller, manage subscription payment. These will capture any charges outside the fixed monthly charges outlined in the Service Plan, and will draw off the available credit.
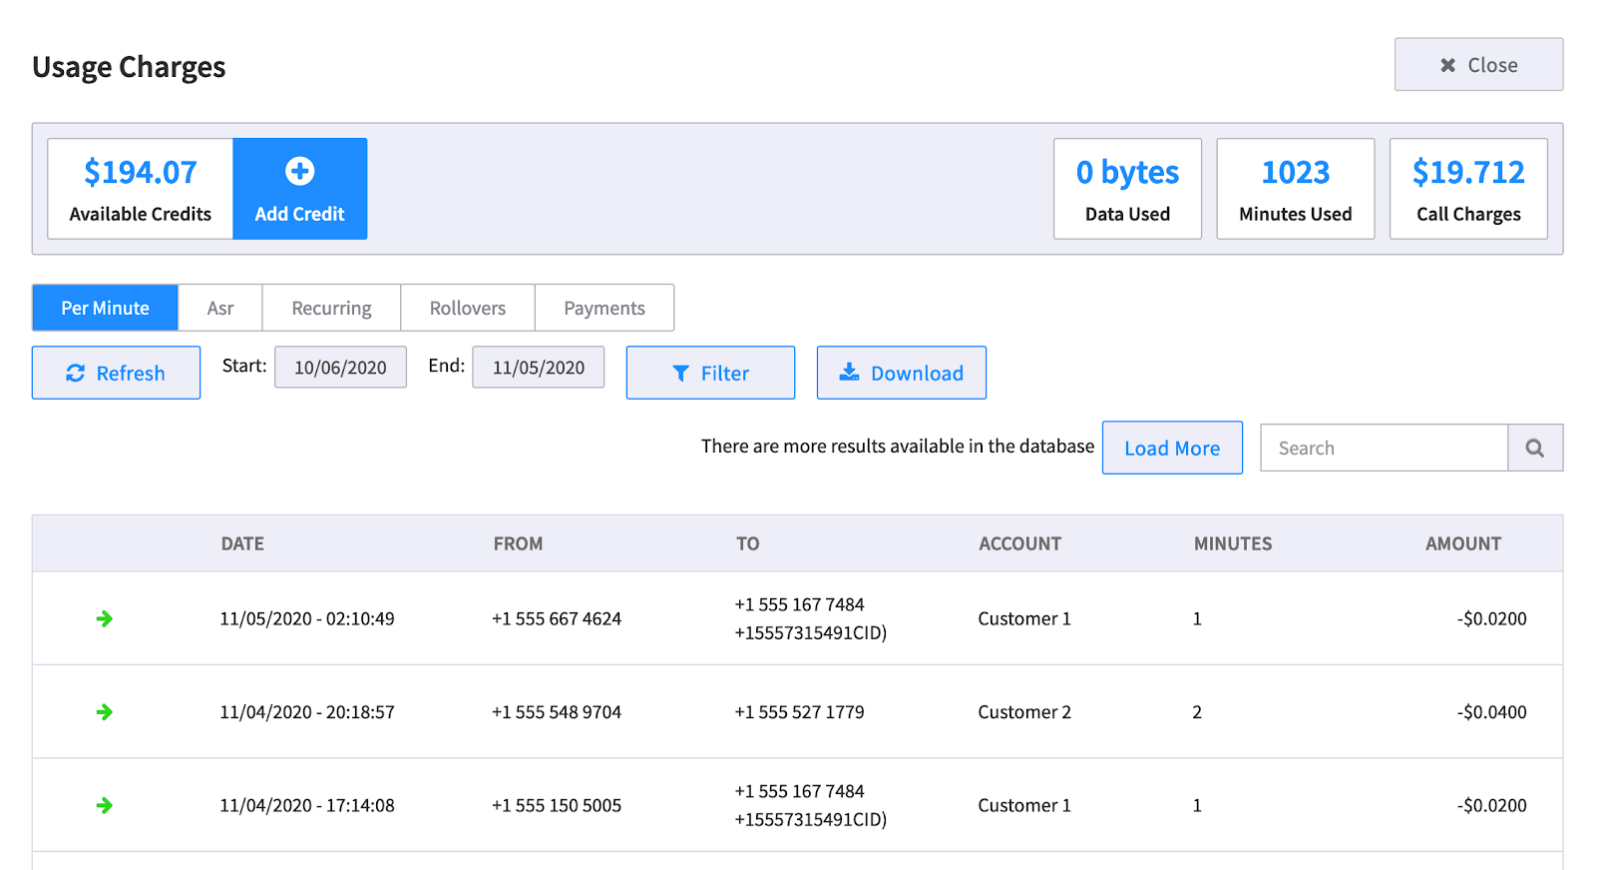
Per minute charges
This tab will display any additional charges that accrue from an account, for example if its trunk limit is exceeded or if there is a 911 call. You can sort this based on your sub-account for billing purposes.
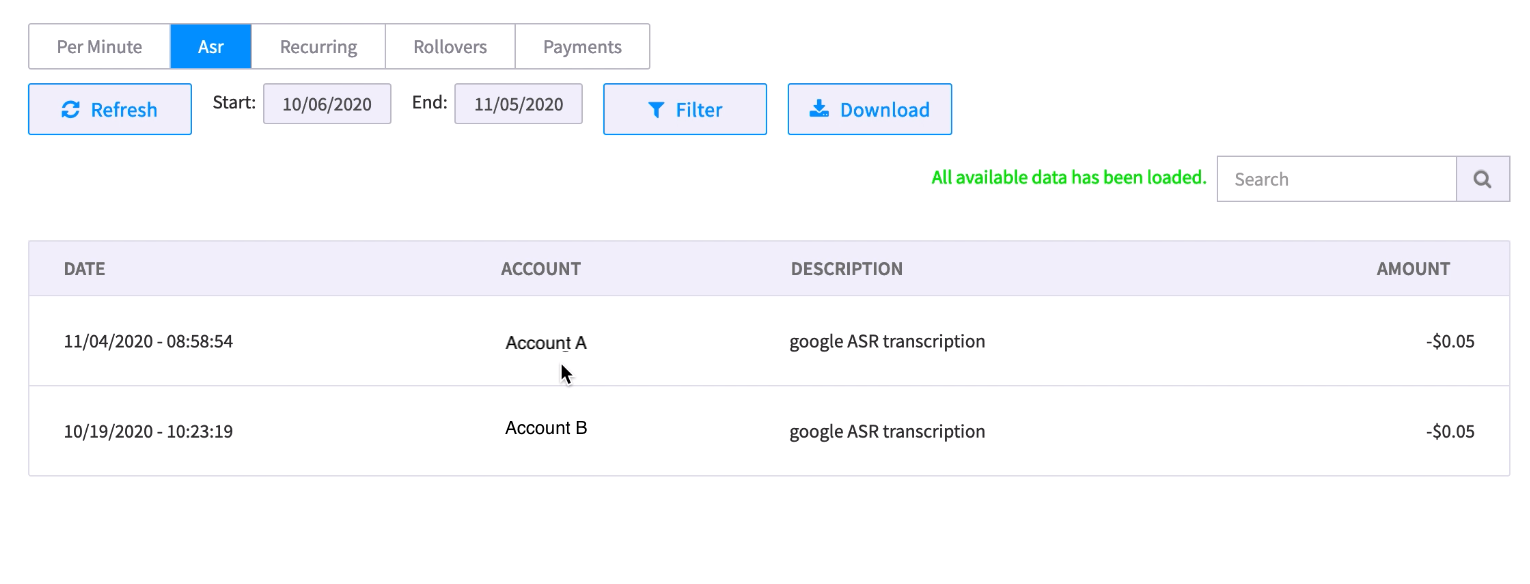
Asr Charges This tab will display any Asr (Automatic Speech Recognition, or Speech-to-text) transcriptions that your account has used. These display each event that has been transcribed and sent as an email.
Recurring Charges This tab displays recurring charges similar to the Service Plan (below).
Rollover Charges This tab displays rollover charges or credits that may have incurred the previous month.
Payments Displays your payment history.
Managing Credit for Main and Sub Accounts
At the top of the Usage Charges screen is the option to add credit to your account. Below is an overview of the options..
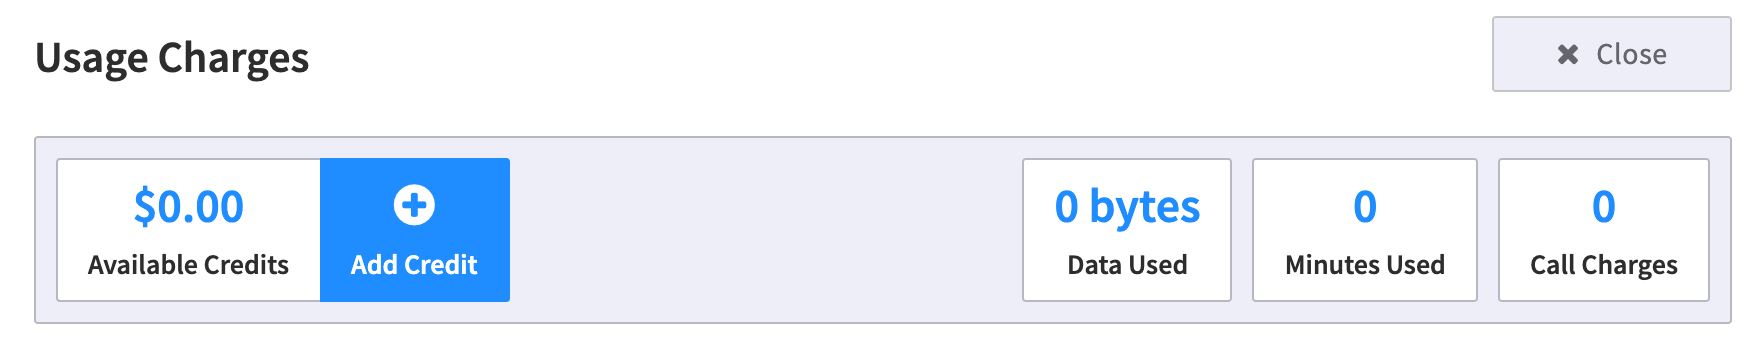
- Available Credits Make sure you check to see if you are in the Master Account or your sub-account when you add credit.
- The master account credit is the value that will be used to bill you.
- The sub-account credit is what we call “fake money.” This is a dollar value directed at the sub account, but will be billed through the main account. All charges appear on the master account. SO if they are using per minute only, it will deduct from the sub account, and from the master account.
The “fake money” from the sub account is used as a way to limit and prevent fraud while it passes the actual charges onto the master account. While it appears that there are two charges only one is being deducted actually money
NOTES:
- It is critical you maintain a positive credit balance as there are functions that require accessing this in order to work. This includes:
- Per-minute, inbound toll-free or international calls when using trunks or not.
- If no credit is available and they have no trunks, calls will fail.
- Only toll-free outbound would work.
- Depending on the amount of trunks and call volume it can be fairly quick to spot or it can take days to realize this.
- When using trunks, if toll-free international per-minute calls, and inbound toll-free.
- Per-minute, inbound toll-free or international calls when using trunks or not.
Add Credits
When you select Add Credits you will see a new dialog box with several tabs inside.
-
Manage Credits This provides an option to manually add credits to your Current Balance (shown as “available credit” in your master account).

-
Threshold Alerts This sets a minimum account balance threshold. When the Current Balance falls below this, you will receive an email alert.
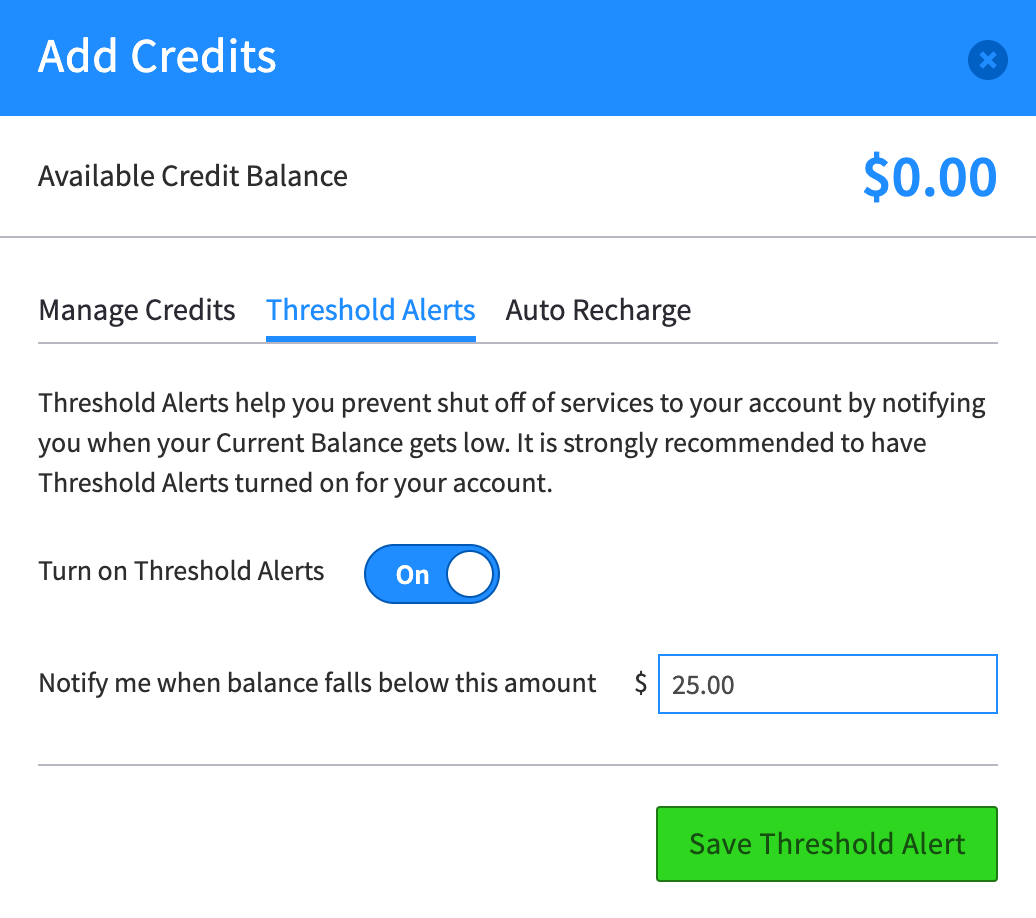
Set this value based on how many customers you have and how many calls you anticipate will be billed per month. A common setting to start is $20-25.00.
- Auto Recharge Set this to ensure that your calls are not canceled due to a run-out balance. Enter the threshold amount and the amount of credit you want to add.
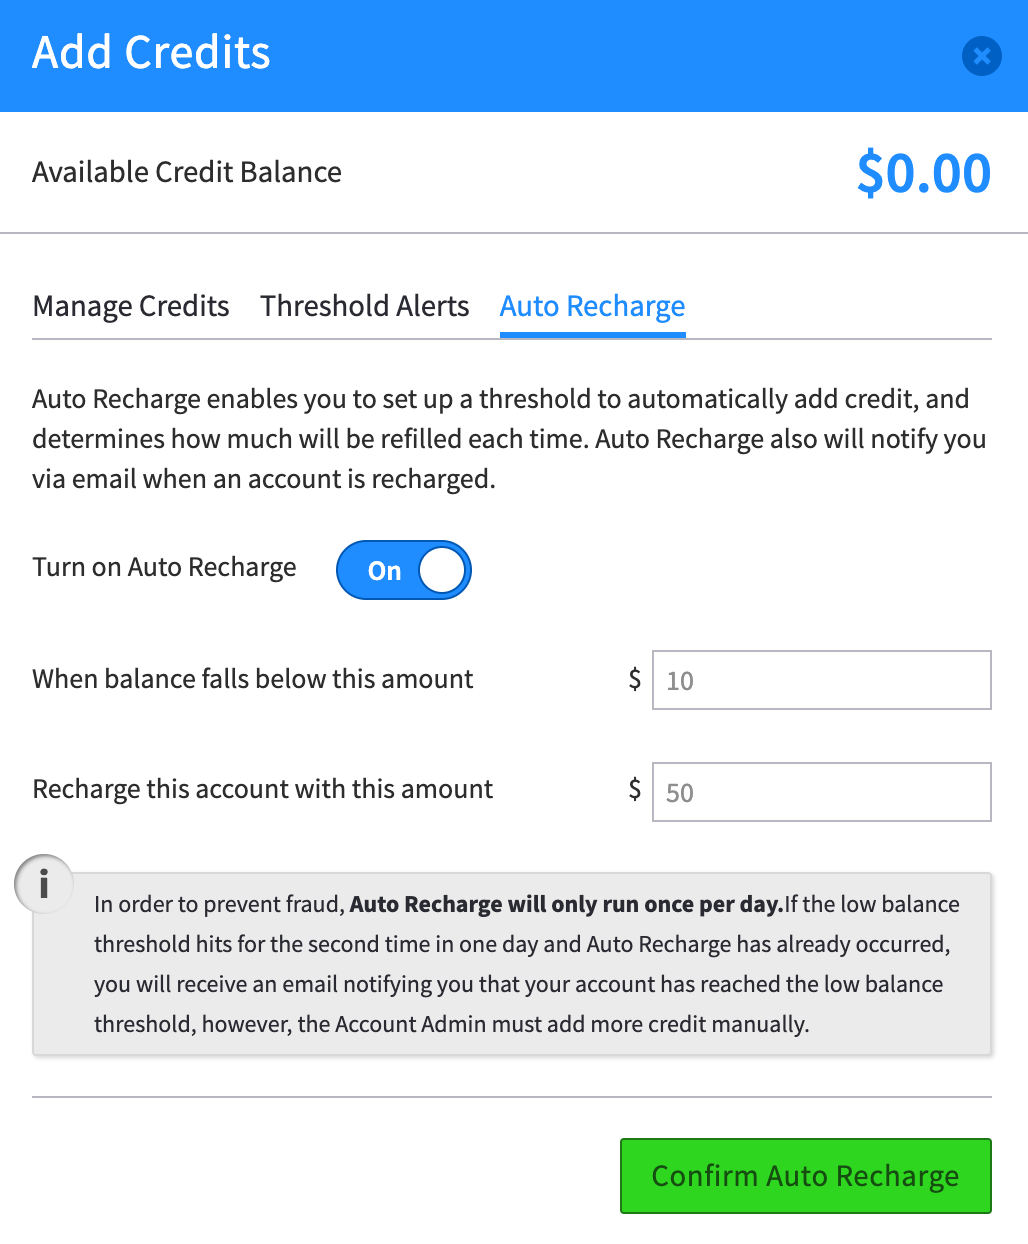
NOTE: It is important to set the recharge amount so it will cover at least a day, as the charge event occurs once a day only and it would require a manual update
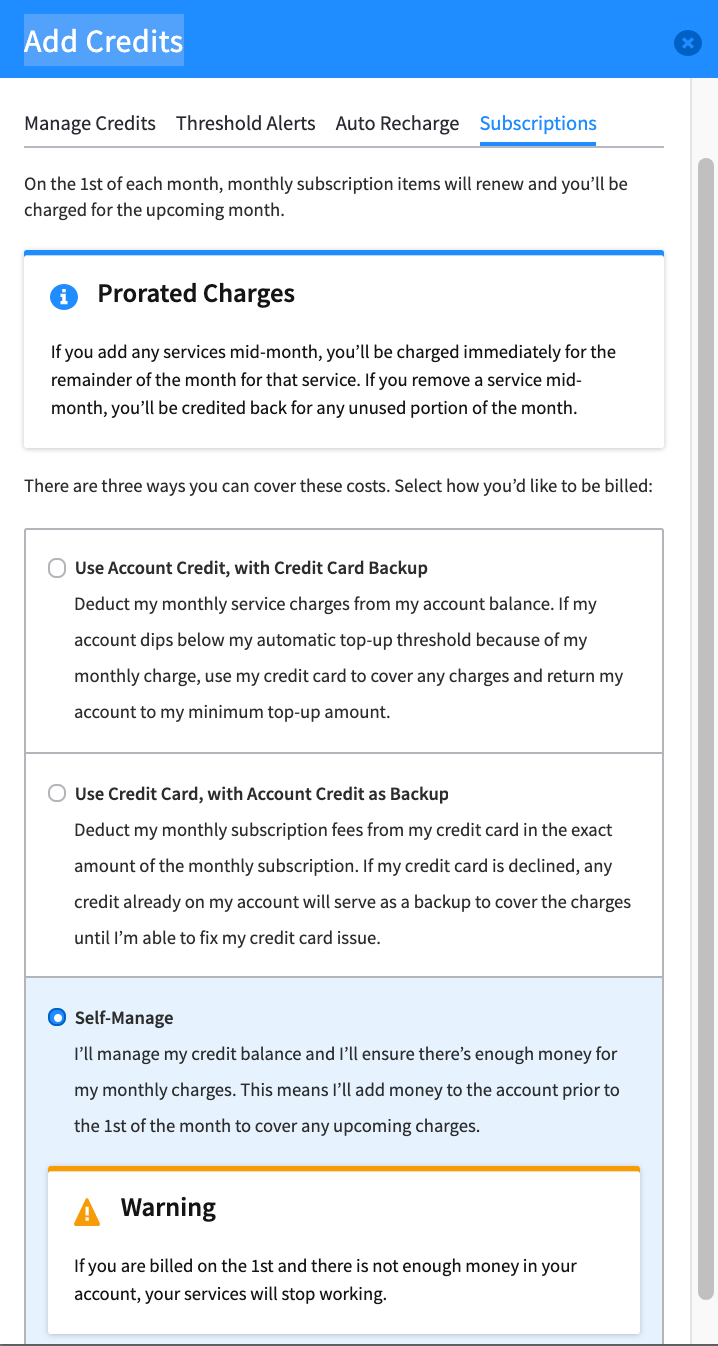
Subscriptions On the first of each month, your monthly subscription will renew and you’ll be charged for the upcoming month. Enter how you want to manage these charges.
- Use Account Credit, with payment method Backup
- Use Payment Method, with Account Credit as Backup
- Self managed — manual entry. This is the default setting.
Display Filters Below your Credit Balance summary there are filters to view your charges.
- Per Minute This tab displays the per minute charges incurred based on your settings in SmartPBX for call charges.
- Mobile Data If you have enabled SMS text messaging and/or mobile phone devices to your account, this tab will display the data (in Megabytes) that you’ve used for the month.
- Rollovers This reflects any credits or balances carried forward from the previous month. The value is calculated after monthly charges are applied.
- Start and End fields If you want to filter based on a time window, enter the start and end dates.
- Filter When you select the filter button you can sort the list by clicking on the field you want to sort. This is how to view different accounts’ billing summaries.
- Download Select the download option to save a .csv file to your desktop. This can be imported into a 3rd party billing system or simply to a spreadsheet for your own reporting process.
Service Plan This displays a breakdown of the Account’s service plan and amount due at the end of each month. It will stay fixed unless you add a device or a separate service or upgrade your monthly support plan. The download button allows you to download the data into a .csv file.
.png.96fd0bb0c5e4a4a87a25d9d476eb52d6.png)
Transactions The transaction summary lists the charges that have been made to the card listed. This can be filtered by date.